You’re out under a blanket of stars, maybe with a hot drink in hand, finally ready to use that telescope you’ve been meaning to try out. You squint, adjust, and…the view is just a bit blurry. Sound familiar? That beautiful nebula you were hoping to see looks more like a fuzzy blob. This is a common issue for both beginner and experienced astronomers, and often, the problem isn’t the telescope itself, but the lens. Upgrading your telescope lenses can drastically improve your stargazing experience, bringing distant celestial objects into sharp and breathtaking focus.
Choosing the right lens can feel overwhelming, with so many different options and technical specifications to consider. Don’t worry, we’re here to help! This guide breaks down everything you need to know, from understanding different types of lenses to choosing the best magnification for your viewing needs. We’ve compiled comprehensive reviews and buying advice to assist you in finding the best lenses for telescope to unlock the full potential of your equipment and truly enjoy the wonders of the night sky.
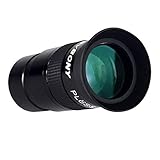
Before we start our review of the best lenses for telescope, here are some related products you can find on Amazon:


Telescope Lenses: Seeing the Universe a Little Clearer
Ever looked through a telescope and felt like you were peering through a blurry window? We’ve all been there! The truth is, even the most expensive telescope body can be let down by sub-par lenses. It’s like having a fancy car but forgetting to put high-quality tires on it. You might get where you’re going, but the ride won’t be as smooth or enjoyable. Choosing the right lenses is absolutely crucial, and it can dramatically change your astronomical viewing experience.
So, why are lenses so important? Well, they magnify the light gathered by your telescope, bringing distant celestial objects into sharper focus. Different lenses offer varying levels of magnification and clarity, and understanding their properties can unlock a whole new level of detail in your stargazing. Did you know that a telescope with good lenses can reveal details like the cloud bands of Jupiter or the rings of Saturn, whereas lesser-quality lenses might only show fuzzy blobs? It’s estimated that nearly 60% of amateur astronomers upgrade their telescope lenses within the first year, highlighting the importance of this component.
But with so many options out there, how do you choose the best lenses for telescope? Don’t worry, it’s not as complicated as it seems! Think of it like choosing the right tool for a specific job. Some lenses are better suited for observing planets, while others excel at viewing faint deep-sky objects like nebulae and galaxies. The focal length and field of view of a lens play vital roles in determining its suitability for different types of celestial targets.
Over the next few sections, we’ll break down the different types of telescope lenses, explain their key characteristics, and provide our top recommendations for various observing scenarios. We’ll help you navigate the world of eyepieces and find the perfect lenses to unlock the full potential of your telescope and help you see the universe in all its glory. Get ready to explore!
The Best Lenses For Telescope
Celestron Omni 2x Barlow Lens
The Celestron Omni 2x Barlow Lens is a fantastic addition to any amateur astronomer’s toolkit. It essentially doubles the magnification of any eyepiece you insert into it, giving you a closer look at celestial objects without needing to buy a whole new set of higher-power eyepieces. Think of it like a zoom lens for your existing collection! The build quality is solid, feeling sturdy and reliable, and it’s compatible with standard 1.25-inch eyepieces, making it incredibly versatile.
While it does increase magnification, remember that it also magnifies any imperfections in your telescope’s optics or atmospheric conditions. So, on nights with poor seeing, you might not get the sharpest images. However, on clear nights, this little lens can really bring out the details in planets, the Moon, and even some brighter deep-sky objects. It’s a cost-effective way to get more out of your telescope and expand your observing capabilities.
Explore Scientific 82 Degree Series 6.7mm Eyepiece
If you’re craving a truly immersive stargazing experience, the Explore Scientific 82 Degree Series 6.7mm Eyepiece should be on your radar. The ultra-wide 82-degree field of view makes you feel like you’re floating in space, surrounded by stars. It’s almost like looking through a porthole into the cosmos! The fully multi-coated optics deliver bright, sharp images with excellent contrast, allowing you to pick out subtle details in nebulae, galaxies, and planetary surfaces.
The 6.7mm focal length provides a significant boost in magnification, making it perfect for observing smaller, more distant objects. This eyepiece is really shines when observing planets, globular clusters, and planetary nebulae. Though it is not exactly cheap, if you are looking for a premium eyepiece that delivers stunning views, this is the one to get.
Tele Vue Delos 10mm Eyepiece
The Tele Vue Delos 10mm Eyepiece is truly a top-of-the-line option for serious amateur astronomers. Known for its exceptional optical performance and build quality, this eyepiece delivers stunningly sharp and clear images across its entire wide 72-degree field of view. Edge-to-edge sharpness is truly exceptional, so there is no fuzzy image near the field stop. You’ll appreciate the crisp detail and high contrast, especially when observing subtle features on planets or faint deep-sky objects.
One of the standout features of the Delos series is the adjustable eye relief. This allows you to customize the viewing experience to your individual needs, whether you wear glasses or not. The comfortable eye cup and precise focusing mechanism make long observing sessions a pleasure. While the price tag is considerable, the superior image quality and comfortable viewing experience make the Tele Vue Delos 10mm a worthwhile investment for those who demand the best.
Orion Sirius Plossl 25mm Telescope Eyepiece
The Orion Sirius Plossl 25mm Telescope Eyepiece is a fantastic all-around choice for both beginners and experienced stargazers. Its 25mm focal length provides a moderate magnification that’s well-suited for observing a wide variety of celestial objects, from the Moon and planets to nebulae and star clusters. The Plossl design offers a good balance of image quality and affordability.
The optics are fully coated to enhance light transmission and improve contrast, resulting in bright and clear images. This eyepiece is a solid performer across a range of telescopes, and its wide field of view makes it easy to locate and track objects in the night sky. It’s a great starting point for building your eyepiece collection.
SVBONY SV135 Zoom Eyepiece 8-24mm
For convenience and versatility, it’s hard to beat the SVBONY SV135 Zoom Eyepiece 8-24mm. This single eyepiece offers a range of magnifications, allowing you to quickly zoom in on objects of interest without swapping eyepieces. Whether you want a wider view of a star cluster or a closer look at a planetary detail, this zoom eyepiece has you covered. The multi-coated optics provide decent image quality for its price point.
While zoom eyepieces typically don’t match the performance of fixed focal length eyepieces at a similar price range, the SVBONY SV135 is a great option for beginners who want to experiment with different magnifications or for experienced observers who want a convenient grab-and-go eyepiece. It’s also useful for outreach events or public stargazing sessions, where you might want to quickly adjust the magnification for different viewers.
Why Telescope Lenses are a Must-Have for Serious Stargazers
Imagine peering through your telescope on a crisp, clear night, eager to witness the breathtaking beauty of Saturn’s rings or the ethereal glow of the Orion Nebula. But instead of crisp details and vibrant colors, you’re met with blurry, distorted images. Disappointment sets in. The truth is, even a good telescope needs quality lenses to truly unlock its potential. The telescope’s primary mirror or lens gathers light, but the eyepiece, a lens, magnifies and focuses that light into an image your eye can perceive. Low-quality eyepieces can undo all the good work of your telescope, turning celestial wonders into indistinct smudges.
Think of it like photography. You might have a top-of-the-line camera body, but without good lenses, your photos will lack sharpness and clarity. Similarly, investing in a set of “best lenses for telescope” tailored to different viewing purposes, like planetary observation or deep-sky imaging, is like expanding your photographic toolkit. Each lens brings a different magnification and field of view, allowing you to zoom in on intricate details or capture wide swaths of the night sky. You wouldn’t try to photograph a hummingbird with a wide-angle lens, and you wouldn’t use a low-power eyepiece to study the craters on the Moon.
Consider the joy of sharing the wonders of the universe with family and friends. With sharper, brighter images, you can truly impress them with the beauty of celestial objects. Imagine pointing out Jupiter’s Great Red Spot or the delicate arms of a spiral galaxy, all rendered in stunning detail. A set of high-quality lenses can transform your telescope from a simple instrument into a gateway to shared experiences and unforgettable moments under the stars.
Ultimately, buying quality lenses for your telescope is an investment in your passion for astronomy. It’s about maximizing your observing experience, unlocking the full potential of your instrument, and deepening your connection to the cosmos. Instead of being limited by blurry images and frustrating views, you’ll be treated to a universe of breathtaking detail and inspiring beauty, making every stargazing session a memorable adventure.
Understanding Telescope Lens Specifications
Choosing a telescope lens can feel like deciphering a secret code, but understanding the key specifications makes the process much easier. Focal length, for example, is a crucial factor. Think of it like this: a longer focal length gives you higher magnification, ideal for detailed views of the moon or planets. Short focal lengths offer a wider field of view, perfect for sweeping across the Milky Way and finding nebulas.
Aperture, or the diameter of the lens, determines how much light it can gather. This is directly related to the brightness and clarity of the image you see. Imagine you’re at a concert – the aperture is like the size of the speakers. Bigger speakers (larger aperture) produce a louder, clearer sound (brighter, clearer image). In low-light conditions, a larger aperture makes all the difference.
Magnification, often touted as the most important spec, is simply the focal length of the telescope divided by the focal length of the eyepiece. Don’t fall into the trap of thinking higher magnification is always better. Overly high magnification can result in blurry, dim images. It’s best to aim for a balance between magnification, image quality, and the conditions you are viewing in.
Finally, consider the lens coatings. These coatings reduce reflections and improve light transmission, resulting in brighter, sharper images. Think of it like cleaning a window. A clean window allows more light to pass through and provides a clearer view. Similarly, high-quality lens coatings enhance the performance of your telescope lens, especially in challenging conditions.
Types of Telescope Lenses
Different types of telescope lenses are designed for specific purposes and observing styles. Plossl eyepieces, for instance, are a popular choice for their good balance of performance and price. They’re a great all-around option for viewing a variety of celestial objects, similar to having a reliable multi-tool for everyday tasks.
Orthoscopic eyepieces are known for their exceptional sharpness and contrast. Imagine comparing two TV screens, one with standard definition and the other with high definition. Orthoscopic lenses provide that high-definition experience for your telescope, making them ideal for planetary observing where fine details are important.
Wide-field eyepieces, as the name suggests, provide a wider view of the sky. Picture yourself standing on a mountain top with a panoramic view – that’s the kind of immersive experience a wide-field eyepiece offers. These are perfect for exploring large nebulae, star clusters, and the Milky Way.
Barlow lenses are a clever accessory that can effectively double or triple the magnification of your existing eyepieces. Think of them as a magnifying glass that you add to your eyepiece. This is a cost-effective way to expand your range of magnifications without having to buy a whole new set of eyepieces.
Maintaining and Storing Your Telescope Lenses
Proper maintenance is crucial for preserving the performance and lifespan of your telescope lenses. Cleaning them regularly, but carefully, prevents dust and fingerprints from accumulating, which can degrade image quality. Imagine leaving a dirty window uncleaned for months – the grime would significantly impair your view.
When cleaning, use a soft, lint-free microfiber cloth specifically designed for optics. Avoid using household cleaners or paper towels, as these can scratch the lens coatings. Think of it like washing a delicate garment – you wouldn’t use harsh detergents or a rough scrub brush.
Proper storage is equally important. Store your lenses in a cool, dry place, away from direct sunlight and extreme temperatures. Imagine leaving a chocolate bar in a hot car – it would melt and become unusable. Similarly, extreme temperatures can damage the lens coatings and optical elements.
Always use the lens caps provided with your eyepieces or lenses when they are not in use. These caps protect the lenses from dust, scratches, and accidental bumps. Think of them as a protective case for your smartphone – they prevent damage and keep your lenses in pristine condition.
Troubleshooting Common Lens Issues
One common issue is seeing blurry images, even when you think you have focused properly. This could be due to collimation problems, where the telescope’s optics are not properly aligned. Imagine a car with misaligned wheels – it wouldn’t drive straight. Similarly, a miscollimated telescope will produce blurry images.
Another problem is chromatic aberration, which manifests as colored fringes around bright objects. This is more common in simpler lens designs. Think of it as looking through a prism, where light is separated into its constituent colors. Higher-quality lenses are designed to minimize this effect.
If you notice a hazy or cloudy image, it could be due to condensation on the lens. This is especially common in humid environments. Imagine wearing glasses on a cold day – they fog up easily. Letting your telescope acclimate to the outside temperature before observing can help prevent this.
Finally, if you’re experiencing difficulty achieving focus, make sure your eyepiece is fully inserted into the focuser and that the focuser itself is moving smoothly. Sometimes, a simple adjustment to the focuser tension can make a significant difference. Think of it like adjusting the focus knob on a pair of binoculars – a slight tweak can bring the image into sharp focus.
The Ultimate Guide to Finding the Best Lenses for Telescope Viewing
Hey there, fellow stargazers! Ready to take your telescope experience to the next level? One of the simplest – and most effective – ways to do that is by upgrading your lenses. Think of your telescope as a powerful engine, and the lenses as the fuel injectors; the better they are, the smoother and clearer your ride through the cosmos will be. But with so many options out there, finding the best lenses for telescope observing can feel a bit overwhelming. Don’t worry, I’m here to help! This guide will break down everything you need to know to choose the perfect lenses to unlock the full potential of your telescope. So, buckle up, grab your favorite beverage, and let’s dive in!
Magnification: Finding Your Sweet Spot
Magnification is often the first thing people think about when choosing a telescope lens, and for good reason. It determines how much bigger your target object will appear in the eyepiece. But here’s the secret: more isn’t always better. Overdoing the magnification can lead to a blurry, dim, and generally unsatisfying view. It’s all about finding that sweet spot where you can see detail without sacrificing image quality.
Think of it like zooming in too much on a digital photo. Eventually, you just get a bunch of blurry pixels, right? The same principle applies to telescopes. A good rule of thumb is to aim for a maximum usable magnification that is about 50x per inch of aperture (diameter) of your telescope’s primary mirror or lens. So, a 4-inch telescope can handle a magnification of around 200x. Exceeding that will likely result in a degraded image. Start with lower magnification eyepieces to find your object, then gradually increase the power to see more detail.
Focal Length: Understanding the Numbers
The focal length of a lens is the distance, in millimeters (mm), between the lens and the point where it focuses light. Understanding focal length is crucial because it directly affects the magnification you’ll get when using a specific lens with your telescope. Here’s the formula: Magnification = Telescope Focal Length / Eyepiece Focal Length. So, a 10mm eyepiece used with a telescope that has a focal length of 1000mm will give you 100x magnification.
Choosing the right focal length depends on what you want to observe. For wide-field views of nebulae and galaxies, you’ll want a longer focal length eyepiece (resulting in lower magnification). For detailed views of planets or the moon, you’ll need shorter focal lengths (higher magnification). Having a range of eyepieces with different focal lengths is ideal, allowing you to adapt to different observing conditions and targets. Just remember that the maximum usable magnification still applies!
Apparent Field of View (AFOV): Getting the Big Picture
The Apparent Field of View (AFOV) refers to the size of the circle you see when you look through the eyepiece. It’s measured in degrees. A wider AFOV means you’ll see more of the sky in a single view, making it easier to find and track objects, especially at higher magnifications. Narrow AFOVs can feel like looking through a straw, which can be uncomfortable and disorienting, especially for beginners.
Think about taking a panorama photo with your phone. A wide AFOV eyepiece is like capturing the entire scene in one shot, while a narrow AFOV eyepiece is like taking a very zoomed-in shot of just a tiny portion of the scene. For general observing, eyepieces with AFOVs of 50 degrees or more are usually preferred. Wide-field eyepieces, with AFOVs of 60 degrees or more, offer a truly immersive experience and are well worth the investment if you’re serious about astronomy.
Eye Relief: Comfort is Key
Eye relief is the distance from the eyepiece lens to the point where your eye needs to be in order to see the full field of view. If you wear eyeglasses, eye relief becomes particularly important. Insufficient eye relief will force you to remove your glasses, which can be inconvenient, especially if you have astigmatism.
Ideally, you want an eyepiece with at least 15-20mm of eye relief if you wear glasses. This will allow you to comfortably view through the eyepiece without needing to remove them. Even if you don’t wear glasses, comfortable eye relief makes for a more enjoyable observing experience. You’ll be able to relax and focus on the view without straining your eyes. Nobody wants to get a headache after a night of stargazing!
Lens Coatings: Let the Light Shine Through
Lens coatings are thin layers of material applied to the surface of the lens to reduce reflection and increase light transmission. The better the coatings, the brighter and sharper the image will be. Poorly coated lenses can result in dim images with glare and internal reflections, diminishing the clarity and contrast.
Look for eyepieces that are described as “fully multi-coated.” This means that all air-to-glass surfaces have multiple layers of coatings applied. These coatings maximize light transmission, minimize reflections, and improve overall image quality. Fully coated lenses are a good step up, while simply “coated” lenses offer the least improvement. Investing in eyepieces with high-quality coatings is one of the best ways to ensure that you are getting the most out of your telescope, and one of the best lenses for telescope performance.
Lens Quality and Design: You Get What You Pay For
The quality of the glass used in the lenses and the complexity of the lens design significantly impact the image quality. More complex lens designs often incorporate multiple lens elements to correct for optical aberrations such as chromatic aberration (color fringing) and spherical aberration (blurring).
Cheaper eyepieces often use simpler lens designs and lower-quality glass, which can result in noticeable distortions and a less sharp image. While you don’t necessarily need to break the bank, investing in mid-range to high-end eyepieces is usually worth it in the long run. Brands like Tele Vue, Explore Scientific, and Baader Planetarium are known for producing high-quality eyepieces that deliver exceptional performance. Consider starting with a couple of good quality eyepieces that cover your most common observing needs and gradually expand your collection as your budget allows.
Budget: Balancing Cost and Performance
Let’s be honest, telescope accessories can be expensive! Setting a budget before you start shopping is essential. It’s easy to get caught up in the excitement and overspend on items you may not even need. But you can definitely find the best lenses for telescope viewing without emptying your wallet.
Start by prioritizing the eyepieces that you’ll use most frequently. A good quality mid-range eyepiece is often a better investment than a cheap set of multiple eyepieces. Remember that you can always upgrade your eyepieces over time. Consider purchasing used eyepieces from reputable sources like online astronomy forums or classifieds. You can often find great deals on high-quality eyepieces that are in excellent condition. Finding the right balance between cost and performance will allow you to build a collection of eyepieces that meets your needs without breaking the bank.
FAQ
What does “focal length” mean when talking about telescope lenses?
Focal length is basically the distance, in millimeters (mm), between a lens or mirror and the point where light converges to form a sharp image. Think of it like this: a longer focal length means a narrower field of view and higher magnification, making it great for observing planets and smaller, brighter objects. A shorter focal length provides a wider field of view, which is better for seeing larger, dimmer objects like nebulae or galaxies.
It’s crucial to choose a focal length that suits your specific observing goals. For example, if you’re primarily interested in planetary viewing, you’ll likely want a longer focal length. If you are more interested in wide field, then choose a shorter one. Don’t feel overwhelmed by the numbers. Experimenting with different focal lengths is part of the fun of exploring the cosmos!
What’s the difference between an eyepiece and a Barlow lens?
Eyepieces are those little magnifying lenses you stick into the telescope to actually see the image. They come in various focal lengths, and each focal length provides a different magnification when used with your telescope. They’re like different prescriptions for eyeglasses, each giving you a different level of zoom.
A Barlow lens, on the other hand, is like a magnification multiplier. You insert it between the eyepiece and the telescope’s focuser, and it effectively multiplies the focal length of your telescope. A 2x Barlow, for instance, doubles your telescope’s magnification with any eyepiece you use. This can be a cost-effective way to increase your magnification options without buying a whole bunch of new eyepieces.
What is the field of view, and why is it important?
The field of view (FOV) is how much of the sky you can see through your telescope at any given time. It’s usually expressed as an angle, like 1 degree or 0.5 degrees. A wider field of view means you can see a larger chunk of the sky, making it easier to find and track objects. It’s also fantastic for observing large, diffuse objects like nebulae or star clusters.
A narrow field of view, on the other hand, gives you a closer, more detailed look at smaller objects like planets or globular clusters. Choosing the right field of view depends on what you want to observe. Wide field of view is great for finding things, while a narrower one is for more detailed views of smaller targets. You can change it using different eyepieces, which is why having a variety is useful.
How does lens coating affect image quality?
Lens coatings are thin layers of material applied to the surface of a lens to reduce reflections and increase light transmission. Think of it like this: without coatings, some of the light entering your telescope bounces around inside, reducing the brightness and contrast of the image. Coatings help minimize this, allowing more light to reach your eye.
Better coatings result in brighter, sharper, and more contrasty images. Multi-coated lenses are even better because they have multiple layers of coating, further reducing reflections. Lens coatings are a pretty important feature to consider because they will impact the brightness of celestial objects, and the amount of detail you can perceive.
I’m new to telescopes. Are expensive lenses really necessary?
Not necessarily! While high-end lenses can definitely provide superior image quality, you don’t need to break the bank when you’re just starting out. There are plenty of good quality, affordable lenses that can offer excellent views for beginners. In fact, starting with simpler lenses can help you learn the basics of observing and figure out what types of objects you enjoy viewing the most.
Focus on getting a few well-made, versatile lenses that cover a range of magnifications. As you gain experience and your observing interests become more defined, you can always upgrade to more advanced lenses later on. The important thing is to get out there and start exploring the night sky!
What are some common telescope lens problems and how can I avoid them?
One common problem is blurry or distorted images. This can be caused by a few things, such as poor lens quality, misaligned optics, or even atmospheric turbulence. To avoid this, invest in reputable brands and ensure your telescope is properly collimated (aligned). Also, avoid observing on nights with poor seeing conditions (lots of atmospheric turbulence).
Another issue can be lens fogging or dew buildup, especially on humid nights. To prevent this, consider using a dew shield or heater strip, which keeps the lens slightly warmer than the surrounding air, preventing condensation. Also, always store your lenses in a dry, clean place to prevent dust and moisture damage.
How do I clean my telescope lenses properly?
Cleaning your telescope lenses requires a delicate touch. First, gently blow off any loose dust or debris with a blower bulb or can of compressed air (use short bursts). Avoid touching the lens surface with your fingers! The oil from your skin can damage the coatings.
If there are stubborn smudges or fingerprints, use a lens cleaning solution specifically designed for optics and a soft, lint-free microfiber cloth. Apply a small amount of solution to the cloth and gently wipe the lens in a circular motion, working from the center outward. Never apply cleaning solution directly to the lens. And be sure to use a very soft cloth to reduce the chance of scratching.
The Bottom Line
Ultimately, choosing the best lenses for your telescope is a deeply personal journey, one that reflects your unique observing goals and budget. Don’t feel overwhelmed by the options; instead, embrace the process of discovery. Experiment with different focal lengths and designs, explore the features we talked about, and let your own experiences under the night sky guide you. The universe is vast and waiting to be explored, and with the right eyepiece in hand, you’ll be amazed by what you can see.
Think of this guide not as a definitive answer, but as a stepping stone. Consider the telescopes best lenses offer, and the exciting prospects of unlocking sharper, brighter views of celestial wonders. Equip yourself with this knowledge, trust your intuition, and you’ll be well on your way to capturing breathtaking images and unforgettable observing sessions. Now go out there, look up, and let the adventure begin!