Have you ever looked up at the night sky, iPhone in hand, and wished you could capture the breathtaking beauty of the moon or a distant nebula? You’re not alone! More and more people are discovering the incredible potential of combining the accessibility of smartphone technology with the power of telescopes to create stunning astrophotography. The good news is, you don’t need expensive, professional-grade equipment to get started.
This guide is designed to help you navigate the world of stargazing through your iPhone. We’ll explore the best telescopes for iPhone astrophotography, taking into account factors like ease of use, image quality, and compatibility. Get ready to unlock the universe and start capturing amazing photos of celestial wonders!
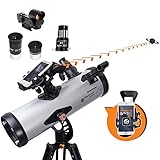
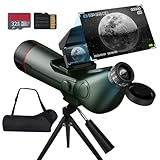
Before we start our review of the best telescopes for iphone astrophotography, here are some related products you can find on Amazon:


Reaching for the Stars: Your iPhone and the Universe
Ever looked up at the night sky and wished you could capture that breathtaking view with your phone? You’re not alone! Astrophotography, once a hobby reserved for those with expensive cameras and specialized equipment, is now increasingly accessible thanks to the incredible cameras built into our smartphones. And the key to unlocking even more celestial detail? A telescope! But which telescope is the right fit for pairing with your iPhone? Let’s embark on this journey together to find the perfect match.
The truth is, the combination of an iPhone and a telescope creates a surprisingly potent astrophotography setup. While you might not get Hubble-quality images (yet!), you can definitely capture stunning photos of the Moon, planets like Jupiter and Saturn (with their moons!), and even some brighter deep-sky objects like nebulae. The smartphone astrophotography market is booming, and it is projected to reach $1.7 billion by 2028, further signifying the growing public interest. What makes the setup work is that telescopes gather and concentrate light, allowing your iPhone’s camera to capture details that would otherwise be invisible to the naked eye.
So, how do you choose from the vast array of telescopes available? It can feel overwhelming, but don’t worry! We’ll break down the key features to consider when searching for the best telescopes for iPhone astrophotography. We will discuss different types of telescopes, like reflectors and refractors, and which ones tend to pair best with smartphone photography. We’ll also delve into the crucial accessories, such as smartphone adapters, that will make your astrophotography experience smooth and enjoyable.
Whether you’re a seasoned stargazer or just starting your cosmic adventure, this guide will equip you with the knowledge to select the best telescopes for iPhone astrophotography. We’ll explore options for various budgets and skill levels, highlighting their strengths and weaknesses. Get ready to transform your iPhone into a powerful tool for exploring and capturing the beauty of the night sky!
The Best Telescopes For Iphone Astrophotography
Celestron NexStar 8SE
The Celestron NexStar 8SE is a legendary scope for a reason, packing serious light-gathering ability into a relatively portable package. This Schmidt-Cassegrain telescope uses computerized GoTo technology, making finding celestial objects a breeze, even for beginners. Just punch in what you want to see, and the telescope will automatically slew to its location. It’s an absolute game-changer when it comes to spending more time observing and less time hunting.
When it comes to iPhone astrophotography, the 8SE shines. While you’ll need an adapter to mount your phone, the views you’ll capture of the Moon, planets like Jupiter and Saturn, and even some brighter deep-sky objects are incredibly rewarding. The combination of the 8″ aperture and GoTo system allows for longer exposures, perfect for bringing out faint details. Plus, the extensive community support means there are plenty of tips and tricks available online for getting the most out of this scope.
Orion StarBlast 6i IntelliScope Reflector Telescope
The Orion StarBlast 6i is a fantastic choice for those who want a sizable aperture without breaking the bank. This Dobsonian reflector boasts a 6-inch mirror, providing bright and detailed views of a wide range of celestial objects. What sets it apart is the IntelliScope object locator. While not fully automated like a GoTo system, the IntelliScope guides you to your desired object using digital setting circles, offering a great balance between manual control and assisted navigation.
For iPhone astrophotography, the StarBlast 6i delivers impressive results, especially on the Moon and planets. The large aperture allows for capturing more light, resulting in brighter and sharper images. While it requires manual tracking, the smooth Dobsonian mount makes it easy to keep your target centered. With a smartphone adapter, you can easily capture stunning images and videos of the night sky.
Sky-Watcher Heritage 150P Flextube Dobsonian Telescope
This telescope really packs a punch. The Sky-Watcher Heritage 150P is a collapsible Dobsonian reflector that offers a lot of aperture for its size and price. The innovative flextube design makes it incredibly compact and portable, perfect for taking to dark sky locations. The 6-inch mirror gathers plenty of light, revealing stunning details in the Moon, planets, and brighter deep-sky objects like nebulae and galaxies.
Astrophotography with your iPhone and the 150P is definitely doable. While it’s a manual telescope, its smooth Dobsonian base allows for relatively easy tracking of objects. Using a smartphone adapter, you’ll be able to capture some amazing shots of the Moon’s craters or the rings of Saturn. It’s a great choice for beginner astrophotographers looking for a powerful and portable telescope.
Celestron AstroMaster 130EQ
The Celestron AstroMaster 130EQ is a classic reflector telescope, offering a good balance of aperture and portability. Its 130mm (5.1-inch) aperture gathers ample light, providing clear views of the Moon, planets, and some brighter deep-sky objects. The equatorial mount allows for manual tracking of celestial objects as they move across the sky, a skill that’s great for learning astronomy.
Pairing the AstroMaster 130EQ with an iPhone for astrophotography can yield impressive results. While the manual tracking requires some practice, the equatorial mount does make it easier to keep your target centered. With the right smartphone adapter, you can capture detailed images of the lunar surface or the cloud bands on Jupiter. It’s a great option for beginners looking to get started in astrophotography without breaking the bank.
Explore Scientific FirstLight 127mm Maksutov-Cassegrain Telescope
The Explore Scientific FirstLight 127mm Mak-Cass is a compact and versatile telescope that’s great for both planetary and lunar viewing. Its Maksutov-Cassegrain design delivers sharp, high-contrast images with excellent color correction. The long focal length makes it particularly well-suited for observing details on the Moon, planets, and double stars. Its small size makes it easily portable for observing on the go.
When combined with an iPhone, the FirstLight 127mm Mak-Cass can produce fantastic results in astrophotography, particularly for capturing stunning images of the Moon and planets. With a smartphone adapter, you can easily attach your iPhone and capture high-resolution images of craters, mountains, and other lunar features. The telescope’s sharp optics ensure that you’ll get detailed and crisp images, making it a great choice for anyone interested in capturing the beauty of our solar system with their phone.
Why Do People Need to Buy Telescopes for iPhone Astrophotography?
Ever tried taking a picture of the moon with just your iPhone? You probably ended up with a tiny, blurry white dot. That’s because your phone’s lens, amazing as it is for everyday photos, simply isn’t designed to gather enough light or provide the magnification needed to capture the stunning details of celestial objects. Imagine wanting to photograph the rings of Saturn or the vibrant colors of a distant nebula. Without a telescope, those cosmic wonders remain just faint smudges on your iPhone screen.
Think of it like trying to watch a baseball game from the parking lot versus being right behind home plate. Your eyes are great, but you need binoculars (or a really good seat!) to see the action up close. A telescope, paired with your iPhone, essentially acts as that “front row seat” for the universe. It collects much more light than your phone’s lens can, allowing you to capture incredibly detailed images of the moon, planets, and even some brighter deep-sky objects. Plus, the magnification helps you zoom in on these targets, revealing details you never knew existed.
Investing in one of the “best telescopes for iPhone astrophotography” opens up a whole new world of possibilities. You can capture breathtaking close-ups of lunar craters, track Jupiter and its moons, or even delve into the realm of nebulae and galaxies, all using the device you already carry in your pocket. It transforms your iPhone from a simple camera into a powerful tool for exploring the cosmos, allowing you to share the beauty of the universe with your friends and family.
Ultimately, purchasing a telescope for iPhone astrophotography isn’t just about taking pictures; it’s about embarking on a visual journey of discovery. It’s about connecting with the universe on a deeper level and capturing those moments to share and cherish. It’s about unlocking the full potential of your iPhone and turning it into a portal to the stars, allowing you to create stunning astrophotography that will astound and inspire.
Essential Accessories to Elevate Your iPhone Astrophotography
Alright, you’ve got your telescope picked out, ready to capture the cosmos through your iPhone. But hold on a second! There are a few key accessories that can seriously level up your astrophotography game. Think of it like buying a camera – the body is important, but the lenses and other gear really make the difference. Without these crucial add-ons, you might find yourself struggling with blurry images or limited tracking capabilities.
First up: consider investing in a good quality smartphone adapter. These nifty gadgets securely attach your iPhone to the telescope’s eyepiece, ensuring stability and precise alignment. Without a solid adapter, you’ll likely end up with shaky, out-of-focus photos, especially at higher magnifications. It’s like trying to thread a needle with your eyes closed – frustrating and not very effective!
Another essential accessory is a decent Barlow lens. A Barlow lens effectively multiplies the magnification of your telescope’s eyepiece, allowing you to zoom in closer on celestial objects. Imagine trying to see the craters on the moon without a zoom function on your phone camera – a Barlow lens gives you that extra power, bringing those distant details into sharp focus.
Finally, don’t underestimate the importance of a portable power bank. Astrophotography sessions can last for hours, especially if you’re trying to capture long-exposure shots. Draining your iPhone battery mid-session is a surefire way to miss that perfect moment. A power bank keeps your phone juiced up and ready to capture the wonders of the night sky, ensuring you don’t lose out on any amazing cosmic opportunities.
Understanding Magnification and Aperture for iPhone Astrophotography
Magnification and aperture: these two terms are thrown around a lot when talking about telescopes, but what do they actually mean, and how do they impact your iPhone astrophotography? Think of aperture as the “light-gathering power” of your telescope – the wider the aperture, the more light it can collect, resulting in brighter and more detailed images. It’s like comparing a dim flashlight to a powerful searchlight – the searchlight (larger aperture) reveals much more.
Magnification, on the other hand, is how much bigger the telescope makes an object appear. While high magnification might sound appealing, it’s not always the best option. Excessive magnification can actually worsen image quality, making the view blurry and dim, especially with smaller telescopes. It’s similar to digitally zooming in too far on your phone camera – the image becomes pixelated and loses detail.
The key is to find a balance between aperture and magnification that suits your needs and the type of objects you want to photograph. For example, if you’re interested in capturing faint galaxies or nebulae, a telescope with a large aperture is crucial for gathering enough light. For observing the moon or planets, where brightness isn’t as much of an issue, you can get away with slightly lower aperture and higher magnification.
Ultimately, understanding the interplay between aperture and magnification will empower you to make informed decisions when choosing a telescope and accessories for your iPhone astrophotography endeavors. It’s about optimizing your setup to capture the best possible images, whether you’re gazing at lunar craters or distant galaxies.
Troubleshooting Common iPhone Astrophotography Issues
Let’s be honest, iPhone astrophotography isn’t always a walk in the park. You’re bound to encounter some challenges along the way. It’s like learning to ride a bike – you’re going to fall a few times before you find your balance. Knowing how to troubleshoot common issues can save you a lot of frustration and help you capture those stunning celestial images you’re after.
One frequent problem is blurry images. This can be caused by a number of factors, including shaky hands, incorrect focus, or atmospheric turbulence (seeing). Try using a sturdy tripod to stabilize your telescope, and practice fine-tuning the focus using the telescope’s knobs. If atmospheric conditions are poor, consider waiting for a night with better seeing before attempting to capture images.
Another common issue is light pollution. City lights can significantly degrade the quality of your astrophotography images, washing out faint details and making it difficult to see fainter objects. To minimize the effects of light pollution, try to find a dark sky location away from city lights. Alternatively, you can use light pollution filters that block out specific wavelengths of light, improving contrast and revealing more details in your images.
Finally, battery life is always a concern when using your iPhone for extended astrophotography sessions. As mentioned earlier, a portable power bank is a must-have accessory. You can also conserve battery life by turning off unnecessary features on your phone, such as Wi-Fi and Bluetooth, and reducing the screen brightness.
Best Apps For Enhancing Your iPhone Astrophotography Experience
Your iPhone isn’t just a camera; it’s a powerful computer in your pocket! And just like any computer, you can unlock its potential with the right software. When it comes to iPhone astrophotography, there are several apps that can significantly enhance your experience, from assisting with star alignment to stacking images for improved clarity. Think of these apps as your digital assistants, guiding you through the complexities of capturing the night sky.
First off, consider a dedicated astronomy app that helps you locate celestial objects. Apps like SkyView or Star Walk 2 use your phone’s GPS and compass to identify stars, planets, and constellations in real-time. This is incredibly useful for finding specific objects you want to photograph, especially if you’re new to astronomy. It’s like having a personal tour guide to the cosmos.
Next, explore camera apps designed specifically for astrophotography. These apps often offer features like manual focus controls, adjustable ISO and shutter speed, and RAW image capture, giving you more control over the imaging process. Apps like ProCam or Camera+ are great options to explore. Using these apps will allow you to take photos comparable to that of a professional camera.
Lastly, don’t underestimate the power of image stacking apps. Image stacking involves combining multiple images of the same object to reduce noise and increase detail. Apps like DeepSkyStacker (available for Windows) or Sequator can automatically align and stack your iPhone astrophotography images, resulting in significantly improved image quality. It’s like taking multiple snapshots and merging them together to create one super-detailed image.
Best Telescopes For iPhone Astrophotography: A Beginner’s Buying Guide
So, you’re bitten by the astrophotography bug and want to capture the cosmos with your iPhone? Awesome! It’s totally achievable and can be seriously rewarding. You don’t need super expensive equipment to get started, but choosing the right telescope is key. Think of this guide as having a chat with a friend who’s been down this road before. I’m here to break down what matters most when selecting one of the best telescopes for iPhone astrophotography. Let’s get started!
Aperture: Gathering the Starlight
Think of aperture as the telescope’s eye – the bigger the eye, the more light it can gather. And in astrophotography, light is everything. A larger aperture lets you see fainter objects and capture more detail, leading to brighter, more vibrant images of nebulae, galaxies, and planets. A telescope with a smaller aperture might be perfect for viewing the moon and brighter planets like Jupiter and Saturn, but when you try to capture faint deep-sky objects with your iPhone, you’ll likely end up with grainy, underwhelming images.
For iPhone astrophotography, especially when venturing beyond the moon and planets, aim for a telescope with an aperture of at least 70mm, and ideally 80mm or larger. While larger apertures mean bigger and often more expensive telescopes, the improvement in image quality is significant. Consider it an investment in future-proofing your astrophotography journey. The best telescopes for iPhone astrophotography often strike a good balance between aperture size, portability, and budget, so consider all these factors.
Focal Length and Focal Ratio: Framing Your Shot
Focal length and focal ratio are closely related and impact the “zoom” and brightness of your images. Focal length, measured in millimeters (mm), determines the magnification. A longer focal length gives you a narrower field of view and higher magnification, ideal for planets and smaller objects. Focal ratio (f-number) is the focal length divided by the aperture. A lower f-number (like f/5) means a faster telescope, letting in more light in a shorter amount of time, which is great for capturing faint deep-sky objects.
For iPhone astrophotography, a versatile focal length range is ideal. Something in the 500mm to 1000mm range can be a good starting point. If you’re primarily interested in planets, a longer focal length is better, but if you want to capture wider field views of nebulae and galaxies, a shorter focal length is preferable. Also, consider the focal ratio. A faster telescope (lower f-number) will be more forgiving when using your iPhone, as it gathers light more efficiently. Some of the best telescopes for iPhone astrophotography will also allow you to attach a focal reducer, which will improve the overall results.
Telescope Type: Refractor, Reflector, or Catadioptric?
There are three main types of telescopes: refractors, reflectors, and catadioptric telescopes. Refractors use lenses to gather and focus light, reflectors use mirrors, and catadioptric telescopes use a combination of both. Each type has its own advantages and disadvantages in terms of image quality, portability, and cost.
Refractors are generally good for planetary viewing and provide sharp, high-contrast images. Reflectors offer a larger aperture for the same price as a refractor, making them excellent for deep-sky astrophotography. Catadioptric telescopes, like Schmidt-Cassegrains and Maksutov-Cassegrains, are compact and versatile, offering a good balance of performance for both planetary and deep-sky observing. For iPhone astrophotography, reflectors, especially Dobsonian reflectors when used with an equatorial platform, and catadioptric telescopes are often the best choice. The best telescopes for iPhone astrophotography will depend on the type of object you want to photograph and what is important to you in terms of portability.
Mount Type: Stability is Key
The telescope mount is what holds the telescope and allows you to point it at different parts of the sky. There are two main types of mounts: alt-azimuth (alt-az) and equatorial (EQ). Alt-az mounts move up/down (altitude) and left/right (azimuth), similar to a camera tripod. Equatorial mounts are aligned with the Earth’s axis and allow you to track objects as they move across the sky due to the Earth’s rotation.
For astrophotography, an equatorial mount is essential. Since the Earth is constantly rotating, stars and planets appear to move across the sky. An equatorial mount compensates for this movement, allowing you to take longer exposures without star trails. While you can get away with an alt-az mount for very short exposures of bright objects like the moon, you’ll quickly find it limiting when trying to capture fainter objects. Go-To equatorial mounts are even better, automatically finding and tracking celestial objects. These are especially helpful for beginners learning their way around the night sky. When considering the best telescopes for iPhone astrophotography, do not skimp on the mount. A shaky mount will negate all other efforts!
iPhone Compatibility: Adapters and Apps
Attaching your iPhone to a telescope requires an adapter. There are many different types of adapters available, ranging from simple universal smartphone adapters to more specialized adapters that are designed for specific telescope eyepieces. The key is to find an adapter that securely holds your iPhone and aligns the camera lens with the telescope’s eyepiece.
Beyond the physical connection, consider what apps you might use. Some apps offer features specifically designed for astrophotography, such as long exposure modes, focus peaking, and image stacking. Experiment with different apps to find one that suits your needs and provides the best results with your iPhone and telescope setup. Many of the best telescopes for iPhone astrophotography will come with accessories that make it easier to connect your device.
Portability and Storage: Where Will You Use It?
Consider where you’ll be using your telescope. If you plan to travel to dark sky locations, portability becomes a crucial factor. Large reflectors, especially Dobsonians, can be bulky and difficult to transport. Refractors and catadioptric telescopes are generally more portable. Also, think about where you’ll store your telescope when it’s not in use. Space can be a major consideration, especially if you live in an apartment or have limited storage space.
Before buying, measure your car’s trunk or back seat to make sure the telescope will fit. Consider also the weight of the telescope and mount, especially if you’ll be carrying it long distances. Finding a balance between aperture and portability is important. While a larger aperture is desirable, a telescope that’s too cumbersome to transport will end up gathering dust in your closet. The best telescopes for iPhone astrophotography are those that are easy to set up, transport, and store.
Budget: Finding the Sweet Spot
Telescopes can range in price from a few hundred dollars to tens of thousands of dollars. It’s important to set a budget before you start shopping and stick to it. Don’t feel pressured to buy the most expensive telescope, especially when you’re starting out. There are many excellent telescopes available at reasonable prices that can provide great results for iPhone astrophotography.
Remember to factor in the cost of accessories, such as an iPhone adapter, extra eyepieces, and a light pollution filter. A good starting point is to aim for a telescope and mount that cost between $500 and $1000. This will give you a good quality instrument that will last for years. As you gain experience and your skills improve, you can always upgrade to a more advanced telescope later. It’s best to start with a solid foundation and learn the basics before investing in more expensive equipment. The best telescopes for iPhone astrophotography don’t need to break the bank!
FAQ
What makes a telescope good for iPhone astrophotography?
A great telescope for iPhone astrophotography isn’t just about raw power, though magnification definitely helps! It’s really about how well it works with your iPhone. Look for telescopes with sturdy mounts that can hold your phone adapter securely, minimizing vibrations and giving you clearer shots. Also, consider the telescope’s aperture (the size of its light-gathering lens or mirror). A larger aperture lets in more light, which is crucial for capturing faint celestial objects.
Another key aspect is the telescope’s ease of use. Nobody wants to wrestle with complicated setups in the dark! Models designed for beginners often have simpler mechanics and intuitive controls. And, of course, compatibility with common iPhone telescope adapters is a must. Think about how easy it will be to attach and detach your phone for viewing through the eyepiece versus taking pictures. The easier the process, the more you’ll use it!
Do I need a special adapter to connect my iPhone to a telescope?
Yes, you’ll absolutely need a special adapter to connect your iPhone to a telescope for astrophotography. These adapters are designed to securely hold your phone in place over the telescope’s eyepiece, allowing your iPhone’s camera to capture the magnified image. They come in various styles, from simple universal phone holders to more sophisticated, adjustable mounts.
The adapter you choose will depend on your telescope’s eyepiece size and your iPhone model. Many universal adapters are quite versatile and can accommodate different phones, even with cases on. It’s always a good idea to check reviews and compatibility information before buying to ensure a snug and stable fit. A wobbly connection can lead to blurry images, so a secure adapter is key!
What is the difference between refractor and reflector telescopes, and which is better for astrophotography with an iPhone?
Refractor telescopes use lenses to gather and focus light, while reflector telescopes use mirrors. Refractors tend to be more compact and require less maintenance, but can become expensive for larger apertures. Reflectors generally offer larger apertures for the price, which means they can gather more light and show fainter objects. However, they might require occasional alignment of the mirrors (collimation).
For iPhone astrophotography, both types can work well. Reflectors often offer a better “bang for your buck” in terms of aperture, which is helpful for capturing detail in faint deep-sky objects. However, refractors can produce sharper, higher-contrast images, which might be preferable for planetary and lunar photography. It really boils down to your budget, the type of objects you want to observe, and your preference for maintenance. A smaller refractor is often recommended for beginners due to simplicity.
What kind of objects can I expect to see with a telescope and my iPhone?
With a telescope and your iPhone, you can see a surprising amount! The Moon is an obvious target, and you’ll be able to capture amazing detail of its craters, mountains, and maria (the dark, smooth plains). Planets like Jupiter and Saturn will appear as small disks, and you might even be able to glimpse Jupiter’s four largest moons or Saturn’s rings depending on your telescope’s power and the seeing conditions.
Beyond the solar system, you’ll be able to observe brighter deep-sky objects like nebulae (clouds of gas and dust), star clusters (groups of stars held together by gravity), and even some galaxies. The brighter the object, the easier it will be to capture with your iPhone. Don’t expect Hubble-like images right away, but you’ll be amazed at what you can see and photograph with relatively modest equipment!
Is a higher magnification always better for astrophotography?
Not necessarily! While higher magnification makes objects appear larger, it also magnifies any atmospheric turbulence or vibrations. This can result in blurry or shaky images. Think of it like zooming in too much on a digital photo – eventually, you just get pixelation and a loss of detail.
For iPhone astrophotography, it’s often better to start with lower magnifications and gradually increase them until you find the “sweet spot” where you can see good detail without excessive blurring. A stable mount and good atmospheric seeing conditions are crucial for using higher magnifications effectively. Experiment to find what works best for your telescope, location, and target object!
How important is a good mount for astrophotography?
A good mount is absolutely crucial for astrophotography, even with an iPhone! It’s the foundation that supports your telescope and keeps it steady. A wobbly or unstable mount will make it nearly impossible to capture sharp images, no matter how good your telescope or iPhone camera is.
Think of it like trying to take a picture with a shaky hand – the resulting image will be blurry. For astrophotography, you need a mount that can smoothly track the movement of celestial objects across the sky as the Earth rotates. Equatorial mounts are specifically designed for this purpose, but even a sturdy alt-azimuth mount can work well for shorter exposures. Investing in a quality mount is one of the best things you can do to improve your astrophotography results.
What are some tips for taking good astrophotography photos with my iPhone?
First, make sure your phone is securely attached to the telescope with a good adapter. A wobbly connection is the enemy of sharp images! Also, use a remote shutter release (or the timer function on your iPhone) to avoid shaking the telescope when you take the photo.
Next, experiment with your iPhone’s camera settings. Try reducing the ISO to minimize noise and adjusting the exposure time to capture more detail. You might also want to use a stacking app to combine multiple images, which can significantly improve the clarity and detail of your final photo. Patience is key! Astrophotography takes practice, so don’t get discouraged if your first few attempts aren’t perfect. Keep experimenting and you’ll be amazed at what you can capture!
Verdict
Armed with this knowledge, you’re now much closer to unlocking the universe with your iPhone! The world of astrophotography can seem daunting at first, but with the right gear and a little practice, incredible sights are well within your reach. Think about the stunning images you’ve always dreamed of capturing – the rings of Saturn, the craters of the moon, or even distant nebulae. The journey to capturing these wonders begins with choosing one of the best telescopes for iPhone astrophotography discussed here.
It’s time to take the plunge! Don’t overthink it – pick the telescope that resonates most with your needs and budget. Remember, the perfect telescope is the one you’ll actually use. Get out there, experiment, and let your curiosity guide you. The universe is waiting to be explored, one stunning iPhone astrophoto at a time. Happy stargazing!