Remember that heart-stopping moment when your Mac screen flickered, and your prized photo library, painstakingly curated music collection, and crucial work documents threatened to vanish into the digital ether? I do! After a near-disaster myself, involving a faulty hard drive and a frantic data recovery scramble, I realized that relying on a single internal drive for my creative work wasn’t just risky, it was downright irresponsible. That’s when I dove headfirst into the world of RAID storage, determined to find the perfect solution to safeguard my data and boost my workflow. Whether you’re a photographer drowning in RAW files, a video editor juggling terabytes of footage, or just someone who values the security of their digital life, you’ve come to the right place.
This guide is dedicated to helping you navigate the often-confusing landscape and discover the best raid hard drives for mac. We’ll break down the jargon, explore the different RAID levels, and provide honest, unbiased reviews of top-rated external hard drives specifically tailored for Apple devices. Say goodbye to data-related anxiety and hello to a faster, more secure, and more productive creative journey!
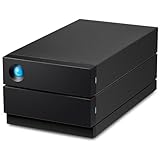
We’ll review the best raid hard drives for mac shortly, but first, check out some relevant products on Amazon:


Raiding for Speed and Security: A Mac User’s Guide to Storage Nirvana
Alright, picture this: You’re knee-deep in a massive video editing project, your deadline’s looming, and your Mac’s hard drive is groaning under the weight of terabytes of footage. Or maybe you’re a photographer with a growing archive of precious, irreplaceable images. Sound familiar? We’ve all been there. The truth is, most of us eventually outgrow our Mac’s built-in storage. But before you panic and start deleting family photos, there’s a smarter, more elegant solution: RAID.
RAID, or Redundant Array of Independent Disks, might sound intimidating, but it’s really just a way of combining multiple hard drives to achieve either faster speeds, increased data redundancy (a fancy way of saying “peace of mind”), or both! Think of it as building a super-powered storage system tailored to your specific needs. For example, RAID 0 focuses on speed, striping data across multiple drives, potentially doubling or tripling your read and write speeds. Conversely, RAID 1 mirrors data across two drives, providing a perfect backup in real-time. According to recent surveys, approximately 60% of creative professionals using Macs rely on external storage solutions, and RAID is a popular choice amongst them.
Choosing the best raid hard drives for mac depends on what you’re trying to accomplish. Are you a video editor who needs blistering speeds for 4K editing? Or are you a photographer prioritizing the safety of your irreplaceable portfolio? Perhaps you need a balance of both? The right RAID configuration and the right drives can drastically improve your workflow and safeguard your valuable data.
So, buckle up! We’re about to dive into the world of RAID, demystify the jargon, and help you choose the perfect storage solution to unleash the full potential of your Mac. We’ll explore different RAID levels, discuss key features to look for, and recommend some of the best raid hard drives for mac currently on the market, ensuring you find the perfect match for your unique workflow and budget.
Best Raid Hard Drives For Mac – Reviewed
G-Technology ArmorLock Encrypted NVMe SSD
Looking for serious speed and rock-solid security for your precious Mac data? The G-Technology ArmorLock is a beast. This NVMe SSD screams with transfer rates, making light work of even the largest video files or photo libraries. Plus, the hardware encryption is a game-changer. Forget clunky passwords, simply unlock the drive with a compatible iPhone or Mac using the ArmorLock app. It’s super convenient and gives you peace of mind knowing your data is safe from prying eyes.
It’s not the cheapest option on the market, but the performance and security features justify the price, especially for professionals who deal with sensitive information. The rugged design also means it can handle the bumps and bruises of on-location shoots. If you need to protect your data and need fast transfer speeds, the G-Technology ArmorLock Encrypted NVMe SSD is worth a serious look.
LaCie Rugged RAID Pro
Need a storage solution that can survive a zombie apocalypse while keeping your Mac happy? The LaCie Rugged RAID Pro is your champion. This thing is seriously tough. Water resistant, drop resistant, crush resistant… you name it, it probably survives it. But it’s not just about durability. The built-in SD card reader is a massive time-saver for photographers and videographers, allowing you to quickly offload footage without needing extra dongles.
It offers RAID 0 and RAID 1 configurations, providing a balance of speed and data redundancy. While it’s not the fastest RAID solution out there, its ruggedness and built-in SD card reader make it a great choice for creatives who work in the field. If your workflow takes you to the most remote or challenging environments, the LaCie Rugged RAID Pro is a dependable storage partner.
OWC ThunderBay 4
The OWC ThunderBay 4 is a flexible powerhouse for Mac users looking for serious storage expansion. This enclosure lets you populate it with your own drives, whether you prefer blazing-fast SSDs or high-capacity HDDs, giving you total control over performance and cost. With Thunderbolt 3 connectivity, you can expect lightning-fast data transfers, making it ideal for demanding tasks like video editing and large-scale backups.
It’s a straightforward, no-frills enclosure that prioritizes performance and customization. Setting it up is easy, and OWC provides excellent software for managing your RAID configuration. If you are looking for a customizable storage solution that can keep up with your growing storage needs, the OWC ThunderBay 4 is an excellent choice.
TerraMaster D5 Thunderbolt 3
Looking for a budget-friendly way to boost your Mac’s storage with RAID? The TerraMaster D5 Thunderbolt 3 enclosure delivers serious bang for your buck. Housing up to five drives, this enclosure supports multiple RAID configurations, letting you tailor performance and redundancy to your specific needs. It’s a solid option for small businesses, creative professionals, or anyone who needs a reliable and scalable storage solution without breaking the bank.
While it might not have the same brand recognition as some of the other options, the TerraMaster D5 offers impressive performance and features for the price. The build quality is decent, and the Thunderbolt 3 connectivity ensures fast data transfers. If you’re on a budget but still need a capable RAID enclosure for your Mac, the TerraMaster D5 Thunderbolt 3 is a compelling option.
Promise Pegasus32 R4
Need a reliable and high-performance RAID solution for your Mac that just works? The Promise Pegasus32 R4 delivers. This pre-configured RAID system is incredibly easy to set up, making it a great choice for users who want a hassle-free experience. The Thunderbolt 3 connectivity offers lightning-fast transfer speeds, and the hardware RAID controller ensures consistent performance even under heavy workloads.
This is a dependable solution for video editors, photographers, and other creative professionals who need a robust storage system. It might not be the cheapest option, but the reliability, performance, and ease of use make it a worthwhile investment for those who value a seamless workflow. If you want a dependable, high-performance RAID array that integrates seamlessly with your Mac, the Promise Pegasus32 R4 is a strong contender.
Why Mac Users Should Consider RAID Hard Drives
Imagine you’re a photographer editing a massive collection of high-resolution images from a recent photoshoot. Your Mac is your creative hub, but suddenly, your single hard drive fails. Years of work, irreplaceable memories, and crucial client projects vanish in an instant. This nightmare scenario is precisely what RAID (Redundant Array of Independent Disks) is designed to prevent. RAID technology essentially combines multiple physical drives into a single, logical unit, offering crucial data redundancy and safeguards against data loss when one drive fails.
Consider a filmmaker working with 4K video footage. The sheer size and complexity of these files demand both immense storage capacity and fast data transfer speeds. A single hard drive might struggle to keep up, leading to frustrating lags and bottlenecks during editing. That’s where the “best RAID hard drives for Mac” shine. They can significantly improve performance, allowing for seamless playback and editing of large video files, saving valuable time and boosting productivity.
Beyond performance, RAID offers flexibility. Different RAID levels cater to specific needs. RAID 1, for instance, mirrors data across two drives, providing excellent data protection. RAID 0 stripes data across multiple drives, maximizing speed. Finding the “best RAID hard drive for Mac” involves assessing your workflow, storage needs, and desired level of data security. Whether you’re a creative professional, a small business owner, or simply someone who values their data, RAID offers a tailored solution.
Ultimately, investing in a RAID system for your Mac is an investment in peace of mind. It’s about safeguarding your valuable data, optimizing your workflow, and ensuring that a single drive failure doesn’t derail your projects. By choosing the “best RAID hard drives for Mac” that align with your specific needs, you can confidently tackle any creative endeavor, knowing that your data is protected and your performance is enhanced.
Understanding RAID Levels for Mac Users
Choosing the right RAID level can feel like deciphering a secret code, but it’s more straightforward than you might think. Different RAID levels offer varying trade-offs between speed, redundancy (protection against data loss), and storage capacity. Think of it as choosing the right insurance policy for your precious data. For instance, if you’re a video editor working with large 4K files, RAID 0 or RAID 5 might be your go-to for the speed they offer.
RAID 0, often called “striping,” splits your data across multiple drives. This boosts speed but offers no redundancy. If one drive fails, you lose everything. Imagine building a race car, maximizing speed at the expense of safety features. It’s great for temporary projects where speed is paramount, but definitely not ideal for your long-term photo library.
RAID 1, or “mirroring,” duplicates your data onto two or more drives. This provides excellent redundancy—if one drive fails, the other takes over seamlessly. It’s like having a backup artist on standby, ready to jump in the moment the original falters during a live performance. The downside? You only get half the storage capacity, as the other half is dedicated to the mirror.
RAID 5 uses striping with parity, distributing data and error-correction information across multiple drives. This offers a good balance of speed, redundancy, and storage capacity. If a drive fails, the parity information allows the system to reconstruct the missing data. Think of it as a team project where everyone contributes equally, ensuring that the task gets done even if one person is out sick. This is a popular choice for many Mac users needing reliable storage for video editing, photography, and other creative tasks.
Connectivity Options: Thunderbolt, USB-C, and More
When choosing a RAID hard drive for your Mac, connectivity is key. Thunderbolt, USB-C, and even older USB-A connections offer different speeds and capabilities. Thunderbolt is typically the fastest, ideal for demanding tasks like video editing directly from the drive. Think of it as having a high-speed fiber optic cable connecting your storage to your computer.
USB-C offers a good balance of speed and convenience, and is becoming increasingly common on newer Macs. While not as fast as Thunderbolt, it’s still a significant step up from older USB-A connections. It’s like upgrading from a standard definition TV to a crisp, high-definition one – a noticeable improvement in performance.
USB-A is still a viable option, especially for older Macs or for less demanding tasks. However, keep in mind that it’s significantly slower than Thunderbolt or USB-C. Imagine trying to fill a swimming pool with a garden hose versus a fire hose – the speed difference is quite dramatic. If you’re primarily backing up documents and photos, it might suffice, but for video editing or large file transfers, you’ll definitely want to consider the faster options.
Consider the ports available on your Mac and the type of work you’ll be doing. If you’re using a newer MacBook Pro with Thunderbolt ports and regularly work with large video files, a Thunderbolt RAID is a no-brainer. For general use and compatibility with older Macs, a USB-C RAID might be a better choice.
Software and Compatibility: Ensuring Seamless Integration with Your Mac
Just because a RAID hard drive has the right connections doesn’t mean it will seamlessly integrate with your Mac. Software and compatibility are crucial for a smooth user experience. Most RAID devices come with their own management software for configuring RAID levels, monitoring drive health, and performing other essential tasks. It’s like getting a new car – you need to learn how to use all the features to get the most out of it.
Check if the RAID’s software is compatible with your version of macOS. Some older software might not work correctly with the latest operating systems. Imagine trying to run a vintage program on a modern computer – things might not work as intended. Always verify compatibility before making a purchase to avoid frustrating compatibility issues.
Consider if the RAID enclosure supports macOS’s built-in Disk Utility. This can be helpful for formatting drives, partitioning, and running basic drive diagnostics. It’s like having a universal tool that works with all your devices. Some RAID devices might require you to use their proprietary software for all management tasks, which can be inconvenient.
Look for RAID drives that are pre-formatted for macOS. While you can reformat most drives yourself, having one that’s ready to go right out of the box saves time and effort. It’s similar to buying a pre-built computer versus assembling one yourself – it’s ready for immediate use. This ensures compatibility and simplifies the setup process, especially for those less comfortable with technical tasks.
Maintaining Your RAID Hard Drive: Longevity and Data Security
Investing in a RAID hard drive is a significant decision, so proper maintenance is key to ensuring its longevity and the safety of your data. Regular monitoring of drive health, timely backups, and a clean environment can extend the lifespan of your RAID system. Think of it like maintaining a car – regular oil changes and check-ups prevent major problems down the road.
Implement a regular backup schedule, even with the redundancy offered by RAID. RAID protects against drive failure, but it doesn’t protect against accidental deletion, viruses, or natural disasters. It’s like having a backup plan in case your backup plan fails. Consider using Time Machine or another backup solution to create an offsite backup of your data.
Monitor the temperature of your RAID enclosure, especially if you’re using it for demanding tasks like video editing. Overheating can significantly shorten the lifespan of hard drives. It’s similar to how overheating your car engine can cause severe damage. Make sure the enclosure has adequate ventilation and consider using a fan to improve cooling if necessary.
Regularly check the SMART (Self-Monitoring, Analysis, and Reporting Technology) status of your drives using the RAID’s management software or macOS’s Disk Utility. SMART data provides valuable insights into the health of your drives and can alert you to potential problems before they lead to data loss. It’s like getting regular health checkups – early detection allows for timely intervention. Taking these steps can help ensure your RAID system provides reliable storage for years to come.
Best Raid Hard Drives For Mac: Your Ultimate Buying Guide
Hey there, Mac user! Ready to supercharge your storage and protect your precious files? If you’re a creative professional, a data hoarder, or simply someone who values reliability, you’ve probably started exploring the world of RAID hard drives. But let’s be honest, it can feel overwhelming. Don’t worry, this guide is here to break it all down in a way that’s easy to understand, helping you pick the best raid hard drives for mac and find the perfect solution for your specific needs.
We’ll walk through the key factors you need to consider before making a purchase, ensuring you end up with a RAID setup that fits your workflow and budget. Think of me as your tech-savvy friend, giving you the inside scoop on everything RAID related. Let’s dive in!
1. RAID Level: Choosing the Right Configuration
Okay, let’s talk RAID levels. This is the core of understanding what kind of protection and performance you’re getting. RAID isn’t just one thing, it’s a spectrum of configurations, each with its own strengths and weaknesses. Think of it like different types of pizza: each has unique ingredients (in this case, drives and configurations) that make it suitable for different tastes (your specific storage needs).
For most Mac users, RAID 0, RAID 1, RAID 5, RAID 6, and RAID 10 are the most common choices. RAID 0 prioritizes speed by striping data across multiple drives, but offers no redundancy (if one drive fails, you lose everything). RAID 1 mirrors data across two drives, providing excellent redundancy but halving your usable storage. RAID 5 requires at least three drives and uses parity to protect against single drive failure. RAID 6 is similar to RAID 5 but uses dual parity, allowing for two drive failures. RAID 10 combines the speed of RAID 0 with the redundancy of RAID 1, requiring at least four drives. Considering your needs and risk tolerance is vital when choosing the best raid hard drives for mac.
2. Capacity: How Much Storage Do You Really Need?
Don’t just think about your current storage needs, but also consider future growth. It’s like buying a house – you might not fill every room right away, but you want to ensure you have enough space to grow into. Underestimating your storage needs can lead to headaches down the road, like having to migrate your data to a new system or constantly juggling files.
Think about the types of files you work with. Are you dealing with large video files, high-resolution photos, or massive databases? These eat up storage quickly. Add up your current storage usage, estimate your future needs based on your workflow, and then add a buffer. It’s always better to have a little extra room than to constantly worry about running out of space. Also consider the capacity of the individual drives within the RAID enclosure. While the total capacity is important, larger individual drives can sometimes be more efficient in the long run. Finding the best raid hard drives for mac means getting the right capacity for your specific needs.
3. Connectivity: Thunderbolt, USB-C, or Something Else?
The connection type between your RAID enclosure and your Mac significantly impacts data transfer speeds. It’s like the highway your data travels on – a narrow road will create a bottleneck, while a wide highway allows for smooth and fast traffic flow. Thunderbolt is generally the fastest option, offering blazing-fast transfer speeds that are ideal for demanding tasks like video editing and large file transfers.
USB-C is a versatile option that offers good performance, especially the newer USB 3.2 Gen 2×2 standard. However, it’s not quite as fast as Thunderbolt. USB-A is the oldest and slowest option, and should generally be avoided if you need high performance. Consider what ports are available on your Mac and what kind of speeds you need. For professionals dealing with large media files, Thunderbolt is often the way to go. For general storage and backup, USB-C might be sufficient. The best raid hard drives for mac should have the connectivity that matches your workflow.
4. Drive Type: HDD vs. SSD RAID
The choice between traditional Hard Disk Drives (HDDs) and Solid State Drives (SSDs) is a crucial one, impacting both speed and cost. Think of it like choosing between a reliable truck (HDD) and a sporty race car (SSD). HDDs offer high capacity at a lower price point, making them ideal for archiving large amounts of data. However, they are slower than SSDs and more susceptible to physical damage.
SSDs, on the other hand, offer significantly faster read and write speeds, resulting in quicker boot times, faster application loading, and snappier overall performance. However, they are more expensive per gigabyte than HDDs. A hybrid approach, using an SSD for your operating system and frequently accessed files, and an HDD RAID for archival storage, can offer a good balance of speed and affordability. When choosing the best raid hard drives for mac, consider your budget and performance needs to determine the best drive type for your raid setup.
5. Enclosure Quality and Features: Durability and Functionality
The enclosure that houses your hard drives plays a vital role in the overall performance and reliability of your RAID system. It’s like the foundation of a house – a strong foundation ensures the house stands the test of time. Look for enclosures made from durable materials like aluminum, which can help dissipate heat and protect the drives from physical damage.
Consider features like hot-swappable drives, which allow you to replace a failed drive without shutting down the entire system. Also, look for enclosures with good cooling systems, as overheating can significantly reduce the lifespan of your drives. Some enclosures also offer advanced features like built-in hardware RAID controllers, which can improve performance and offload processing from your Mac. When searching for the best raid hard drives for mac, pay close attention to the enclosure quality and features to ensure long-term reliability.
6. Hardware vs. Software RAID: Which Controller is Right for You?
RAID can be implemented using either hardware or software. Hardware RAID uses a dedicated controller card within the enclosure to manage the RAID array, while software RAID relies on your Mac’s CPU to handle the calculations. It’s like having a dedicated chef (hardware RAID) versus asking your already busy housemate to cook dinner (software RAID).
Hardware RAID generally offers better performance, especially for demanding tasks, as it offloads the processing from your Mac’s CPU. It also provides more consistent performance and can be more reliable in the long run. Software RAID is a more affordable option, as it doesn’t require a dedicated controller card. However, it can impact your Mac’s performance, especially during heavy workloads. For professional applications, hardware RAID is generally the preferred choice. For basic backup and storage, software RAID might be sufficient. For the best raid hard drives for mac in a professional setting, hardware RAID is usually recommended.
7. Budget: Balancing Cost and Performance
Finally, let’s talk about the elephant in the room: budget. RAID systems can range in price from a few hundred dollars to several thousand, depending on the capacity, drive type, RAID level, and features. It’s like buying a car – you need to balance your needs and desires with your financial limitations.
Determine your budget upfront and prioritize the features that are most important to you. If speed is paramount, you might need to invest in SSD RAID, even if it means sacrificing some capacity. If redundancy is your top priority, you might be able to save money by choosing a slower HDD RAID with a higher level of protection. Don’t be afraid to shop around and compare prices from different vendors. Reading reviews and doing your research can help you find the best value for your money. Finding the best raid hard drives for mac involves balancing your needs with your budget. Don’t overspend on features you don’t need, but also don’t skimp on quality if reliability is important.
FAQs
What exactly is a RAID hard drive, and why would I need one for my Mac?
RAID stands for Redundant Array of Independent Disks, and at its core, it’s a way to combine multiple hard drives into a single, logical unit. Instead of your Mac seeing several separate drives, it sees one big, fast, or extra-safe storage space, depending on the specific RAID configuration you choose. Think of it like combining several lanes on a highway to either increase the flow of traffic or provide redundancy in case one lane closes.
For Mac users, RAID offers several compelling advantages. Primarily, it can drastically increase performance for tasks like video editing, graphic design, or audio production, where large files need to be accessed quickly. RAID can also significantly improve data security. With certain RAID configurations, your data is mirrored across multiple drives, so if one drive fails, you won’t lose anything. It’s like having an instant backup, giving you peace of mind knowing your important files are protected.
Which RAID level is best for my needs as a Mac user?
Choosing the right RAID level really depends on what you prioritize most – speed, data protection, or a balance of both. RAID 0 is all about speed, striping data across multiple drives for faster read and write times. However, it offers no redundancy, so if one drive fails, you lose everything. RAID 1 mirrors your data across two drives, providing excellent data protection, but halving your available storage space.
Then there are the more advanced RAID levels like RAID 5 and RAID 10. RAID 5 is a great compromise, offering both speed and data protection with the ability to withstand a single drive failure. RAID 10 combines the benefits of RAID 1 and RAID 0, providing both high performance and redundancy, but it’s more expensive due to requiring more drives. Think about your workflow and how critical your data is, that will help you decide!
Are RAID hard drives compatible with all Mac models?
Generally, yes, RAID hard drives are compatible with most Mac models, but there are a few factors to consider. The connection type is the most important thing to check. Most modern RAID enclosures use Thunderbolt 3/4 or USB-C, which offer fast data transfer speeds and are compatible with most recent Macs. Older Macs might require a Thunderbolt 2 or even USB 3.0 connection.
Also, consider the enclosure itself. Some enclosures are designed for desktop Macs and require an external power source, while others are bus-powered, drawing power directly from the Mac’s USB or Thunderbolt port. Make sure the enclosure you choose is compatible with your Mac’s available ports and power capabilities. Remember to check the specifications of both your Mac and the RAID enclosure to ensure seamless compatibility.
What is the difference between hardware RAID and software RAID on a Mac?
Hardware RAID is managed by a dedicated controller within the RAID enclosure itself. This controller handles all the data striping, mirroring, and parity calculations, offloading the processing burden from your Mac’s CPU. This typically results in better performance, especially for demanding tasks like video editing. Hardware RAID also tends to be more reliable, as it’s less dependent on the operating system.
Software RAID, on the other hand, is managed by your Mac’s operating system. While it doesn’t require a dedicated hardware controller, it does put more strain on your Mac’s CPU. Software RAID is generally less expensive than hardware RAID, but it might not offer the same level of performance. For basic tasks or smaller RAID setups, software RAID might be sufficient, but for professional workflows, hardware RAID is usually the preferred option.
Do I need any special software or drivers to use a RAID hard drive with my Mac?
Most RAID enclosures are designed to be plug-and-play with Macs, so you shouldn’t need to install any special software or drivers. Your Mac should recognize the RAID as a single drive automatically. However, some RAID enclosures come with management software that allows you to monitor the health of the drives, configure RAID settings, and perform other maintenance tasks.
It’s always a good idea to check the manufacturer’s website for the latest firmware updates for your RAID enclosure. These updates can often improve performance, stability, and compatibility with newer versions of macOS. Even if the RAID enclosure works out of the box, keeping the firmware up to date can help ensure optimal performance and prevent potential issues down the line.
What happens if a drive fails in a RAID array? How do I recover my data?
The good news is that with most RAID configurations (excluding RAID 0), a single drive failure won’t result in data loss. RAID 1, RAID 5, and RAID 10 all offer some level of redundancy, allowing you to continue working even if one drive fails. The first thing you should do is back up any recent changes you have made as quickly as you can. This ensures you have a recent backup of your most important data.
The next step is to replace the failed drive with a new one. The RAID enclosure’s management software should guide you through the process of rebuilding the RAID array. This process involves copying the data from the remaining drives onto the new drive to restore redundancy. This can take some time, depending on the size of the array, but once it’s complete, your data will be fully protected again. If using RAID 0, contact a data recovery specialist.
How much should I expect to spend on a good RAID hard drive setup for my Mac?
The cost of a RAID hard drive setup can vary widely depending on several factors, including the storage capacity, the number of drives, the RAID level, and the quality of the enclosure. A basic two-drive RAID 1 setup with a few terabytes of storage might cost a few hundred dollars. A more advanced four or five-drive RAID 5 or RAID 10 setup with higher capacity drives can easily cost over a thousand dollars.
It’s important to consider your budget and your specific needs when choosing a RAID hard drive. Don’t overspend on features or capacity you don’t need. Instead, focus on finding a setup that provides the right balance of performance, data protection, and value for your workflow. Also, remember to factor in the cost of replacement drives in case of future failures.
Final Thoughts
Alright, we’ve covered a lot of ground! You’re now armed with the knowledge to navigate the world of RAID arrays for your Mac like a pro. Remember, the “best raid hard drives for mac” aren’t just about storage; they’re about unlocking your creative potential, safeguarding your precious memories, and streamlining your workflow. It’s about investing in peace of mind, knowing your data is safe and accessible whenever you need it.
So, go forth and conquer that digital mountain! Take the time to weigh your options, consider your needs, and trust your gut. You’ve got this! Embrace the power of organized storage and prepare to witness your Mac’s performance soar. Happy creating!