Remember that time you crammed everything you needed for that camping trip into your car, feeling like a sardine in a can? We’ve all been there! Stuffed vehicles, blocked rearview mirrors, and the constant fear of something shifting and hitting you in the back of the head. That’s when the thought of a cargo rack pops into your head, doesn’t it? Suddenly, the promise of extra space and a more comfortable journey seems incredibly appealing. But then you start thinking about the cost… That’s where we come in to help.
If you are looking to avoid breaking the bank, we’ve done the research and curated a list of the best cargo racks under $200 to make your life easier. This comprehensive guide will walk you through our top picks, highlighting their key features, pros, and cons, ensuring you find the perfect rack to suit your needs without emptying your wallet. Let’s dive in and find the ideal cargo solution for your next adventure!
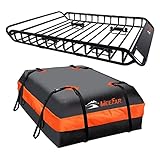
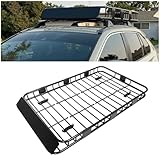
We’ll review the best cargo racks under $200 shortly, but first, check out some relevant products on Amazon:


Finding Your Perfect Ride: Best Cargo Racks Under $200
Ever feel like your trusty bicycle just isn’t quite cutting it when it comes to hauling groceries, picnic gear, or even just your everyday work essentials? You’re not alone! Many cyclists find themselves wishing for a little extra carrying capacity. Thankfully, you don’t need to break the bank to upgrade your ride. Investing in a good cargo rack can transform your bicycle from a recreational toy into a versatile workhorse. The beauty of it all? You can find amazing options without emptying your wallet.
Now, navigating the world of bike racks can feel a bit overwhelming. From pannier compatibility to weight limits, there’s a lot to consider. The good news is that there are plenty of fantastic racks out there that offer excellent value. According to a recent survey by Bicycle Commuters of America, 70% of daily bike commuters rely on cargo racks to transport their belongings. Finding the best cargo racks under $200 isn’t about settling for less; it’s about being smart and choosing a product that perfectly meets your needs and budget.
We’re here to guide you through the process. Think of this article as your friendly neighborhood bike shop guru, offering personalized advice on finding the perfect rack for your specific bike and lifestyle. We’ll be exploring various types of racks, highlighting key features to look for, and sharing our top picks that offer the best bang for your buck. After all, a happy cyclist is one who can effortlessly carry everything they need!
So, buckle up (or rather, clip in!) as we dive into the world of affordable cargo racks. Get ready to discover how you can maximize your bike’s potential and enjoy a more practical, convenient, and enjoyable riding experience, all while staying comfortably under that $200 mark.
The Best Cargo Racks Under $200
Yakima MegaWarrior Cargo Basket
Looking for a rooftop cargo basket that’s both rugged and affordable? The Yakima MegaWarrior definitely throws its hat in the ring. This thing is a beast! It boasts a durable steel construction, ready to take on whatever gear you throw at it – camping equipment, luggage, even the occasional oversized impulse buy. Installation is fairly straightforward, attaching easily to most factory or aftermarket crossbars. The aerodynamic fairing upfront also helps to cut down on wind noise, which is a massive plus on those long road trips.
While the MegaWarrior offers a generous amount of space, keep in mind that its size might be a bit overwhelming for smaller vehicles. Also, while durable, the steel construction does mean it can be a bit heavier than some aluminum alternatives, potentially affecting fuel economy slightly. However, for the price and the sheer carrying capacity, the Yakima MegaWarrior provides a fantastic blend of value and performance that’s hard to beat.
Thule Canyon XT Cargo Basket
The Thule Canyon XT is a sleek and stylish cargo basket that’s perfect for anyone who wants to add extra storage to their vehicle without sacrificing aesthetics. Its low-profile design not only looks great but also minimizes wind resistance and noise. This means a quieter and more fuel-efficient ride, which is always a win. Assembly is simple, and it fits a wide range of roof rack systems, making it a versatile choice for various vehicles.
One slight drawback is that the Canyon XT’s side rails aren’t as tall as some other baskets, which might make securing taller items a bit more challenging. And while it’s certainly durable, the powder-coated steel might be susceptible to rust over time in harsh weather conditions, so keeping it clean is a good idea. Overall though, the Canyon XT hits a sweet spot between style, functionality, and price.
SportRack Vista XL Cargo Box
Alright, so technically it’s a cargo box, not a basket, but the SportRack Vista XL is a serious contender for anyone needing weatherproof rooftop storage under $200. This is your go-to for keeping gear dry and protected from the elements. Think ski trips, camping in unpredictable weather, or simply hauling sensitive items. The aerodynamic design helps minimize wind resistance and noise, so you won’t feel like you’re dragging a parachute behind you.
The downside? Cargo boxes can sometimes be a bit more cumbersome to load and unload compared to open baskets, especially with heavier items. Also, while the Vista XL offers a decent amount of space, it might not be ideal for exceptionally large or oddly shaped items. But, if weather protection is a priority, this cargo box offers an impressive amount of storage space at a very affordable price.
Arksen Universal Roof Rack Cargo Carrier
Need a budget-friendly solution that’s as versatile as it is strong? The Arksen Universal Roof Rack Cargo Carrier might just be your answer. This thing is a workhorse, built with sturdy steel and designed to fit most vehicles with crossbars. Its open basket design makes it easy to load and unload items of varying shapes and sizes. Plus, the included wind fairing helps to reduce noise and drag.
The coating on the Arksen can be somewhat susceptible to rust, especially if exposed to harsh weather conditions regularly, so applying a protective layer might be worthwhile. Also, while the assembly is generally straightforward, some users have reported that the instructions could be clearer. Regardless, if you’re looking for a cost-effective and durable cargo carrier that can handle a variety of loads, the Arksen is definitely worth considering.
MaxxHaul 70115 Steel Roof Rack Cargo Carrier
For a no-frills, heavy-duty cargo carrier that won’t break the bank, look no further than the MaxxHaul 70115. This steel roof rack is all about function over form. Its robust construction can handle some serious weight, making it perfect for hauling camping gear, sporting equipment, or even moving boxes. The raised side rails keep your cargo secure, and the mesh bottom prevents smaller items from slipping through.
While the MaxxHaul is certainly tough, its simple design might not be as aesthetically pleasing as some of the sleeker options on the market. Also, as with most steel carriers, it’s essential to keep an eye out for rust, especially in wet climates. However, if you prioritize durability and affordability over style, the MaxxHaul 70115 is a fantastic option for adding extra cargo space to your vehicle.
Why You Need a Cargo Rack Under $200
Life’s adventures, big or small, often require hauling more than our cars can comfortably handle. Think about that upcoming camping trip where you’re squeezing tents, sleeping bags, and cooking equipment into every nook and cranny of your vehicle, leaving you and your passengers cramped and uncomfortable for hours. Or perhaps you’re a weekend warrior at the local farmers market, needing a reliable way to transport your handcrafted goods without damaging your car’s interior. A cargo rack provides that extra space, freeing up precious legroom and protecting your vehicle from scratches and spills.
Investing in a cargo rack doesn’t have to break the bank. The “best cargo racks under $200” offer a sweet spot of affordability and functionality. Imagine easily loading and unloading your luggage for a road trip, knowing it’s securely strapped down and protected from the elements. Picture yourself effortlessly transporting oversized items like kayaks or bikes, expanding your recreational possibilities without the hassle of borrowing a truck or van. These racks are often surprisingly versatile, adaptable to various vehicle types, and relatively easy to install, even for those who aren’t mechanically inclined.
Beyond the practical benefits, a cargo rack can also boost your peace of mind. No more worrying about overloaded vehicles or the potential for items shifting during transit. With a secure and reliable rack, you can focus on enjoying the journey, knowing your belongings are safe and sound. Plus, freeing up interior space improves visibility and overall driving comfort, making those long trips significantly more enjoyable for everyone.
Ultimately, purchasing a cargo rack under $200 is about investing in convenience, safety, and the ability to embrace new experiences. It’s about unlocking the potential of your vehicle and transforming it into a versatile adventure companion. So, ditch the cramped car and embrace the freedom of extra cargo space – your next adventure awaits!
Understanding Different Types of Cargo Racks
Choosing the right cargo rack under $200 can feel overwhelming with so many options available. Let’s break down the common types to make the decision easier. We’ll focus on options suitable for various needs, from carrying groceries to light camping gear. Each type offers different advantages and disadvantages, particularly when considering budget constraints.
First, there are platform racks. These are like a solid, flat surface, great for bulky items or even strapping down a cooler for a picnic. Imagine you’re hauling a small generator for a tailgate – a platform rack would be ideal. However, they can be heavier and might not be the most aerodynamic.
Then, there are pannier racks, designed to work with pannier bags that clip onto the sides. If you commute to work and need to carry your laptop, lunch, and a change of clothes, panniers are a lifesaver. They keep your gear organized and easily accessible. They are often a better fit for longer and narrower items that platform racks cannot accommodate.
Lastly, there are trunk racks, which are designed specifically to fit over the trunk or rear hatch of your car. These are a common option for those with a hatchback or SUV. Trunk racks are generally very easy to install, and remove, without tools. This type of rack will only work with vehicles that have trunks and rear hatches.
Installation Tips & Tricks for Budget-Friendly Racks
Installing a cargo rack yourself can save money, but it’s essential to do it right to ensure safety and prevent damage to your vehicle. Let’s explore some tips and tricks for a smooth and secure installation, keeping in mind the budget-friendly nature of these racks. Before you start, always read the manufacturer’s instructions – they’re your best guide.
First, carefully inspect all parts before you begin. Make sure you have everything needed, from bolts and washers to any included straps or clamps. Imagine starting the installation and realizing you’re missing a critical piece – frustrating, right? Taking that first step ensures a smoother process overall. This also helps ensure that the pieces needed are there before the return window expires, should something be missing.
Next, focus on proper alignment. Misaligned racks can wobble, cause noise, or even damage your car. A level is your friend here. Think of it like hanging a picture – you want it straight and secure. Taking your time here can save you frustration later on. If there are instructions that include torque specifications for bolts, be sure to follow them.
For racks that require straps, like trunk-mounted ones, ensure they’re tightened evenly and securely. Loose straps can lead to the rack shifting or even coming off while driving. Test the straps by shaking the rack vigorously after installation and if it moves, tighten the straps a little more. A rule of thumb here is to not over-tighten them, as that could result in damaging the vehicle and/or the straps.
Finally, consider using protective pads between the rack and your car’s paint. This prevents scratches and keeps your car looking good. You can buy these pads or even use a soft cloth as a buffer. This is especially helpful for long road trips to help prevent wear and tear as much as possible.
Maximizing Space and Securing Your Load
Once your cargo rack is installed, you need to load it properly to maximize space and ensure your items are secure during transit. Effective loading is key, especially when dealing with a budget-friendly rack, as it might not have all the bells and whistles of more expensive models. Think about it – a poorly loaded rack can be a hazard on the road.
Start by distributing the weight evenly across the rack. Heavy items should be placed in the center to maintain balance and prevent the rack from tilting. Imagine carrying groceries – you wouldn’t put all the heavy cans on one side of the bag, would you? The same principle applies here.
Use straps, bungee cords, or nets to secure your load firmly. Ensure these are in good condition and strong enough to handle the weight. Visualize driving over a bump – you don’t want your items flying off! Consider a cargo net if you have smaller items that could easily shift around. This will keep them together.
For larger items, use ratchet straps for extra security. These provide a tighter, more reliable hold than bungee cords. Think about carrying a small kayak or canoe – ratchet straps would be a must to keep it from shifting during your journey. This also is an added security measure to prevent theft or items falling from the rack.
Remember to check your load periodically, especially on longer trips. Straps can loosen over time, so it’s a good habit to make sure everything is still secure. Pull over at a rest stop, give everything a tug, and readjust if necessary. Also be sure to check any weather forecast before you leave. Rain and wind can both impact how well items are held in place on cargo racks.
Maintenance and Care for Long-Lasting Use
Even budget-friendly cargo racks can last for years with proper maintenance and care. Regular upkeep not only extends the rack’s lifespan but also ensures it performs safely and reliably. Let’s discuss some simple yet effective maintenance routines. After all, a little effort goes a long way.
First, regularly clean your cargo rack to remove dirt, grime, and road salt. These can corrode the metal and weaken the structure over time. Imagine neglecting to wash your car – the same thing happens to your cargo rack. Use a mild soap and water solution and a soft brush for a thorough cleaning.
Inspect the rack for any signs of rust or damage. Address these issues promptly to prevent them from worsening. Small rust spots can be sanded down and repainted. Think of it like a small chip in your windshield – if left unattended, it can spread and become a bigger problem.
For racks with moving parts, such as folding mechanisms or adjustable straps, lubricate them regularly. This keeps them functioning smoothly and prevents them from seizing up. A simple spray of lubricant can make a big difference. This will also help prevent squeaks and other noises that can occur over time with movement and friction.
Finally, store your cargo rack properly when not in use. Keep it in a dry place, away from direct sunlight, to prevent fading and deterioration. Hanging it in your garage or storing it in a shed is a good idea. This is very important, especially for trunk racks that may have straps and other flexible elements that can degrade quickly in direct sunlight.
Best Cargo Racks Under $200: Your Complete Buying Guide
Hey there, fellow adventurer! Planning your next road trip, camping excursion, or just need a way to haul extra gear around town? A cargo rack is a fantastic solution, but let’s face it, nobody wants to break the bank. The good news is you don’t have to! You can find excellent, reliable cargo racks without spending a fortune. This guide is all about helping you navigate the world of *best cargo racks under $200*. We’ll explore the crucial factors to consider before you click “buy,” ensuring you get the perfect rack to suit your needs and budget. So, buckle up and let’s get started!
1. Vehicle Compatibility: Does it Even Fit?
First and foremost, and I cannot stress this enough, make sure the cargo rack you’re eyeing is actually compatible with your vehicle! It sounds obvious, right? But trust me, overlooking this simple step can lead to a whole lot of frustration. Check the manufacturer’s specifications for both the rack and your vehicle. Pay close attention to roof type (bare roof, raised rails, flush rails, etc.) and any existing mounting points. Some racks require specific crossbars, while others come with universal mounting systems.
Imagine excitedly unboxing your new cargo rack, only to realize it’s designed for a completely different type of vehicle! Not only is that a waste of time and money, but the return process can be a real hassle. Double, triple, even quadruple-check compatibility before making a purchase. Look for clear product descriptions that explicitly list compatible vehicle makes and models. If you’re unsure, don’t hesitate to contact the seller or manufacturer for clarification. Better safe than sorry!
2. Weight Capacity: How Much Can It Handle?
Okay, so the rack fits your car – awesome! But now, let’s talk about weight. Every cargo rack has a maximum weight capacity, and exceeding it is a recipe for disaster. Not only could you damage the rack itself, but you could also compromise the structural integrity of your vehicle’s roof. This is especially important when considering the *best cargo racks under $200*.
Think about what you plan to carry. Are you hauling camping gear, luggage, sports equipment, or something else entirely? Consider the weight of each item and add it all up. Then, choose a cargo rack with a weight capacity that exceeds your estimated load by a reasonable margin. A little extra wiggle room is always a good idea. Also, remember to factor in the weight of the rack itself.
3. Material and Durability: Will it Last?
Let’s be real, even if you’re aiming for *best cargo racks under $200*, you still want something that’s going to last. The material of the rack plays a huge role in its overall durability and resistance to the elements. Common materials include steel, aluminum, and plastic. Each has its pros and cons.
Steel is strong and affordable, but it’s also susceptible to rust if not properly treated. Aluminum is lightweight and corrosion-resistant, but it can be more expensive. Plastic is generally the least durable option, but it can be a good choice for lighter loads and occasional use. Look for racks with powder-coated finishes or other protective coatings to help prevent rust and corrosion. Read reviews and pay attention to what other users say about the rack’s long-term durability.
4. Size and Dimensions: Is it Big Enough (or Too Big)?
The size of the cargo rack is another critical factor to consider. You want a rack that’s large enough to accommodate your gear, but not so large that it creates excessive wind resistance or obstructs your view.
Think about the types of items you’ll be carrying most frequently. Will you be hauling long items like skis or kayaks? Do you need a wide rack for bulky luggage? Measure your gear and compare it to the dimensions of the cargo rack. Also, consider the overall height of the rack. A tall rack can increase the overall height of your vehicle, which could be a problem when entering parking garages or driving under low bridges.
5. Ease of Installation: How Much Assembly is Involved?
Nobody wants to spend hours wrestling with complicated instructions and trying to figure out how to install a cargo rack. Look for racks that are relatively easy to install and come with clear, concise instructions. Some racks require professional installation, while others can be installed at home with basic tools.
Read reviews and pay attention to what other users say about the installation process. Are there any common problems or challenges? Does the rack come with all the necessary hardware? If you’re not comfortable with DIY projects, consider choosing a rack that can be easily installed by a professional. Even within the *best cargo racks under $200* price range, you can find options that are user-friendly to install.
6. Security Features: Protecting Your Precious Cargo
Okay, you’ve found a rack that fits, can handle the weight, and is easy to install. Now, let’s talk security! If you’re planning to leave your cargo unattended for any length of time, you’ll want a rack with decent security features.
Look for racks with locking mechanisms or tie-down points that can be used to secure your gear. Some racks come with built-in locks, while others require you to purchase separate locks. Also, consider the overall design of the rack. Is it easy for someone to tamper with or remove your cargo? A well-designed rack will make it difficult for thieves to steal your belongings. Think about investing in additional security measures, such as cargo nets or straps, to further protect your gear.
7. Aerodynamics and Noise: Minimizing Wind Resistance
One often-overlooked factor when shopping for *best cargo racks under $200* is aerodynamics. A poorly designed cargo rack can create significant wind resistance, which can negatively impact your fuel economy and create unwanted noise.
Look for racks with streamlined designs and wind deflectors that help to reduce drag. Read reviews and pay attention to what other users say about noise levels. Some racks are notoriously noisy, while others are relatively quiet. Consider the shape of the rack and how it will interact with the airflow around your vehicle. A more aerodynamic rack will not only save you money on gas but also provide a more comfortable and enjoyable driving experience.
FAQs
What kind of bike can I use with these cargo racks?
That’s a great question! Most of the cargo racks we’ve reviewed are designed to be pretty universal and can fit a wide range of bike types, like hybrids, road bikes, mountain bikes (sometimes with a bit of tweaking), and even some e-bikes. The key thing to look for is whether your bike has mounting points, also known as eyelets, near the rear dropouts and sometimes on the seat stays. These are the little threaded holes where the rack attaches.
If your bike doesn’t have these eyelets, don’t worry! There are some racks specifically designed to work without them, often using clamps or straps to attach to the frame. Just be sure to double-check the rack’s compatibility before you buy to avoid any headaches later on. Also, consider the weight capacity of both the rack and your bike frame itself, especially if you plan on hauling heavier loads.
How much weight can these cargo racks typically hold?
That’s definitely an important consideration, especially if you’re planning on carrying groceries, textbooks, or other heavy items. Generally speaking, cargo racks in the under $200 price range tend to have a weight capacity of around 50 to 60 pounds. Some might even handle a bit more, but it’s always best to err on the side of caution and stick to the manufacturer’s recommendations.
Overloading a rack can not only damage the rack itself but can also make your bike unstable and potentially dangerous to ride. So, before you load up, double-check the weight limit listed in the product description or owner’s manual. Also, remember to distribute the weight evenly across the rack for better balance and control.
Are these racks easy to install, or do I need to be a bike mechanic?
You don’t need to be a bike mechanic, promise! Most cargo racks come with pretty straightforward instructions and all the necessary hardware for installation. If you’re comfortable using basic tools like wrenches and screwdrivers, you should be able to handle the installation yourself.
However, if you’re not particularly handy or if you’re unsure about any step, it’s always a good idea to take your bike and the rack to your local bike shop. They can usually install it for you quickly and properly, ensuring everything is safe and secure. Plus, it’s a great way to support your local bike shop!
What if the rack doesn’t quite fit my bike? Are there any adjustments I can make?
That’s a valid concern, as not all bikes are created equal! Fortunately, many cargo racks offer some degree of adjustability. You might be able to adjust the height of the rack stays or the width of the mounting brackets to get a more customized fit.
If you’re having trouble getting the rack to fit perfectly, take a closer look at the instructions and see if there are any specific adjustment options available. Sometimes, a small tweak is all it takes to get a secure and stable fit. If you’re still struggling, don’t hesitate to contact the rack manufacturer or your local bike shop for assistance. They might have some helpful tips or tricks to get everything aligned correctly.
What kind of panniers or bags work best with these racks?
Good question! Most of the racks we recommend are designed to be compatible with a wide variety of panniers and bags. Look for panniers with hooks or clips that are adjustable, as this will give you more flexibility in terms of fit.
When choosing panniers, consider the size and capacity you need. If you’re just carrying a few small items, a smaller set of panniers will be sufficient. But if you’re planning on hauling groceries or other bulky items, you’ll want to opt for larger panniers with more storage space. Also, consider the weather conditions you’ll be riding in and choose panniers that are waterproof or water-resistant to protect your belongings.
How durable are these cargo racks, especially for daily use?
Durability is key, especially if you plan on using your cargo rack regularly! The racks we’ve featured are made from materials like aluminum or steel, which are known for their strength and resistance to wear and tear. How long your rack lasts will depend on how frequently you use it, the kind of loads you carry, and the conditions you ride in.
To maximize the lifespan of your rack, it’s a good idea to inspect it regularly for any signs of damage, such as cracks, bends, or loose hardware. Tighten any loose bolts or screws, and replace any damaged parts promptly. Storing your bike indoors when not in use can also help protect the rack from the elements and prevent corrosion.
Will adding a cargo rack significantly affect my bike’s handling?
That’s a smart question, as bike handling is super important! Adding a cargo rack and carrying loads will definitely change how your bike feels and handles, especially at first. The added weight will make it a bit harder to accelerate and climb hills, and you’ll need to be more mindful of your balance, especially when cornering or riding in windy conditions.
However, with a little practice, you’ll quickly get used to the new handling characteristics. Start by carrying lighter loads and gradually increase the weight as you become more comfortable. Distribute the weight evenly on both sides of the rack to maintain balance, and be prepared to brake a bit earlier than usual. You might even find that the added weight makes your bike feel more stable and planted on the road.
Final Words
So there you have it! You’re now armed with the knowledge to find the best cargo racks under $200 that perfectly fits your needs and budget. Remember, the “best” one is the one that lets you confidently and safely haul your gear, opening up a world of possibilities for your adventures. Don’t let gear limitations hold you back any longer; the freedom of the open road (or trail) is calling your name.
Now it’s time to take the leap! Stop dreaming and start doing. Review your priorities, revisit the features, and pick the cargo rack that excites you the most. Adventure awaits, and with a reliable and affordable cargo rack, you’re ready to embrace it. Happy travels!