Remember that time you were halfway through that epic cross-state tour, legs pumping, wind in your hair… and your hands screaming in protest? Yeah, me too. It wasn’t the hills that were getting me down, but the relentless pressure on my palms. The cheap, rock-hard grips that came stock on my bike felt like they were actively trying to sabotage my adventure. I learned the hard way that a comfortable grip isn’t a luxury on a long ride – it’s an absolute necessity. That’s why I’m diving deep into the world of handlebar havens to help you find the best touring bike grips.
Choosing the right grips can make or break your next cycling adventure. We’ll explore the different materials, shapes, and features to consider so you can say goodbye to hand numbness and hello to happy miles. Whether you’re a seasoned touring pro or just starting to explore the world on two wheels, this guide will equip you with the knowledge you need to select the perfect hand-holds for your next long ride. Let’s get started!
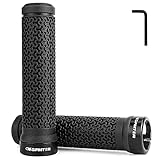
We’ll review the best touring bike grips shortly, but first, check out some relevant products on Amazon:


Your Hands, Your Journey: Finding the Perfect Grip
Let’s be honest, on a long tour, your hands are doing some serious work. We’re not just talking about steering; they’re absorbing bumps, managing shifting, and providing a crucial connection to your bike. Think of them as the unsung heroes of your adventure. After clocking hundreds of miles, even the smallest discomfort can become a major pain. In fact, studies suggest that up to 70% of cyclists experience hand numbness or pain at some point, so finding the right gear for your hands is key to a comfortable ride.
That’s why choosing the best touring bike grips is so important. It’s not just about aesthetics; it’s about comfort, control, and ultimately, enjoying your ride. Have you ever spent a day gripped tightly to the handlebar on a bumpy road? If so, you’ll know that what seems like a small detail can make a big difference between a joyous adventure and a miserable slog.
This isn’t about finding the fanciest or most expensive option; it’s about finding the grips that work best for you and your riding style. Factors like grip material, diameter, shape, and the presence of ergonomic features can all influence your comfort levels. Plus, considering your common riding postures, whether you prefer to be upright or leaned over the bars, will help to inform your choice.
So, whether you’re planning a cross-continental adventure or a weekend getaway, let’s dive in and explore what makes the best touring bike grips. We’ll look at the different types available, what features to look for, and how to choose the right grips for your hands and your tour. Get ready to make those miles more comfortable and enjoyable.
5 Best Touring Bike Grips
Ergon GP1 Grips
The Ergon GP1 grips are a perennial favorite among touring cyclists, and for good reason. They’re ergonomically designed to provide excellent hand support and distribute pressure evenly, reducing numbness and fatigue on long rides. The large surface area of the grips allows for a more natural hand position, which can be a lifesaver when you’re spending hours in the saddle each day. The rubber compound is comfortable and grippy, even in wet conditions, and the overall build quality is top-notch.
Installation is straightforward, and the grips are available in different sizes to accommodate various hand sizes. Some users might find the pronounced wing shape a bit unusual at first, but most report that they quickly get used to it and appreciate the added support. If you’re prone to hand pain or numbness on long rides, the Ergon GP1 grips are definitely worth considering as an investment in your comfort.
Brooks Cambium Rubber Grips
The Brooks Cambium Rubber Grips offer a classic aesthetic combined with modern comfort and durability. These grips feature the same vulcanized natural rubber as Brooks’ renowned Cambium saddles, providing a similar level of shock absorption and comfort. They have a textured surface that enhances grip and control, and the natural rubber material feels great in the hand, even without gloves.
These grips are a great choice for cyclists who appreciate the Brooks heritage and want a touch of elegance on their touring bike. They are also more environmentally friendly than many synthetic alternatives. While they might not offer the same level of ergonomic support as some other grips on this list, the Brooks Cambium Rubber Grips are a stylish and comfortable option for riders who prioritize a classic look and natural materials.
SQlab 711 Tech & Trail 2.0 Grips
The SQlab 711 Tech & Trail 2.0 grips are designed with ergonomics and performance in mind, making them a great choice for touring cyclists who also enjoy tackling more technical terrain. These grips feature a unique shape that supports the natural curvature of the hand and prevents pressure points. They are available in multiple sizes to ensure a perfect fit, which is crucial for maximizing comfort and control.
The rubber compound used in these grips is both grippy and durable, providing excellent control in various weather conditions. Installation is simple, and the grips are compatible with most handlebars. While they may not be as visually striking as some other grips, the SQlab 711 Tech & Trail 2.0 grips prioritize function and comfort above all else, making them an excellent choice for serious touring cyclists.
ESI Grips Chunky
The ESI Grips Chunky are a simple yet highly effective option for touring cyclists who prefer a minimalist approach. These grips are made from silicone, which provides excellent shock absorption and comfort. They are incredibly lightweight, making them a great choice for riders who are concerned about weight. They offer a surprisingly secure grip, even when wet, and are easy to clean.
While they lack the ergonomic shaping of some other grips, the ESI Grips Chunky provide a comfortable and vibration-damping experience for long days in the saddle. They’re also very easy to install and are available in a wide range of colors to match your bike. If you’re looking for a lightweight, comfortable, and low-maintenance grip for your touring bike, the ESI Grips Chunky are definitely worth considering.
Specialized Body Geometry Contour Locking Grips
The Specialized Body Geometry Contour Locking Grips are designed with input from medical professionals to maximize comfort and prevent numbness. These grips feature a contoured shape that supports the natural curvature of the hand and reduces pressure on the ulnar nerve, which is a common cause of hand pain and numbness in cyclists. The dual-density construction provides a balance of comfort and support.
The locking design ensures that the grips stay securely in place, even in wet or challenging conditions. They’re also relatively easy to install. While they may not be the most aesthetically striking grips on the market, the Specialized Body Geometry Contour Locking Grips prioritize comfort and ergonomics, making them an excellent choice for touring cyclists who are prone to hand pain or numbness.
Why You Need Touring Bike Grips for Your Next Adventure
Imagine yourself halfway through a breathtaking, multi-day bike tour. The sun is shining, the scenery is stunning, but your hands are screaming. Blisters are forming, numbness is creeping in, and the joy is slowly being replaced by sheer discomfort. That’s where touring bike grips come in – they’re not just an accessory, they’re an essential investment in your comfort and enjoyment on the road.
Touring bike grips are specifically designed to provide superior comfort and control during long rides. Unlike standard grips, they often incorporate ergonomic shapes, gel padding, or shock-absorbing materials that significantly reduce pressure on your hands and wrists. Think of them as the orthopedic shoes for your handlebars, providing the support and cushioning you need to conquer those long stretches. The best touring bike grips are constructed to distribute weight evenly across your hands, preventing hotspots and reducing the likelihood of developing painful conditions like carpal tunnel syndrome.
Consider the added control and safety benefits. With sweaty or tired hands, gripping the handlebars tightly becomes increasingly challenging. Touring grips often feature textured surfaces or specialized compounds that enhance grip even in wet conditions, providing a more secure hold and improved handling, especially when navigating challenging terrain or unexpected obstacles. This translates to greater confidence and a reduced risk of accidents, allowing you to focus on the journey ahead.
Investing in a good set of touring bike grips is like investing in your overall touring experience. No more dreaded hand pain or aching wrists! The best touring bike grips are designed to transform your ride from a painful endurance test into a comfortable and enjoyable adventure. So, before you embark on your next cycling journey, prioritize your comfort and upgrade to a pair of touring-specific grips – your hands (and your overall experience) will thank you for it!
Types of Touring Bike Grips: Finding Your Perfect Match
When it comes to touring, you’re going to be spending hours holding onto those handlebars. It’s not just about grip, it’s about comfort and endurance. The wrong grip can lead to numbness, pain, and a generally miserable ride. So, let’s delve into the common types. There are your standard round grips, ergonomic grips, lock-on grips, and grips with integrated bar ends. Think about your usual hand position on long rides. Do you tend to rest your palms flat, or do you prefer a more angled approach? This will largely guide your decision.
Round grips, the classic choice, offer a simple, straightforward feel. They’re usually the most affordable and easiest to install. However, they might not provide the best support for longer rides, potentially leading to hand fatigue. Imagine yourself 50 miles into a day of touring, the sun beating down, and your hands are starting to ache. A round grip might exacerbate that.
Ergonomic grips, on the other hand, are designed with your hand’s natural shape in mind. They often feature a wider platform to support the palm, reducing pressure points. Think about it like switching from a regular desk chair to an ergonomic one – the difference in comfort can be significant, especially over extended periods. These are great if you experience wrist pain or numbness.
Lock-on grips provide a secure hold on the handlebars, preventing slippage, especially in wet or muddy conditions. This is crucial for safety and control, especially if you’re tackling challenging terrain. Ever had a grip twist unexpectedly while navigating a tricky descent? It’s not a pleasant experience. Lock-on grips eliminate that risk. Finally, grips with integrated bar ends offer additional hand positions, allowing you to shift your weight and alleviate pressure. Think of them like having different gears for your hands. This can be a lifesaver on those ultra-long stretches of open road.
Material Matters: Comfort and Durability Considerations
The material of your touring bike grips plays a vital role in both comfort and durability. Common materials include rubber, foam, cork, and even leather. Each offers a unique feel and level of resistance to wear and tear. For instance, rubber grips are the most common and affordable option. They offer good grip and decent durability, but can become sticky in hot weather or wear down relatively quickly with heavy use. Think of the basic rubber grips on a rental bike – they get the job done, but they’re not exactly luxurious.
Foam grips are known for their exceptional comfort and vibration absorption. They’re often preferred by riders seeking to minimize hand fatigue on long tours. Imagine riding over rough roads for days on end; foam grips can significantly cushion the impact and keep your hands feeling fresher. However, they tend to be less durable than rubber or cork, and can tear or degrade more easily.
Cork grips provide a unique blend of comfort, durability, and natural feel. They offer excellent grip, even in wet conditions, and mold to the shape of your hand over time. Think of them as your favorite pair of leather shoes – they get better with age. Plus, cork is a sustainable material, which is a bonus for environmentally conscious riders.
Leather grips offer a luxurious feel and exceptional durability. They are often found on high-end touring bikes and provide a classic aesthetic. Imagine the feel of supple leather under your hands as you cruise through the countryside. However, leather grips require regular maintenance to prevent cracking and drying out, and they can be more expensive than other options.
Installation and Maintenance: Keeping Your Grips in Top Shape
Proper installation and regular maintenance are crucial for ensuring your touring bike grips last and perform optimally. A poorly installed grip can slip, twist, or cause discomfort, while neglected grips can become brittle, sticky, or even harbor bacteria. So, let’s look at how to keep them shipshape. Installation varies depending on the grip type. Slip-on grips typically require some lubrication, like rubbing alcohol or soapy water, to slide onto the handlebars. Lock-on grips, on the other hand, usually involve tightening bolts or clamps to secure them in place. Imagine wrestling with a stubborn grip that just won’t budge – proper lubrication can make all the difference.
For slip-on grips, ensure they are fully seated on the handlebars before the lubricant dries. This prevents them from sliding off during a ride, which can be dangerous. Once the lubricant has evaporated, the grip should be firmly in place. Think of it like building a solid foundation for a house; the grip needs to be secure. Lock-on grips require tightening the bolts or clamps to the manufacturer’s specifications. Over-tightening can damage the grip or handlebars, while under-tightening can lead to slippage. Using a torque wrench is always a good idea for precision.
Regular cleaning is essential for maintaining your grips. Use a mild soap and water solution to remove dirt, sweat, and grime. Avoid harsh chemicals or abrasive cleaners, as they can damage the material. Imagine the accumulated sweat and dirt after a long day in the saddle – a quick wash can make a world of difference. For leather grips, use a specialized leather cleaner and conditioner to keep them supple and prevent cracking. Regular conditioning will extend the life of your leather grips and keep them looking their best.
Check your grips periodically for signs of wear and tear, such as cracks, tears, or excessive stickiness. Replace them when they become damaged or worn, as this can compromise your grip and control. Think of it like changing your tires when they’re worn – it’s a matter of safety and performance. By following these simple steps, you can ensure your touring bike grips provide years of comfortable and reliable service.
Grip Size and Hand Physiology: A Comfortable Fit is Key
Choosing the correct grip size is essential for comfort and preventing hand fatigue, numbness, and pain on long tours. Grips that are too small can cause your hands to cramp, while grips that are too large can make it difficult to maintain a secure hold. Think of it like wearing shoes that are too tight or too loose – neither is comfortable for long distances. To determine the right size, measure the circumference of your hand around the palm, just below the knuckles. Most grip manufacturers provide size charts based on hand circumference.
Consider your hand shape and finger length. Some grips are designed with specific hand shapes in mind, offering better support and comfort for certain individuals. For instance, riders with longer fingers might prefer grips with a longer profile, while those with wider palms might benefit from grips with a wider platform. Imagine finding a glove that fits your hand perfectly – the same principle applies to bike grips. Pay attention to the shape of your hand and choose grips that complement it.
Experiment with different grip shapes and textures to find what feels best for you. Some grips have a smooth surface, while others have a textured surface for added grip. Some are round, while others are ergonomic. Think of it like test-driving different cars before making a purchase – try out different grips to see what suits your preferences. Don’t be afraid to try different grips until you find the perfect fit. What works for one rider might not work for another. It’s all about finding what feels most comfortable and supportive for your individual hands and riding style.
Finding Your Perfect Handle: A Guide to the Best Touring Bike Grips
Hey there, fellow cycling enthusiast! Planning a long-distance tour? That’s awesome! Getting ready for adventure is exciting, but let’s not forget one crucial component that can make or break your journey: your handlebar grips. Trust me, nothing ruins a beautiful vista faster than numb hands and aching wrists. Choosing the right grips is about more than just aesthetics; it’s about comfort, control, and overall enjoyment of your ride. This guide is designed to walk you through everything you need to consider to find the best touring bike grips for your adventures.
Let’s dive into the world of grips and get you set up for a comfortable and enjoyable tour!
Grip Material: Feeling Good for the Long Haul
The material of your grips is probably the biggest factor in how your hands will feel after hours on the road. Think of it like your mattress – you want something supportive and comfortable that conforms to your body (or in this case, your hands!). Common materials include rubber, foam, cork, and even leather. Each has its own pros and cons in terms of comfort, durability, and weather resistance.
Rubber grips are durable and offer decent shock absorption, making them a reliable choice. Foam grips are typically lighter and more comfortable, absorbing more vibration, but they might not last as long. Cork grips are a popular choice for touring because they are comfortable, eco-friendly, and mold to your hand over time, but can require a bit more care. Leather grips offer a classic look and can be very comfortable once broken in, but they are generally more expensive and require regular maintenance. Finding the right material is key to finding the best touring bike grips for your individual needs.
Grip Shape and Ergonomics: Hand Happiness is the Goal
Beyond the material, the shape of your grips plays a huge role in preventing hand fatigue and numbness. Ergonomic grips are designed to support the natural shape of your hand and wrist, reducing pressure points and promoting better blood flow. Think about the shape that feels most natural when you hold your handlebars. Do you prefer a round grip, or something with a flatter surface to support your palm?
Many ergonomic grips feature a wing or palm rest that provides additional support. These are especially helpful on long tours where you’ll be spending hours in the same position. Experiment with different shapes to see what feels best for you. Don’t be afraid to try out different grips in a bike shop before committing to a purchase. The shape of your grips, more than anything, will determine if you’ve found the best touring bike grips for long days in the saddle.
Grip Diameter: A Perfect Fit for Your Mitts
Grip diameter might not seem like a big deal, but it can have a significant impact on your comfort and control. If the grips are too thick, you might find it difficult to maintain a comfortable grip, especially if you have smaller hands. If they’re too thin, you might feel like you’re squeezing too hard, which can lead to hand fatigue.
Finding the right diameter is all about personal preference. If possible, try out different grips to get a feel for what works best for you. Generally, people with smaller hands prefer grips with a smaller diameter, while those with larger hands might find thicker grips more comfortable. Remember, finding the best touring bike grips is all about optimizing comfort and control so you can enjoy the ride.
Grip Texture: Staying in Control, Rain or Shine
The texture of your grips affects how well you can hold onto the handlebars, especially in wet or sweaty conditions. A good texture will provide enough grip without being too abrasive or uncomfortable. Think about the types of conditions you’ll be riding in most often. If you’re planning on touring in wet climates, you’ll want grips with a texture that provides good grip even when wet.
Some grips have a smooth surface, while others have a textured pattern. Some textures are designed to channel water away from your hands, while others are designed to provide extra grip. Consider your riding style and the types of conditions you’ll be facing when choosing a grip texture. Finding the best touring bike grips means thinking about all the possible riding conditions you may encounter.
Grip Length: Coverage Where You Need It
Grip length is often overlooked, but it can affect your hand positioning and comfort. Standard grips are designed to fit most handlebars, but if you have wider handlebars or prefer to use bar ends, you might need longer grips. Think about how you typically position your hands on the handlebars. Do you use the entire length of the grip, or do you tend to hold onto the ends?
If you use bar ends, you’ll want to make sure your grips are long enough to provide adequate coverage. Some grips are designed to be used with bar ends, while others are not. Consider your handlebar setup and riding style when choosing the length of your grips. You want your hands to have the best possible positioning for the best touring bike grips.
Installation and Compatibility: Smooth Sailing from the Start
Before you buy a new set of grips, make sure they’re compatible with your handlebars and shifters. Most grips are designed to fit standard handlebars, but some may require specific installation tools or techniques. Think about your own mechanical skills and whether you feel comfortable installing the grips yourself.
Some grips are slip-on, while others require adhesive or locking mechanisms. Slip-on grips are typically easier to install, but they might not be as secure as grips that use adhesive or locking mechanisms. Consider the installation process when choosing your grips, especially if you plan to do it yourself. You don’t want to be stuck on the side of the road trying to install incompatible grips! Compatibility is important when searching for the best touring bike grips.
Price and Durability: Value for Your Investment
Finally, consider your budget and the expected lifespan of the grips. While it’s tempting to go for the cheapest option, keep in mind that quality grips can last for years and provide a much more comfortable riding experience. Think about how often you plan to use the grips and the types of conditions you’ll be riding in.
More expensive grips are often made from higher-quality materials and are more durable, but they might not always be the best choice for everyone. Consider the value you’re getting for your money and choose grips that are both comfortable and durable. Investing in the best touring bike grips may feel like a big expense now, but it’ll pay off in comfort and reduced hand fatigue on your long tours.
Frequently Asked Questions
What makes a good grip for touring?
Choosing the right grips for touring is more important than you might think! Think about all those hours you’ll be spending on the road, gripping those handlebars. You really want something comfortable and supportive. A good touring grip should prioritize vibration dampening to reduce fatigue in your hands and wrists, especially on long stretches of rough roads. Look for grips made of gel or foam, as these materials are known for their shock-absorbing qualities.
Ergonomics are also key. Grips with a wider platform or a contoured shape can distribute pressure more evenly across your palm, preventing numbness and pain. Bar ends or integrated extensions offer additional hand positions, which is a huge plus on long rides, allowing you to change your grip and avoid strain. And don’t forget about durability! Touring grips need to withstand the elements and the wear and tear of daily use.
How do I know what size grips I need?
Don’t worry, figuring out the right grip size isn’t rocket science! Most handlebars come in standard diameters (22.2mm is the most common), so you won’t usually have to measure. However, it’s always a good idea to double-check your bike’s specs or the existing grip size if you’re unsure.
The bigger consideration is grip length. Measure the available space on your handlebars, taking into account any shifters, brake levers, or other accessories already installed. You want a grip that fits snugly without being too long or short, and that also has enough room for your hands. Manufacturers usually list the grip length in the product description, so just match that to the available space on your handlebars.
Are ergonomic grips really worth it?
Honestly, for touring, ergonomic grips can be a game-changer. If you’re planning on spending hours in the saddle day after day, anything that can reduce fatigue and discomfort is well worth the investment. Ergonomic grips are designed to support the natural shape of your hand, which distributes pressure more evenly and prevents numbness, tingling, and pain in your wrists and hands.
Think of it like investing in a good pair of shoes for hiking – your hands are doing a lot of work holding onto the handlebars, and ergonomic grips can provide that extra bit of support and comfort. While they might cost a bit more than standard grips, the improvement in comfort and reduction in fatigue can make a huge difference on long tours.
How do I install new grips?
Installing grips can seem intimidating, but it’s usually a pretty simple process. Start by removing your old grips. You can usually slide them off by twisting and pulling, but if they’re stuck, try using a bit of compressed air or carefully slicing them off with a utility knife (be careful not to damage your handlebars!). Clean the handlebars thoroughly to remove any residue.
Next, lubricate the inside of the new grips with isopropyl alcohol or hairspray. This will allow them to slide on more easily. Slide the grips onto the handlebars, positioning them correctly. Once they’re in place, allow the alcohol or hairspray to dry, which will help the grips adhere to the handlebars. Some grips might have a locking mechanism that you’ll need to tighten with an Allen wrench.
How do I clean and maintain my grips?
Keeping your grips clean is pretty straightforward and will help them last longer. Regular wiping with a damp cloth is usually all you need to remove dirt and grime. For tougher stains, you can use a mild soap and water solution. Just make sure to rinse thoroughly and let the grips dry completely before riding.
Avoid using harsh chemicals or solvents, as these can damage the grip material. For grips made of cork or leather, you might want to use a specialized cleaner designed for those materials. Periodically check your grips for wear and tear, such as cracks or tears. Replacing them when they start to deteriorate will help ensure a comfortable and safe ride.
What about grip tape vs. traditional grips?
Grip tape is definitely a popular choice for road bikes and drop handlebars. It offers a lightweight and customizable feel, and can be easily replaced when it wears out. However, for touring bikes with flat bars, traditional grips tend to be more comfortable for long distances.
Grips often provide better vibration damping and ergonomic support than grip tape, which is especially important on extended rides. Plus, grips are generally more durable and offer better grip in wet conditions. While grip tape can be layered for extra cushioning, it doesn’t usually offer the same level of comfort as a good set of touring grips.
Can I use bar ends with any grips?
That’s a great question! Not all grips are designed to be used with bar ends, so you’ll need to pay attention to the product description when you’re shopping. Some grips have a closed end, while others have a removable end cap that allows you to install bar ends.
If you want to use bar ends, make sure you choose grips that are compatible. Bar ends provide an alternative hand position, which can be a huge benefit on long tours, helping to reduce fatigue and prevent numbness. Plus, they can also offer a bit of extra leverage when climbing hills. If you’re not sure whether a particular grip is compatible, check the manufacturer’s website or ask the seller before you buy.
Final Thoughts
So, there you have it! You’re now equipped with the knowledge to choose the best touring bike grips for your next adventure. Remember, the perfect grip is a personal thing. Consider your riding style, hand size, and typical terrain. Don’t be afraid to experiment a little to find that sweet spot of comfort and control. A happy hand is a happy rider, and that makes all the difference on those long hauls!
Now, get out there and put these tips to the test! The world is waiting to be explored on two wheels, and with the right grips, your journey will be even more enjoyable. Confidently choose the touring bike grips that speak to you, pack your bags, and start pedaling towards your next horizon. Adventure awaits!