Remember that time you were carving fresh tracks in that pristine backcountry powder, the sun glinting off the untouched snow? The exhilaration was unmatched, but a tiny voice in the back of your head whispered about safety. We’ve all been there, balancing the thrill of adventure with the knowledge that preparedness is key. One of the most crucial pieces of gear in avalanche terrain is, without a doubt, an avalanche beacon. And finding the best avalanche beacons for your needs can feel overwhelming.
That’s why we’ve created this comprehensive guide. We understand the importance of choosing a reliable and effective beacon, because it could literally be a lifesaver. We’ve sifted through the noise, researched the top models, and compiled our findings to help you make an informed decision. Whether you’re a seasoned backcountry enthusiast or just starting to explore the winter wilderness, this review and buying guide will equip you with the knowledge you need to stay safe and enjoy your adventures.
We’ll review the best avalanche beacons shortly, but first, check out some relevant products on Amazon:


So, You’re Heading into Avalanche Terrain? Let’s Talk Beacons
Alright, let’s be real. Heading into the backcountry is exhilarating, but it demands respect for the mountains and a commitment to safety. One of the most crucial pieces of gear you’ll pack is an avalanche transceiver, often called an avalanche beacon. It’s not just a piece of equipment; it’s potentially the difference between life and death for you or your companions. Think of it as your lifeline in a worst-case scenario. It’s estimated that survival rates drop dramatically after the first 15 minutes following burial in an avalanche. Having the right beacon and knowing how to use it properly is paramount.
The primary function of an avalanche beacon is simple: to transmit a signal if you’re buried and to receive signals from others who are buried. This allows you and your team to quickly locate anyone caught in an avalanche. These devices are constantly evolving, offering improvements in range, ease of use, and features. You’ll want to consider factors like search strip width, battery life, and intuitive user interfaces when making your choice. Some modern beacons even incorporate features like group check, marking functions, and self-testing capabilities.
But owning a beacon is only half the battle. Regular practice with your beacon is absolutely essential. Familiarize yourself with its functions, practice different search techniques, and participate in avalanche safety courses. The more comfortable you are with your beacon, the faster and more effectively you’ll be able to respond in an emergency. Consider that statistics show that even with a beacon, effective rescue depends heavily on the skill and speed of the rescuers.
Ultimately, choosing the best avalanche beacons comes down to finding the right fit for your experience level, the terrain you’ll be exploring, and your budget. In the following sections, we’ll dive into some of the top-rated beacons on the market, explore their key features, and provide guidance to help you make an informed decision. This gear, coupled with education and sound decision-making, is the foundation of responsible backcountry travel.
Best Avalanche Beacons – Reviews
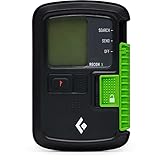
BCA Tracker4
The BCA Tracker4 emerges as a top pick for its remarkable ease of use, especially for those new to backcountry travel or seeking a reliable backup. Its real-time display is intuitive, providing clear distance and direction indicators without overwhelming the user with unnecessary features. The signal suppression and Big Picture mode are invaluable tools in multiple burial scenarios, helping rescuers quickly isolate and prioritize victims. While it may lack some of the advanced features found in higher-end models, its simplicity is its strength, making it an incredibly efficient and effective beacon in a high-stress situation.
This beacon prioritizes user-friendliness above all else. The robust housing and simple interface make it a dependable companion in harsh environments. It’s also fast, boasting impressive processing speeds that quickly lock onto a signal. For those who value simplicity, reliability, and a straightforward user experience, the BCA Tracker4 is a stellar choice. It inspires confidence and lets you focus on the task at hand: saving lives.
Mammut Barryvox S
The Mammut Barryvox S is a powerhouse of features and performance, appealing to experienced backcountry users and professionals. Its impressive range, combined with its intuitive search guidance, makes it a top performer in locating buried victims quickly and efficiently. The Smart Search function adapts to the rescuer’s movements, optimizing the search process and minimizing wasted time. Furthermore, the device’s ability to transmit vital signs information (with compatible devices) adds another layer of sophistication to rescue efforts.
While the wealth of features might seem overwhelming to beginners, the Barryvox S is designed with usability in mind. The large display is clear and easy to read, even in bright sunlight, and the device’s construction feels incredibly durable. It’s a serious tool for serious backcountry enthusiasts who demand the best in performance and reliability. The ability to fine-tune settings and customize the search process makes it a beacon that can adapt to various rescue scenarios.
Pieps DSP Sport
The Pieps DSP Sport strikes an excellent balance between performance and affordability, making it a popular choice for a wide range of backcountry users. Its impressive range and signal processing capabilities ensure quick and accurate location of buried victims. The intuitive interface, combined with the self-check function, provides peace of mind and ensures that the beacon is functioning optimally before venturing into avalanche terrain. The single-button marking function simplifies the process of managing multiple burials.
While it may not boast all the bells and whistles of the higher-end models, the DSP Sport delivers where it counts: in speed and accuracy. The rugged construction and comfortable carrying harness make it a reliable companion on any backcountry adventure. It’s a great option for those seeking a high-performing beacon without breaking the bank. It offers a strong set of features that instill confidence in its capabilities.
Ortovox Zoom+
The Ortovox Zoom+ excels in its simplicity and user-friendliness, making it a fantastic option for beginners and casual backcountry users. With just two buttons and a clear, intuitive display, it’s incredibly easy to learn and use. The Smart Antenna Technology automatically switches to the best transmitting antenna, ensuring a strong and reliable signal. Its compact size and lightweight design make it comfortable to wear all day long.
Don’t let the simplicity fool you, the Zoom+ is a capable beacon with reliable performance. While it may lack some advanced features, it focuses on the essentials: transmitting and receiving a signal effectively. It provides clear directions and distance readings, guiding rescuers to the buried victim with ease. For those who prioritize ease of use and portability, the Ortovox Zoom+ is a winner.
Arva Evo5
The Arva Evo5 is the smallest and lightest beacon on this list, making it a favorite among ski mountaineers and backcountry enthusiasts who prioritize weight savings. Its compact design doesn’t compromise its performance, offering a respectable range and accurate search capabilities. The simple interface and automatic revert-to-transmit function enhance its ease of use, especially in stressful situations. The multiple burial indicator helps rescuers efficiently manage complex rescue scenarios.
Despite its small size, the Evo5 feels robust and well-built. Its minimalist design focuses on the essentials, eliminating unnecessary features and maximizing efficiency. It is an ideal beacon for those who count every gram and want a reliable tool that won’t weigh them down. For experienced backcountry users who prioritize minimalism and performance, the Arva Evo5 is a compelling choice.
Why You Need an Avalanche Beacon
Imagine this: You’re carving through fresh powder, the sun is shining, and the mountain is calling your name. But lurking beneath that pristine surface is a hidden danger: avalanches. Even experienced backcountry enthusiasts can trigger one, and being buried under snow is a race against time. That’s where an avalanche beacon becomes your lifeline, a vital piece of safety equipment that dramatically increases your chances of survival in the event of an avalanche burial. It’s not just about being prepared; it’s about prioritizing your life and the lives of your companions.
Think of an avalanche beacon as a digital walkie-talkie constantly transmitting a signal while you’re out in avalanche terrain. If someone gets buried, their beacon switches to search mode, guiding rescuers to their location. The “best avalanche beacons” boast advanced features like extended range, clear directional indicators, and rapid processing speeds, allowing for quicker and more accurate searches. This translates to precious minutes shaved off rescue times, significantly improving the odds of a successful recovery.
Without a beacon, rescuers are essentially searching blindly, using probes and shovels in a grid pattern, which is incredibly time-consuming and often futile. Every minute spent buried reduces the chance of survival. Owning a beacon isn’t just about yourself; it’s about being a responsible member of the backcountry community, equipped to help rescue others if necessary. It’s about having the power to act swiftly and effectively in a life-or-death situation, turning a potentially tragic outcome into a story of resilience and survival.
Investing in an avalanche beacon is investing in your safety and peace of mind. Don’t let the thrill of the backcountry overshadow the inherent risks. Equip yourself with the necessary tools, learn how to use them properly, and ensure that every member of your group is equally prepared. The best avalanche beacons are more than just gadgets; they’re your shield against the unpredictable forces of nature, empowering you to explore the mountains with confidence and return home safely.
Understanding Avalanche Beacon Technologies
Okay, so you’re ready to dive into avalanche beacons. But before we get lost in specific models, let’s untangle the core technologies that make these life-saving devices tick. Think of it like understanding the engine of a car before deciding which one to buy. Different beacons use different methods for transmitting and receiving signals, and knowing the basics will help you make a more informed choice.
The main tech we’re talking about here is centered around radio frequency (RF) signals operating at 457 kHz. This is the internationally standardized frequency for avalanche beacons. It’s like having a universal language spoken by all beacons in the world. If you’re ever buried in an avalanche, rescuers using any modern beacon can pick up your signal – that’s the idea.
Beyond the frequency, beacons differ in their processing power and signal analysis capabilities. Some beacons are designed for simplicity, focusing on clear and intuitive directional arrows. Others use sophisticated algorithms to analyze complex signals and pinpoint multiple burial victims. Consider your backcountry experience level – a more advanced beacon might be overkill if you’re mostly sticking to well-traveled areas.
Ultimately, understanding the tech behind avalanche beacons is about making smart decisions. It’s about equipping yourself with a tool that matches your skills, your terrain, and your risk tolerance. It empowers you to go beyond just owning a beacon and to truly understand how it works and how to use it effectively in a real-world rescue scenario.
Essential Avalanche Safety Gear: Beyond the Beacon
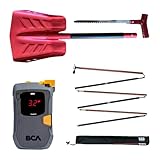
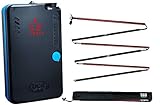
An avalanche beacon is your primary tool for rescue, no doubt. But it’s not the only tool you need in your kit. Think of it like being a surgeon – you wouldn’t go into surgery with just a scalpel, right? The same principle applies in the backcountry. A complete avalanche safety kit consists of three essential items: a beacon, a shovel, and a probe. Each plays a critical role in a successful rescue.
First, let’s talk about shovels. Not just any shovel, but a sturdy, collapsible avalanche shovel. You need to be able to move a lot of snow, and fast. Think about digging through a snowdrift in your driveway – now imagine doing that with someone’s life on the line! A plastic shovel might be fine for your driveway, but it won’t cut it through hard-packed avalanche debris.
Next up: the probe. This is a collapsible pole, usually made of aluminum or carbon fiber, used to pinpoint the exact location of a buried victim after you’ve used your beacon to narrow down the search area. Imagine trying to find a lost key in a giant sandbox – the probe is your finger, allowing you to feel for the key beneath the sand.
Remember, these three items are a team. The beacon helps you find the general area, the probe helps you pinpoint the location, and the shovel helps you dig the victim out. Neglecting any one of these pieces significantly reduces your chances of a successful rescue. Practice using all three together – it’s not enough to just own them, you need to know how to use them quickly and efficiently.
Mastering Companion Rescue Techniques
Okay, you’ve got the gear, you understand the technology. Now comes the most crucial part: knowing how to use it all. Owning an avalanche beacon is like owning a fire extinguisher – it’s useless if you don’t know how to operate it in an emergency. Companion rescue is the art and science of rescuing a buried victim using your avalanche safety gear and skills.
The first step in any rescue situation is to ensure your own safety. Check the slope for continued avalanche danger before rushing in. Remember, one avalanche can trigger another! Assess the scene, mentally note the last seen point of the victim, and then switch your beacon into search mode.
Once you’ve located the buried victim using your beacon and probe, it’s time to start digging. Proper shoveling technique is key. Don’t just dig straight down – create a V-shaped trench downhill from the probe strike to allow for efficient snow removal and to prevent the victim from being buried deeper by collapsing snow.
Practice makes perfect. Take an avalanche safety course, participate in mock rescue drills with your backcountry partners, and practice using your gear in realistic scenarios. The more comfortable you are with the rescue process, the faster and more effectively you’ll be able to respond in a real avalanche emergency.
Maintaining and Testing Your Avalanche Beacon
Think of your avalanche beacon like your car: it needs regular maintenance to perform reliably when you need it most. A broken-down car on the side of the road is an inconvenience, but a malfunctioning beacon in an avalanche emergency could be fatal. Regular maintenance and testing are essential for ensuring your beacon is always ready to go.
Start with the basics: check your beacon’s batteries regularly. Replace them at least once a year, even if they’re not fully depleted. Always use the recommended battery type, and never mix old and new batteries. Leaking batteries can damage the beacon’s internal components, rendering it useless.
Before each backcountry trip, perform a range test with your partners. This involves having one person transmit while the others search, ensuring that all beacons are working correctly and within their specified range. This is also a great opportunity to practice your search skills and refine your rescue techniques.
Finally, store your beacon properly when not in use. Keep it away from extreme temperatures, moisture, and strong electromagnetic fields. Consider purchasing a protective case to prevent accidental damage during storage or transport. By taking these simple steps, you can ensure that your avalanche beacon is always in top working condition and ready to save a life.
Your Guide to Finding the Best Avalanche Beacons
Hey there, backcountry adventurer! Planning to explore those majestic, snow-covered peaks? Awesome! But before you strap on your skis or board, let’s talk about something crucial: staying safe in avalanche terrain. An avalanche beacon, also known as a transceiver, is non-negotiable safety gear. It’s your lifeline, your connection to rescue in a worst-case scenario. Choosing the right beacon can feel overwhelming with all the options out there. That’s where this guide comes in. Think of me as your experienced backcountry buddy, here to help you navigate the world of avalanche beacons and find the perfect one for your needs. Let’s dive in!
Range: How Far Can It Reach?
Range is arguably the most critical factor when choosing one of the best avalanche beacons. In an avalanche scenario, time is of the essence. A beacon with a longer range gives you a larger search area from the get-go, increasing your chances of a swift and successful rescue. Think of it like this: the sooner you can pick up a signal, the sooner you can start pinpointing your buried partner’s location. No one wants to be fumbling around with a short-range beacon while precious seconds tick away.
Consider the terrain you typically frequent. Are you mostly in wide-open bowls, or tight, tree-filled glades? Open terrain calls for a longer range beacon, while tighter areas might be manageable with a slightly shorter range. However, it’s always better to err on the side of caution and opt for a beacon with the maximum effective range possible. Remember that advertised ranges can be misleading because they are often measured in ideal conditions. Look for real-world user reviews that talk about effective range in realistic scenarios before making a purchase.
Ease of Use: Can You Use It Under Pressure?
Let’s be real: in an avalanche rescue situation, you’re going to be stressed. Adrenaline will be pumping, and fine motor skills might take a nosedive. That’s why ease of use is absolutely paramount when it comes to the best avalanche beacons. You want a beacon that’s intuitive, simple to operate, and requires minimal fiddling, even when your heart is pounding. Practice with your beacon regularly so that using it becomes second nature.
Look for beacons with clear displays, simple button layouts, and intuitive search modes. Avoid beacons with complicated menus or confusing instructions. Think about how easy it will be to switch between transmit and search modes with gloved hands. Some beacons have a single button for this, while others require multiple steps. Remember, simplicity and intuitive design are your best friends in a rescue situation. Regular practice is the key, but starting with a user-friendly beacon will make that practice more effective.
Marking Function: Multiple Burials? No Problem!
Imagine this: an avalanche strikes and buries two members of your group. Horrifying, right? That’s where the marking function comes into play. This feature allows you to “mark” or “suppress” a signal once you’ve located a buried victim, allowing you to move on and search for additional signals. Without it, you’d be stuck trying to refine your search on the first victim while ignoring the second.
The marking function is an absolute game-changer when dealing with multiple burials. It streamlines the search process, allowing you to prioritize and efficiently locate each individual victim. Not all beacons have this feature, so be sure to look for it if you plan on traveling in areas with higher group densities. Remember, even in smaller groups, multiple burials are possible, so it is wise to look at the best avalanche beacons with this functionality.
Digital vs. Analog: Understanding the Difference
Avalanche beacons come in two main flavors: digital and analog. Digital beacons display distance and direction to the buried victim on a screen, using numerical readouts and arrows. Analog beacons, on the other hand, rely on audible tones and signal strength to guide your search. While analog beacons were once the standard, digital beacons have become increasingly popular due to their ease of use and precision.
Most modern beacons are digital, offering a user-friendly experience and simplifying the search process. The directional arrows are a visual aid which makes the search much more efficient. Analog beacons, however, still have their place. Some experienced users prefer them because they can provide more nuanced information about the signal, potentially allowing for faster searches in certain situations. Consider your comfort level and experience when choosing between digital and analog beacons. Unless you have extensive practice with an analog device, the best avalanche beacons will be digital.
Antenna Count: The More, the Merrier?
The number of antennas on an avalanche beacon plays a crucial role in its accuracy and efficiency. Most modern beacons have three antennas. This is because each antenna is oriented on a different plane. These antennas work together to provide a more precise and reliable signal, regardless of the orientation of the buried beacon. Think of it like this: a single antenna is like trying to pinpoint a location with one eye closed. Three antennas give you a much wider and more accurate perspective.
Older beacons often had only one or two antennas, which could lead to signal distortion and inaccurate readings, especially in complex terrain. While a single-antenna beacon is better than no beacon at all, a three-antenna beacon is far superior. In today’s market, three-antenna beacons are the standard, and are a key factor for any one looking for the best avalanche beacons.
Battery Life: Will It Last When You Need It Most?
Battery life is an often-overlooked but crucial aspect of avalanche beacon selection. Imagine being in a search and rescue scenario and your beacon’s battery dying halfway through the search! That’s a nightmare scenario. You need a beacon with reliable battery life that can withstand the demands of extended use in cold conditions.
Always check the manufacturer’s specifications for battery life in both transmit and search modes. Keep in mind that cold temperatures can significantly reduce battery performance, so factor that into your calculations. It’s always a good idea to start each day with fresh batteries or fully charged rechargeable batteries. Consider carrying spare batteries or an external battery pack as a backup. Regular battery checks and replacement are essential for ensuring your beacon is always ready when you need it most. The best avalanche beacons will have long lasting batteries so that you are protected during a rescue.
Comfort and Fit: Can You Wear It All Day?
This might seem like a minor detail, but comfort and fit are essential for any piece of safety gear you are wearing all day, every day on the mountain. An uncomfortable or poorly fitting beacon can be distracting and annoying, leading to you adjusting it, or potentially even removing it, which defeats the entire purpose of wearing it in the first place. You should be wearing your beacon all day.
Look for a beacon that is lightweight, compact, and has a comfortable harness system. Make sure the harness is adjustable so you can customize the fit to your body size and layering system. Pay attention to the placement of the beacon on your body. It should be positioned securely and out of the way of your other gear. Some people prefer wearing their beacon in a chest harness, while others prefer a hip belt. The best avalanche beacons are comfortable and don’t feel like a hindrance. Choose the option that feels most comfortable and secure for you. After all, you’ll be wearing it all day, so you want it to feel like a natural extension of your body.
FAQs
What exactly *is* an avalanche beacon and why do I need one?
An avalanche beacon, also known as a transceiver, is a small electronic device that sends out a radio signal. If you’re buried in an avalanche, your beacon will transmit a signal that rescuers can use to pinpoint your location. Crucially, it also receives signals. Before heading out, everyone in your group switches their beacons to “transmit” mode. If someone gets buried, everyone else switches to “search” mode to locate the buried person’s signal.
Think of it like this: It’s a bit like playing a high-stakes game of hide-and-seek, but with life-saving consequences. Without a beacon, rescuers would have to rely solely on probing and visual searches, drastically reducing the chances of a successful recovery within the critical window of time after burial. So, if you’re venturing into avalanche terrain, a beacon isn’t optional; it’s essential safety gear.
How do I choose the right avalanche beacon for me?
Choosing the right beacon depends a lot on your experience level, budget, and personal preferences. Factors to consider include the range, ease of use, and features like marking multiple victims. A longer range is beneficial in complex terrain or if you have a larger search party, but it often comes with a higher price tag. Ease of use is paramount – you want a beacon you can operate quickly and efficiently under pressure, without fumbling with complicated menus.
If you’re new to backcountry travel, prioritize a beacon with a clear display and intuitive interface. More experienced users might appreciate advanced features like signal suppression for multi-victim scenarios. Reading reviews (like the one you’re reading now!) and trying out different models at a local gear shop can help you find the perfect fit. And remember, a high-end beacon won’t save you if you don’t know how to use it, so factor in the cost of avalanche safety courses when budgeting.
What’s the difference between a 2-antenna and a 3-antenna avalanche beacon? Is 3 always better?
Simply put, the number of antennas helps with the directionality and accuracy of the signal. A 2-antenna beacon provides a rough indication of direction and distance to the buried victim. A 3-antenna beacon adds a third antenna that helps to refine the search, making it easier to pinpoint the victim’s location once you’re within close range.
While 3-antenna beacons are generally considered superior for their precision, it’s not always a cut-and-dry “better” scenario. A skilled user with a 2-antenna beacon can still perform an effective search, especially in simpler avalanche scenarios. The key is proficiency with your chosen device. However, for most users, especially those newer to backcountry travel, a 3-antenna beacon provides an added layer of ease and accuracy, potentially saving precious seconds during a rescue.
How often should I practice with my avalanche beacon?
The golden rule is: practice, practice, practice! At a minimum, you should practice with your beacon before every backcountry trip. This isn’t just a quick check to see if it’s working; it’s about running through realistic search scenarios. Bury a test beacon in the snow, and have your group practice finding it. Vary the distances and depths of the burials to simulate different avalanche conditions.
Ideally, aim for regular practice sessions throughout the season, not just before a trip. Consider attending a local avalanche safety course or joining a practice session organized by experienced backcountry users. The more comfortable you are with your beacon, the more effectively you’ll be able to use it in a real emergency. Repetition builds muscle memory and reduces the chance of panic in a high-stress situation.
How long do avalanche beacons last, and how do I take care of them?
Avalanche beacons are built to be durable, but they do have a lifespan. Most manufacturers recommend replacing your beacon every 5-10 years, depending on the model and usage. The internal electronics can degrade over time, and new models often come with improved technology and features.
To prolong the life of your beacon, treat it with care. Store it in a cool, dry place away from direct sunlight and extreme temperatures. Always remove the batteries when storing it for extended periods to prevent corrosion. Regularly inspect the beacon for any signs of damage, such as cracks, loose parts, or a malfunctioning display. And of course, keep the firmware updated!
What other essential avalanche safety gear should I have?
While an avalanche beacon is essential, it’s only one piece of the puzzle. You also need a probe and a shovel. The probe is used to pinpoint the exact location of the buried victim after you’ve narrowed down the search area with your beacon. The shovel is then used to excavate the victim quickly and efficiently. A well-designed shovel should be durable and easy to use, even in hard-packed snow.
Beyond these three essentials, consider carrying an avalanche airbag pack, which can significantly increase your chances of staying on the surface of an avalanche. Also, make sure you’ve taken an avalanche safety course to learn how to assess avalanche terrain, interpret weather forecasts, and perform a rescue. Knowledge and training are just as important as the gear itself.
Are there any common mistakes people make when using avalanche beacons?
Yes, unfortunately, there are a few common mistakes that can hinder a successful rescue. One of the biggest is simply not practicing enough! People often buy a beacon and assume they’ll know how to use it in an emergency, but without regular practice, they’re likely to fumble when the pressure is on. Another common mistake is not verifying that everyone in the group has their beacon turned on and in transmit mode before heading out. This is a crucial step that can easily be overlooked in the excitement of the day.
Another issue is getting complacent and not following proper search patterns. A systematic search is essential for covering the search area effectively. Also, some people forget to switch their beacon to search mode immediately after an avalanche. Precious seconds can be lost if you’re fiddling with your pack or trying to assess the situation before prioritizing the search. Review your skills often, and remain focused on the task at hand if an avalanche occurs.
Final Verdict
So, there you have it – a deep dive into the world of avalanche beacons and hopefully, you’re feeling much more confident about choosing the best avalanche beacon for your needs. Remember, this isn’t just about buying a piece of gear; it’s about investing in your safety and the safety of your companions. Take your time, consider your typical backcountry terrain, and think about what features are most important to you. The right beacon, combined with proper training, can make all the difference.
Now, get out there and explore those snowy peaks! With the right knowledge and the best avalanche beacon by your side, you can embrace the backcountry with confidence and peace of mind. Adventure awaits, but always remember to be prepared, stay informed, and prioritize safety above all else. Happy shredding!