The sun’s setting, the air’s buzzing with laughter, and the smell of charcoal and something utterly delicious hangs heavy in the air. Remember those perfect summer nights where the star of the show was a rack of ribs, falling off the bone tender, kissed with smoky goodness? For me, it was always my Uncle Joe, wielding his trusty Weber kettle like a grillmaster wizard. He swore the secret wasn’t just his rub, but the kettle itself. He’d meticulously control the temperature, adjusting vents and adding wood chips with the precision of a surgeon. The result? Ribs that were legendary. That’s the magic we’re chasing, and that’s why we’ve put together this guide to help you achieve your own backyard BBQ glory with the best ribs on Weber kettles.
If you’re like me, you’re tired of dry, tough ribs that disappoint. You’re ready to unlock the secrets to consistently juicy, flavorful ribs that will have your friends and family begging for more. But with so many techniques and gadgets out there, where do you even begin? Fear not! We’ve done the research, tested the theories, and compiled a comprehensive guide covering everything you need to know. From choosing the right Weber kettle setup to mastering low-and-slow cooking, and even recommending our top picks for rubs and accessories, this is your one-stop shop for achieving the very best ribs on Weber kettles. Let’s get grilling!
We’ll review the best ribs on weber kettles shortly, but first, check out some relevant products on Amazon:

The Quest for Rib Nirvana: Why Weber Kettles Are Your Secret Weapon
So, you’re dreaming of ribs. Tender, smoky, fall-off-the-bone ribs. The kind that make your eyes roll back in your head and have you licking your fingers clean. You’re not alone! Americans consume over 1.5 billion pounds of ribs annually, and a good portion of that is probably dreamed about before it’s cooked. The good news is, you don’t need fancy equipment or years of barbecue experience to achieve rib nirvana. Your humble Weber kettle grill might just be the secret weapon you’ve been overlooking, and this article is dedicated to unlocking its potential for crafting the best ribs on Weber kettles.
Forget the complicated smokers and expensive setups. The beauty of the Weber kettle lies in its simplicity and its incredible ability to create consistent, indirect heat. This is absolutely crucial for cooking ribs low and slow, allowing the connective tissue to break down, resulting in that melt-in-your-mouth texture we all crave. Plus, the Weber kettle’s round shape naturally promotes even heat distribution, which is what can give you consistent success with every cook. We are going to take the basic kettle grill and show you how to make amazing ribs.
Think of your Weber kettle as a mini-smoker. By using the snake method or strategically placing your charcoal, you can maintain a steady temperature for hours, creating that signature smoky flavor. We’ll guide you through the essentials: wood selection, temperature control, and the all-important 3-2-1 method (or variations thereof) to help you achieve the perfect balance of smoke, tenderness, and glaze. Don’t be intimidated!
Consider this your friendly guide to unlocking the secrets of the best ribs on Weber kettles. We’ll break down the process into easy-to-follow steps, share our favorite tips and tricks, and even offer some delicious recipes to get you started. Get ready to impress your friends and family with ribs that rival your favorite barbecue joint. Let’s fire up that kettle and get cooking!
Best Ribs On Weber Kettles – Reviews
Weber Rib Rack
This rib rack is a game changer for anyone who loves to barbecue ribs but is limited on space. The design is simple, yet effective, allowing for multiple racks of ribs to be cooked simultaneously in a Weber kettle. This means more delicious ribs for everyone and less time spent tending to the grill. No more fighting over grill space!
The durable construction ensures this rack will last for many grilling seasons to come. Cleanup is a breeze too, which is always a plus. It’s an affordable and essential accessory for any serious rib enthusiast looking to maximize their Weber kettle’s potential. Don’t be surprised when you’re suddenly everyone’s favorite grill master!
BBQ Dragon 3-in-1 Rib Rack
This isn’t just a rib rack; it’s a versatile grilling assistant! The BBQ Dragon 3-in-1 can handle ribs, roasts, and even chickens. Its clever design allows for different configurations, adapting to whatever you’re craving. It really makes the Weber kettle a multi-functional cooking machine, expanding your BBQ horizons.
The sturdy build quality inspires confidence, and the non-stick coating makes cleaning up much easier. It’s a worthwhile investment for anyone who enjoys experimenting with different cuts of meat and cooking methods. It really elevates the grilling game!
Cuisinart Rib Rack
The Cuisinart Rib Rack is a reliable and well-designed option for grilling ribs on a Weber kettle. It’s crafted from durable materials, ensuring it can withstand the heat and weight of multiple racks of ribs. Its slightly angled design helps with even cooking and allows for better airflow, resulting in perfectly cooked ribs every time.
This rib rack is also incredibly easy to use and clean. It’s a practical and affordable addition to any grilling setup, making it easier than ever to cook restaurant-quality ribs at home. It’s a simple, effective tool that delivers delicious results.
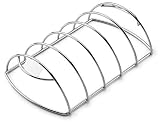
Steven Raichlen Best of Barbecue Rib Rack
If you’re looking to take your rib game to the next level, the Steven Raichlen Best of Barbecue Rib Rack is worth considering. Developed by a renowned BBQ expert, this rack is designed with optimal airflow in mind. This results in even cooking and that sought-after smoky flavor throughout the ribs.
The sturdy construction and generous spacing between the ribs ensure they won’t stick together or become overcrowded. This rack is a great choice for serious grillers who want professional-quality results. It’s a bit of an investment, but the delicious ribs you’ll create are well worth it.
Cave Tools Rib Rack for Grilling
The Cave Tools Rib Rack is designed for both gas and charcoal grills, making it a versatile option for Weber kettle owners. Its unique design allows for consistent cooking. It’s also built to last, ensuring it will be a part of your grilling arsenal for years to come.
The rack helps to maximize space on the grill. This helps you cook multiple racks of ribs without sacrificing quality. It’s a well-made, user-friendly tool that makes grilling ribs a breeze. Plus, the company is known for its helpful customer support.
Why Buy a Rib Rack for Your Weber Kettle?
Ever dreamt of ribs so tender, the meat practically falls off the bone with just a gentle nudge? Or perhaps you’ve wrestled with fitting enough ribs on your Weber kettle, sacrificing perfectly grilled hotdogs and burgers just to squeeze everything in? The truth is, cooking ribs on a Weber kettle can be an art form, but even the most seasoned grill master encounters space constraints. That’s where a rib rack comes in, transforming your kettle from a good grill into a rib-cooking powerhouse.
Imagine this: it’s game day, the aroma of charcoal and wood chips fills the air, and your friends are eagerly anticipating your famous ribs. With a rib rack, you can effortlessly double or even triple the amount of ribs you can cook at once. No more rotating racks, no more stressing about uneven cooking. More ribs mean more happy faces and a more relaxed grilling experience for you. It’s about maximizing your space and your ability to deliver that mouthwatering, smoky flavor to everyone.
Beyond sheer capacity, rib racks promote better airflow around the ribs. This ensures even cooking and that beautiful, consistent bark we all crave. Without a rack, ribs often sit directly on the grill grate, obstructing heat circulation and leading to unevenly cooked sections. A rib rack elevates the ribs, allowing the heat to envelop them from all angles, resulting in a juicier, more flavorful outcome. Think of it as giving your ribs a spa day, surrounded by perfectly balanced heat.
Ultimately, investing in a rib rack for your Weber kettle is an investment in better ribs, more efficient grilling, and happier gatherings. It’s a simple tool that unlocks a whole new level of barbecue potential, allowing you to effortlessly cook larger quantities of perfectly cooked ribs with minimal effort. So, ditch the struggle, embrace the convenience, and get ready to enjoy the best ribs you’ve ever made, right in your own backyard.
Essential Accessories for Perfect Weber Kettle Ribs
So, you’ve got your Weber kettle and you’re ready to tackle some ribs. Awesome! But before you jump in, let’s talk about some key accessories that can make a huge difference in your final product. Think of it like baking – you can technically bake a cake in a casserole dish, but a proper cake pan will give you far better results. Same principle applies here.
First up: a reliable thermometer. I’m not just talking about the one built into the lid (those are often inaccurate). Invest in a good digital thermometer with probes. Knowing the internal temperature of your meat and the ambient temperature inside the kettle is absolutely crucial for achieving that perfectly tender, fall-off-the-bone texture. Imagine inviting friends over, only to serve them ribs that are either tough as leather or completely mushy. Avoid that disaster with a decent thermometer!
Next, consider a rib rack. These handy tools allow you to cook multiple racks of ribs simultaneously without them touching. This is a game-changer if you’re feeding a crowd or just want to maximize your grilling space. Picture this: you’ve got a family reunion and everyone’s craving ribs. Without a rib rack, you’ll be stuck cooking them in batches, which is time-consuming and inefficient.
Finally, don’t forget your fuel. Charcoal briquettes are a classic choice, but lump charcoal can add a nice smoky flavor. Experiment with different wood chips like apple, hickory, or mesquite to find your favorite flavor profile. I once tried pecan wood and it was a revelation – subtly sweet and utterly delicious. Choosing the right fuel can elevate your ribs from good to unforgettable.
Mastering the 3-2-1 Rib Method on Your Weber Kettle
The 3-2-1 method is like the holy grail of ribs, and it’s especially well-suited for the Weber kettle. It breaks down the cooking process into three distinct stages, each contributing to that melt-in-your-mouth texture we all crave. Think of it as a carefully orchestrated dance of smoke, steam, and heat.
The first 3 hours involve smoking the ribs directly on the grill grate. This infuses them with that characteristic smoky flavor. Maintain a consistent temperature of around 225-250°F. I remember one time I got impatient and cranked up the heat. The ribs cooked faster, sure, but they were also noticeably tougher and lacked that deep smoky flavor. Patience is key here!
Next comes the “2” hours of wrapping. Place the ribs in foil with a little liquid – apple juice, beer, or even just water will work. This steams the ribs and tenderizes them further. This is the secret weapon in achieving that fall-off-the-bone tenderness. Imagine trying to pull the meat off the bone with a fork and it effortlessly slides away – that’s the magic of the wrapping stage.
Finally, unwrap the ribs for the last hour and brush them with your favorite BBQ sauce. This allows the sauce to caramelize and create a beautiful, sticky glaze. Be careful not to overcook them at this stage, as they can easily dry out. Think of this as the finishing touch, the final layer of flavor that takes your ribs to the next level.
Troubleshooting Common Weber Kettle Rib Issues
Even with the best intentions and the most meticulous planning, things can sometimes go wrong when cooking ribs on a Weber kettle. The good news is that most problems are easily avoidable or fixable with a little knowledge and foresight. Consider this your troubleshooting guide to rib perfection.
One common issue is ribs that are too dry. This often happens when the temperature is too high or the cooking time is too long. Make sure you’re maintaining a consistent temperature and check the ribs periodically. If they start to look dry, you can add a little more liquid during the wrapping stage or spritz them with apple juice. I once rescued a batch of overly dry ribs by wrapping them in foil with a generous amount of apple cider vinegar – it worked like a charm!
Another problem is ribs that are tough. This usually means they weren’t cooked long enough or the temperature was too low. Extend the cooking time, especially during the wrapping stage, and make sure your temperature is within the recommended range. Remember, low and slow is the name of the game when it comes to ribs. Think of it like slow-cooking a tough cut of beef – time and heat are your allies in breaking down those tough fibers.
Finally, you might encounter ribs that are burnt on the outside but undercooked on the inside. This indicates uneven heat distribution. Make sure your coals are arranged properly for indirect cooking and consider using a water pan to help regulate the temperature. Imagine biting into a rib that looks amazing on the outside but is still raw near the bone – that’s a surefire way to ruin someone’s appetite!
Unique Rib Glazes and Sauces to Try
While a classic BBQ sauce is always a crowd-pleaser, don’t be afraid to experiment with different glazes and sauces to take your Weber kettle ribs to the next level. Think of it as adding your own personal signature to a dish that’s already delicious. The possibilities are truly endless.
For a sweet and tangy glaze, try mixing honey, soy sauce, ginger, and garlic. This combination creates a beautiful caramelization and adds a unique Asian-inspired flavor. I once used this glaze on a rack of St. Louis-style ribs and it was an instant hit. The sweetness of the honey perfectly complemented the saltiness of the soy sauce, creating a flavor explosion that everyone raved about.
If you prefer something with a little kick, try a spicy pineapple glaze. Combine pineapple juice, brown sugar, chili flakes, and lime juice. This glaze adds a tropical twist and a hint of heat. Picture this: you’re hosting a summer barbecue and you serve up ribs with this glaze. Your guests will be transported to a tropical paradise with every bite!
For a more savory option, consider a coffee-based rub and sauce. Ground coffee, paprika, brown sugar, and chili powder create a deep, rich flavor that’s perfect for ribs. Experiment with different types of coffee beans to find your favorite flavor profile. I once used a dark roast espresso and it added a surprisingly complex and delicious flavor to the ribs. It’s a bold choice, but definitely worth trying!
Your Guide to Smokin’ Success: Choosing the Best Ribs On Weber Kettles
Hey there, fellow barbecue enthusiast! So, you’re looking to up your rib game on your Weber kettle, eh? Fantastic choice! There’s nothing quite like tender, smoky ribs cooked low and slow on that iconic grill. But with so many options out there, figuring out what works best can feel a little overwhelming. Don’t worry, I’m here to help you navigate the world of rib-cookin’ accessories and techniques to make sure you’re consistently turning out competition-worthy ribs. Let’s dive in and explore the key factors to consider when aiming for the best ribs on Weber kettles!
1. The Rib Rack: Your Vertical Advantage
Okay, first things first, let’s talk rib racks. A good rib rack is an absolute game-changer when you’re dealing with a Weber kettle. The beauty of a rib rack is simple: it allows you to cook multiple racks of ribs at the same time without them touching and steaming each other. Think of it like a stadium for your ribs, giving each rack its own little seat to bask in the smoky goodness.
Without a rack, you’re pretty much limited to cooking one or two racks of ribs at a time, which can be a real pain if you’re feeding a crowd. Plus, overcrowding the grill means uneven cooking and less smoke penetration. So, invest in a quality rib rack – it’ll save you time, space, and ensure those ribs are cooked to perfection! Look for ones made of sturdy materials that won’t bend or warp under heat.
2. Heat Deflectors: Mastering Indirect Heat
Now, let’s talk about heat deflectors. Achieving the perfect “low and slow” cook that yields the best ribs on Weber kettles depends heavily on indirect heat. Direct heat will char the outside of your ribs before the inside is even close to being done. Heat deflectors, like a good diffuser plate or even just a simple foil pan filled with water, create a barrier between the coals and your ribs.
This indirect heat allows the ribs to cook gently and evenly, rendering the fat and collagen to create that fall-off-the-bone tenderness we all crave. Water pans also add moisture to the cooking environment, preventing the ribs from drying out and promoting better smoke absorption. Experiment with different deflector setups to find what works best for your kettle and your preferred cooking style.
3. Temperature Control: The Key to Tenderness
Temperature control is paramount! We’re aiming for that sweet spot of around 225-250°F (107-121°C) for the entire cooking process. Sounds simple, right? But maintaining that consistent temperature on a Weber kettle can take some practice. The best ribs on Weber kettles are not about blistering heat, they are about low and slow heat.
A good thermometer is your best friend here. Don’t rely on the cheap one built into the lid – invest in a reliable digital thermometer with probes that can monitor both the grill temperature and the internal temperature of the ribs. Learning how to adjust your vents to fine-tune the airflow and control the fire is crucial. Start with small adjustments and be patient – it’s a marathon, not a sprint!
4. Wood Choice: Crafting the Perfect Smoke Profile
The type of wood you use will dramatically impact the flavor of your ribs. Think of wood as the spice rack for your BBQ. Different woods impart different flavor profiles. Some common and popular choices for ribs include hickory (a strong, classic smoky flavor), applewood (a sweet, fruity smoke), and cherry wood (a mild, slightly sweet smoke).
Experimenting with different wood combinations is part of the fun! You can even mix woods to create your signature smoke flavor. Start with a small amount of wood – you don’t want to overpower the ribs with smoke. Remember, more isn’t always better. A subtle, balanced smoky flavor is what we’re after for the best ribs on Weber kettles. Chunks of wood generally produce a longer-lasting and cleaner smoke than wood chips.
5. The 3-2-1 Method: A Reliable Foundation
The 3-2-1 method is a tried-and-true technique for cooking ribs on a Weber kettle (or any smoker, really). It’s not the only way, but it’s a great starting point, especially for beginners. The numbers refer to the hours spent at each stage of the cooking process.
First, you smoke the ribs unwrapped for 3 hours. Then, you wrap them in foil with some liquid (like apple juice, beer, or even just water) for 2 hours to braise and tenderize. Finally, you unwrap them and cook them for the final hour to firm them up and add a glaze or sauce. While not the be-all and end-all, the 3-2-1 method is a solid foundation to help you achieve the best ribs on Weber kettles. Feel free to adjust the times based on the thickness of your ribs and your desired level of tenderness.
6. Fuel Management: Consistency is King
Maintaining a consistent temperature throughout the entire cook requires careful fuel management. There are several approaches to fuel management for the best ribs on Weber kettles: the snake method and the minion method. The snake method involves arranging the charcoal briquettes in a long, winding “snake” around the perimeter of the grill, lighting only one end. As the fire slowly creeps along the snake, it provides a consistent, low heat.
The minion method is similar, but instead of a snake, you fill the charcoal basket with unlit briquettes and then add a small amount of lit briquettes to the top. The lit briquettes slowly ignite the unlit ones, creating a slow and steady burn. Experiment with both methods to see which one works best for you and your Weber kettle. Using high-quality briquettes that burn evenly and consistently is crucial.
7. The Probe Test: Knowing When They’re Done
Forget about time – the best way to tell if your ribs are done is by feel. The “probe test” involves inserting a probe (like a thermometer probe or even a simple toothpick) into the meat between the bones. When the probe slides in and out with little to no resistance, the ribs are done.
This is a much more reliable indicator of doneness than simply relying on cooking time. Every rack of ribs is different, so the cooking time will vary. Don’t be afraid to probe those ribs regularly during the final hour of cooking. The goal is to achieve that “fall-off-the-bone” tenderness, but not so tender that they completely fall apart when you pick them up. Master the probe test, and you’ll consistently achieve the best ribs on Weber kettles.
Frequently Asked Questions
What type of Weber Kettle is best for smoking ribs?
Honestly, any Weber Kettle will do a fantastic job smoking ribs! The beauty of the Weber Kettle is its versatility. Whether you have the classic 22-inch model, or a Performer Deluxe with all the bells and whistles, the principles remain the same: indirect heat and maintaining a consistent temperature. The size of your grill might dictate how many racks you can fit, but it won’t affect the quality of your ribs if you use proper smoking techniques.
Consider your cooking style and how often you plan to smoke. If you’re just starting out, a basic 22-inch Kettle is perfect. If you plan to smoke frequently or cook for larger groups, upgrading to a larger model or one with convenient features like a built-in thermometer might be a worthwhile investment. But remember, the key to great ribs is mastering the cooking process, not necessarily the specific model.
How do I maintain a consistent temperature for smoking ribs on a Weber Kettle?
Maintaining a steady temperature is crucial for tender and juicy ribs, and it’s definitely achievable on a Weber Kettle. The most common method is the “snake” or “fuse” method, where you arrange briquettes around the edge of the charcoal grate, lighting only a small portion to start. As the lit briquettes burn, they slowly ignite the next ones, providing a consistent, low-and-slow burn.
Controlling airflow is another key factor. Use the top and bottom vents to regulate the temperature. Generally, you’ll want the bottom vent mostly open to provide oxygen, and adjust the top vent to control the heat. Experiment with small adjustments to find the sweet spot for your grill and the weather conditions. A good thermometer is your best friend here; monitor the internal grill temperature and make adjustments as needed.
What’s the best wood to use for smoking ribs on a Weber Kettle?
Choosing the right wood can significantly enhance the flavor of your ribs! Fruit woods like apple and cherry are popular choices, as they impart a subtle sweetness and delicate smokiness that complements pork beautifully. Hickory is another classic, offering a bolder, bacon-like flavor that many rib lovers adore.
Ultimately, the best wood is a matter of personal preference. Experiment with different types to find your favorite! You can even combine woods to create a unique flavor profile. For example, mix apple and hickory for a balanced sweet and smoky taste. Just remember to use wood chunks or chips specifically designed for smoking, and soak the chips in water for about 30 minutes before adding them to the coals to prevent them from burning too quickly.
How long does it typically take to smoke ribs on a Weber Kettle?
The cooking time for ribs on a Weber Kettle can vary depending on several factors, including the thickness of the ribs, the temperature of the grill, and your personal preference for doneness. However, a general guideline is to plan for around 5 to 7 hours at a temperature of 225-250°F (107-121°C).
It’s always best to cook to tenderness rather than strictly by time. The “3-2-1” method (3 hours of smoking, 2 hours wrapped in foil, 1 hour unwrapped) is a popular starting point, but adjust the times based on how your ribs are progressing. You’ll know they’re done when the meat is tender and easily pulls away from the bone, or when a probe inserted into the meat feels like it’s going into softened butter.
How do I prevent my ribs from drying out while smoking them on a Weber Kettle?
Dry ribs are a common concern, but there are several ways to keep them moist and tender during the smoking process. One effective technique is to use a water pan. Place a pan filled with water near the heat source. As the water evaporates, it creates a humid environment inside the grill, which helps to keep the ribs from drying out.
Another trick is to spritz the ribs every hour or so with apple juice, apple cider vinegar, or a mixture of both. This adds moisture and flavor to the surface of the meat. You can also wrap the ribs in foil for a portion of the cooking time, as mentioned in the “3-2-1” method. Wrapping traps moisture and helps to braise the ribs, making them incredibly tender. Just remember to unwrap them for the last hour to allow the bark to firm up.
What are some common mistakes to avoid when smoking ribs on a Weber Kettle?
One of the biggest mistakes is using too much wood. Over-smoking can result in bitter-tasting ribs. Start with a small amount of wood and add more as needed. Another common mistake is not maintaining a consistent temperature. Fluctuations in temperature can lead to uneven cooking and dry ribs. Invest in a good thermometer and monitor the grill temperature closely.
Don’t overcrowd the grill! Overcrowding restricts airflow and can lead to longer cooking times and unevenly cooked ribs. Leave space between the racks to allow for proper circulation. And finally, resist the urge to constantly open the lid. Every time you open the lid, you lose heat and prolong the cooking time. Trust the process and let the ribs cook undisturbed as much as possible.
How do I clean my Weber Kettle after smoking ribs?
Cleaning your Weber Kettle after smoking ribs is essential for maintaining its performance and preventing future messes! After the grill has cooled completely, remove the grates and scrape off any excess food debris. You can use a grill brush or a scraper designed for this purpose.
For tougher buildup, soak the grates in warm, soapy water for a while before scrubbing. Empty the ash catcher and wipe down the inside of the grill with a damp cloth. For stubborn grease, you can use a degreaser specifically designed for grills. Regularly cleaning your Weber Kettle will not only keep it in good condition but also ensure that your next batch of ribs tastes amazing!
Verdict
So, there you have it! We’ve walked through some incredible contenders for achieving the best ribs on Weber kettles, dissected the key features to consider, and armed you with the knowledge to make a truly informed decision. Remember, the “best” is ultimately subjective, boiling down to your personal taste and grilling style. Don’t be afraid to experiment with different rubs, wood chips, and cooking techniques to find your own signature rib recipe that will have your friends and family begging for more.
Now it’s time to fire up that Weber, grab your favorite slab of ribs, and get grilling! Don’t let the details overwhelm you; cooking great ribs is more about the joy of the process than achieving absolute perfection. Trust your instincts, learn from your mistakes, and most importantly, have fun! With a little practice and these tips, you’ll be turning out competition-worthy ribs right in your backyard. Get ready to impress!