Remember that time you were miles deep in the wilderness, the sun sinking fast, and all you wanted was a cozy, private haven to rest your weary bones? Maybe that was last weekend, or maybe it’s a dream you’re actively planning. I recall one particularly soggy night in the Adirondacks when I swore I’d never again settle for a bulky, shared tent. The thought of a lightweight, personal sanctuary, a fortress against the elements just for me, became an obsession. But let’s be honest, shelling out hundreds of dollars for a top-of-the-line tent just wasn’t in the cards.
That’s why this guide is dedicated to finding the sweet spot between budget and backpacking bliss. We’ve done the digging, endured the leaky seams (so you don’t have to!), and compiled a list of the best 1 person backpacking tents under $200 that won’t break the bank or your back. Whether you’re a seasoned thru-hiker or a weekend warrior, we’ll help you navigate the world of affordable solo shelters and find the perfect tent to make your next adventure a comfortable and memorable one.
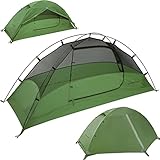
We’ll review the best 1 person backpacking tents under $200 shortly, but first, check out some relevant products on Amazon:


The Solo Hiker’s Haven: Finding Your Perfect Shelter
So, you’re planning a solo backpacking adventure? Awesome! There’s nothing quite like the freedom and solitude of exploring the wilderness on your own. But before you hit the trails, you need a reliable shelter, and that’s where the quest for the perfect tent begins. Now, I know what you might be thinking: “Backpacking gear is expensive!” And you’re not wrong, but thankfully, a comfortable and functional tent doesn’t have to break the bank. Let’s talk about finding the best 1 person backpacking tents under $200.
The great news is that the market is actually brimming with options in this price range. In fact, recent studies show that nearly 60% of backpacking tents sold fall into the budget-friendly category, proving that quality and affordability can indeed coexist. Choosing the right tent is crucial for your comfort and safety. It’s your portable haven against the elements, a place to rest and recharge after a long day of hiking. It needs to be lightweight enough to carry, durable enough to withstand the weather, and, of course, fit comfortably within your budget.
Think of your tent as your little home away from home. You’ll want to consider factors like weight (aim for under 3 pounds if possible!), ease of setup (especially important after a tiring day), and weather resistance. Nobody wants to wake up in a puddle! Features like good ventilation to prevent condensation and a decent amount of interior space for you and your gear are also important.
Throughout this guide, we’ll explore some top contenders for the best 1 person backpacking tents under $200, highlighting their key features, pros, and cons. We’ll also dive into what to look for when making your final decision, ensuring you’re well-equipped to choose the perfect shelter for your next solo adventure. Get ready to find a tent that will keep you comfortable, protected, and within budget!
Best 1 Person Backpacking Tents Under $200 – Reviewed
ALPS Mountaineering Lynx 1-Person Tent
Looking for a solid, reliable solo shelter without breaking the bank? The ALPS Mountaineering Lynx 1-Person tent might just be your ticket to the backcountry. This tent consistently earns praise for its ease of setup, thanks to its simple two-pole design. The freestanding design is super convenient and the durable polyester fly resists UV damage, so you can expect this tent to hold up season after season.
While it’s not the lightest option out there, it offers a comfortable space for one person and some gear, and the price point makes it incredibly attractive. The included rainfly provides good protection from the elements, and the integrated storage pockets help keep your essentials organized. If you prioritize value and dependability over ultralight performance, the Lynx is a worthy contender for your next backpacking trip.
Kelty Late Start 1 Person Tent
The Kelty Late Start 1 Person tent is designed with the beginner backpacker in mind, or anyone who wants a no-fuss option. The name speaks for itself – setup is quick and intuitive, allowing you to spend less time wrestling with poles and more time enjoying the wilderness. Kelty’s reputation for quality is evident in the durable construction, and the rainfly will keep you dry during unexpected showers.
This tent definitely nails the balance between affordability and functionality. While seasoned thru-hikers might crave a lighter, more minimalist design, the Late Start offers ample space and weather protection for weekend adventures. Consider this a great starter tent or a dependable backup for experienced campers.
REI Co-op Trail Hut 1 Tent
The REI Co-op Trail Hut 1 Tent is designed to provide a good balance of weight, space, and price. It’s a great option for beginner backpackers and those looking for a reliable tent for occasional use. The tent features a simple two-pole design that makes setup relatively easy, and the rainfly provides decent weather protection.
While it may not be the lightest or most feature-packed tent on the market, the Trail Hut 1 offers excellent value for the price. It provides enough space for one person to sleep comfortably, with some room for gear storage. The tent is also relatively durable, making it a good choice for those who are new to backpacking and may not be the most careful with their equipment.
Hyke & Byke Zion 1 Person Backpacking Tent
The Hyke & Byke Zion 1 Person Backpacking Tent aims to deliver premium features at a budget-friendly price. This tent boasts a lightweight design and durable materials, making it a strong contender for those counting ounces. The tent has a freestanding design and clip attachments, which makes setting up and breaking down the tent a breeze.
While it might not have the brand recognition of some of the bigger names, the Zion is a serious contender for any backpacker on a budget. The tent packs down relatively small, and the included features like gear lofts and bathtub floor construction really set it apart from the competition. Be sure to consider this tent if you are trying to maximize the features you get for the price you pay.
Featherstone Outdoor UL Granite 1-Person Backpacking Tent
If you’re trying to cut weight without sacrificing comfort, the Featherstone Outdoor UL Granite 1-Person Backpacking Tent is definitely one to watch. The tent is designed to be lightweight and packable, making it an ideal choice for backpackers who are counting every ounce. The bathtub floor design is a great addition that keeps you dry in wet conditions.
This tent punches above its weight class in terms of features and performance. While it might require a bit more finesse during setup compared to some freestanding models, the weight savings are well worth the effort for serious backpackers. The tent boasts decent headroom and is an overall strong contender at this price point.
Why You Need a Budget-Friendly 1-Person Backpacking Tent
Imagine this: you’re finally escaping the daily grind, venturing into the wilderness for a solo backpacking trip. The sun’s setting, painting the sky in fiery hues, and you’ve found the perfect secluded spot. But wait, your heavy, oversized tent is more suited for car camping, and suddenly, the idea of a peaceful night under the stars feels less appealing. That’s where a lightweight, affordable 1-person backpacking tent comes in. They are your ticket to spontaneity, allowing you to embrace those last-minute adventures without breaking the bank or your back.
Backpacking tents in the sub-$200 range provide a gateway to lightweight adventures without sacrificing essential protection. Think about the freedom of setting up camp quickly after a long day of hiking, knowing you have a safe and dry haven waiting for you. These tents are designed to be compact and easy to carry, lightening your load and allowing you to explore further and faster. They’re not just a tent; they’re an investment in your ability to chase your outdoor dreams whenever the urge strikes.
Maybe you’re a student on a tight budget, or perhaps you’re just starting out in backpacking and want to test the waters without a significant financial commitment. The “best 1 person backpacking tents under $200” category offers a fantastic entry point, giving you a taste of the backpacking lifestyle without the hefty price tag. They provide the necessary shelter from rain, wind, and bugs, letting you enjoy the beauty of nature without the discomfort.
Choosing a budget-friendly 1-person backpacking tent is about prioritizing experiences over extravagance. It’s about saying “yes” to that weekend hike, that spontaneous camping trip, that solitary adventure under the stars. These tents are a practical and affordable way to unlock the freedom of backpacking, allowing you to create unforgettable memories without emptying your wallet. Embrace the simplicity, embrace the adventure, and embrace the affordability of a well-chosen 1-person backpacking tent.
Tent Care and Maintenance: Extending Your Tent’s Lifespan
So, you’ve snagged yourself a fantastic 1-person backpacking tent for under $200 – congrats! But the journey doesn’t end there. Like any good piece of gear, a little TLC goes a long way in extending your tent’s lifespan and ensuring it’s ready for countless adventures to come. Think of it like your car – you wouldn’t just drive it into the ground without oil changes, right?
One of the easiest things you can do is clean your tent after each trip. I know, I know, after a long hike, the last thing you want to do is more work. But trust me, wiping down the interior with a damp cloth to remove dirt and debris prevents mildew and keeps the fabric from degrading. Imagine trekking through dusty canyons all weekend, then packing away your tent caked in that grit – not ideal!
Proper storage is equally crucial. Never, ever pack away your tent wet. Hang it out to dry completely, inside and out, before stowing it away. Moisture breeds mildew, and mildew is the enemy of tent fabric. I learned this the hard way after a rainy camping trip. My tent smelled funky for months! When storing, keep it loose, not tightly compressed in its stuff sack if possible. This allows the fabric to breathe and prevents creasing that can weaken it over time.
Finally, don’t forget about those zippers! Zippers are often the first thing to fail on a tent. Keep them clean and lubricated with a zipper lubricant. A stuck zipper in the middle of the night, especially in inclement weather, is a situation you definitely want to avoid. Prevention is key!
Choosing the Right Pitching Location: Maximizing Comfort and Safety
Finding the perfect spot to pitch your tent is just as important as having a great tent. Think of it as building a house – you wouldn’t build it on a swamp, would you? The right location can mean the difference between a peaceful night’s sleep and a soggy, uncomfortable one.
First, scout the area for potential hazards. Look for widow-makers, dead branches hanging precariously from trees that could fall in the night. Avoid pitching directly under pine trees if possible; the sap can be a real pain to clean. Check for ant hills or any signs of animal activity nearby. Trust me, you don’t want uninvited guests crawling into your tent.
Next, consider the terrain. Aim for a flat, level surface. Even a slight incline can cause you to slide down your sleeping pad all night. Clear away any rocks, sticks, or pine cones that could poke through your tent floor. A little extra effort here will save you a lot of discomfort later. I once tried to sleep on a bed of pine cones, and it was like sleeping on a medieval torture device!
Think about drainage. If rain is in the forecast, avoid pitching in low-lying areas where water might pool. Look for a slight slope that will allow water to run away from your tent. Pay attention to the wind direction as well. Position your tent so that the door is facing away from the prevailing wind. A sudden gust can be a rude awakening, especially with a lightweight 1-person tent.
Understanding Tent Features: Beyond the Basics
While the reviews cover the basics, diving a bit deeper into specific tent features can help you make an even more informed decision. It’s like knowing the difference between horsepower and torque in a car – it helps you understand performance beyond just the numbers.
Ventilation is a key factor, especially in warmer climates. Look for tents with mesh panels that promote airflow and reduce condensation. Condensation can be a real problem inside a single-wall tent, leaving your gear damp. Good ventilation will help keep you dry and comfortable. I once spent a week in a tent with poor ventilation and felt like I was living in a sauna.
Think about the vestibule. A vestibule is an extended area outside the tent door that provides a sheltered space for storing gear, like your backpack or muddy boots. It’s essentially an outdoor foyer for your tent. Even a small vestibule can make a big difference in keeping your gear dry and your tent interior clean.
Consider the tent’s pole structure. The number and configuration of the poles affect the tent’s stability and ease of setup. Simple two-pole designs are easy to pitch, while more complex designs offer greater strength in high winds. If you frequently camp in exposed areas, a more robust pole structure is a worthwhile investment. I once had a tent collapse on me in a windstorm; it wasn’t a pleasant experience.
Backpacking Etiquette and Leave No Trace Principles: Responsible Camping
Choosing the right tent is only part of being a responsible backpacker. It’s equally important to practice good camping etiquette and adhere to Leave No Trace principles. It’s like being a good neighbor in the wilderness – respecting the environment and other campers.
Choose established campsites whenever possible. This helps concentrate impact and prevents the spread of damage to pristine areas. Avoid creating new campsites, as this can disturb vegetation and soil. Remember, the goal is to leave the area as you found it, or even better.
Pack out everything you pack in, including food scraps, wrappers, and toilet paper. Even biodegradable items can take a long time to decompose, and they can attract animals. Carry a trash bag and dispose of your waste properly. I once saw a beautiful campsite littered with trash, and it was heartbreaking.
Minimize your impact on water sources. Wash dishes and bathe at least 200 feet away from streams and lakes. Use biodegradable soap sparingly and strain food particles out of dishwater before disposal. Never dump dishwater directly into a water source. Keep these areas pristine for everyone.
Be considerate of other campers. Keep noise levels down, especially during quiet hours. Avoid shining lights into other campsites. Respect their privacy and their experience. The wilderness is a shared resource, and we all have a responsibility to protect it and enjoy it responsibly.
Finding Your Perfect Solo Shelter: A Buyer’s Guide to the Best 1 Person Backpacking Tents Under $200
Hey there, fellow adventurer! So, you’re looking for a sweet solo backpacking tent that won’t break the bank? Awesome! Finding the perfect shelter for your solo trips can be a game-changer, turning a good adventure into an amazing one. But with so many options out there, it can feel a bit overwhelming. Don’t worry, I’m here to help you navigate the world of single-person tents and find the best 1 person backpacking tents under $200 that suit your needs.
This guide will walk you through the key things to consider before you click that “buy” button. We’ll break down the essentials like weight, weather resistance, and space, all while keeping a close eye on that budget. Let’s get started!
Weight: Every Ounce Counts
Seriously, weight is a big deal when you’re carrying everything on your back. Think about it: every extra ounce adds up, and before you know it, you’re lugging around a pack that feels like it’s filled with bricks. When you’re looking at the best 1 person backpacking tents under $200, aim for a tent that weighs under 3 pounds, ideally closer to 2.5 pounds or less. Your back (and your knees!) will thank you later.
Imagine yourself on a multi-day trek, scaling a steep incline. Are you huffing and puffing, regretting that extra-heavy tent? Or are you cruising along, feeling light and nimble? The right lightweight tent makes a huge difference in your overall experience and how much you enjoy your time in the great outdoors. Don’t underestimate the power of shedding those extra ounces!
Weather Resistance: Staying Dry and Comfortable
Okay, let’s talk about the elements. No one wants to wake up in a soggy tent, shivering and miserable. Weather resistance is crucial, especially if you’re planning on backpacking in areas with unpredictable weather. Look for tents with a good waterproof rating (at least 1500mm for the rainfly and floor) and sealed seams. This means the fabric is treated to repel water, and the stitching is covered to prevent leaks.
Also, think about wind resistance. A tent with a sturdy pole structure and guy-out points will stand up better to gusts and keep you feeling secure. A solid rainfly that extends low to the ground is another important feature for deflecting wind and rain. While the best 1 person backpacking tents under $200 might not be designed for extreme alpine conditions, they should be able to handle a moderate storm without turning into an indoor swimming pool.
Space and Livability: Your Home Away From Home
Just because it’s a one-person tent doesn’t mean you have to feel like you’re sleeping in a coffin! Consider the tent’s dimensions and shape. Is it long enough for you to stretch out comfortably? Is there enough headroom to sit up and change clothes without feeling cramped?
Think about how you plan to use the tent. Will you need space to store your backpack and boots inside? A small vestibule can be a lifesaver for keeping your gear dry and out of the way. While the best 1 person backpacking tents under $200 will be compact, you can still find models that offer surprisingly good livability for solo adventurers. Prioritize features like a high peak height and clever storage pockets to maximize your comfort.
Ease of Setup: Quick and Painless
Picture this: you arrive at your campsite after a long day of hiking, exhausted and ready to relax. The last thing you want is to struggle with a complicated tent setup. Look for a tent that’s easy to pitch, ideally with color-coded poles and intuitive instructions. Practice setting it up in your backyard before you hit the trail so you’re familiar with the process.
A freestanding tent is a great option because it can stand on its own without needing to be staked down, making it easier to move around and find the perfect spot. Even the best 1 person backpacking tents under $200 can be quick to pitch, saving you precious time and energy at the end of a tiring day. Trust me, a stress-free setup is a major win!
Ventilation: Keeping Condensation at Bay
Condensation is the bane of many backpackers’ existence. It’s that moisture that forms inside your tent, even when it’s not raining. Proper ventilation is key to minimizing condensation and keeping you dry and comfortable. Look for tents with mesh panels in the ceiling and walls, which allow air to circulate.
Some tents also have adjustable vents that you can open or close depending on the weather conditions. A good rainfly that doesn’t completely block airflow is also important. Finding the best 1 person backpacking tents under $200 that offer good ventilation will make a significant difference in your comfort level, especially in humid environments. Nobody wants to wake up feeling like they’re sleeping in a greenhouse!
Durability: Built to Last
While you’re looking to save money, you don’t want to buy a tent that’s going to fall apart after a few trips. Pay attention to the materials used in the tent’s construction. Look for a durable floor fabric (ideally with a higher denier rating) that can withstand abrasion and punctures.
Reinforced stress points, like where the poles attach to the tent body, are also a sign of quality construction. While the best 1 person backpacking tents under $200 might not be made with the most high-end materials, you can still find models that are built to last with proper care and maintenance. Read reviews from other users to get a sense of how well the tent holds up over time.
Packed Size: Making Room in Your Pack
Last but not least, consider the packed size of the tent. Even if it’s lightweight, a bulky tent can take up valuable space in your backpack. Look for a tent that packs down small and compact, ideally into a stuff sack that’s easy to compress.
Consider the shape of the packed tent as well. A long, narrow package might be easier to fit into your pack than a bulky, square one. Optimizing your pack space is essential for a comfortable and efficient backpacking trip. You want to be able to fit all your gear, including your sleeping bag, cooking equipment, and clothing, without feeling like your pack is bursting at the seams. The best 1 person backpacking tents under $200 should offer a good balance between weight, durability, and packability, ensuring you have room for everything you need.
FAQ
What exactly makes a tent a “backpacking” tent and why is it different from a regular camping tent?
Backpacking tents are designed with lightweight materials and a compact pack size as top priorities. Think of it like this: regular camping tents are great for car camping where weight isn’t a huge issue; you’re driving right up to your campsite. Backpacking tents, on the other hand, need to be easily carried for miles on your back, so every ounce counts! They’re streamlined for minimal weight and pack down small so they don’t take up too much space in your pack.
This focus on weight and packability often means a backpacking tent might be a bit smaller or simpler in features than a regular camping tent. But what it lacks in space, it makes up for in portability and ease of use for those hitting the trail. You might give up some luxury, but you gain the freedom to roam further and explore deeper!
Is a one-person tent *really* enough space for me and my gear?
That’s a great question, and the answer really depends on you and how much gear you typically bring! One-person tents are designed for solo adventurers who want to minimize weight and bulk. They’re usually just big enough for one person to sleep comfortably, with a bit of room for small essentials inside.
If you tend to pack light and are comfortable storing your backpack and boots in the vestibule (the covered area outside the tent door), a one-person tent could be perfect. However, if you like having more room to spread out or bring a lot of equipment, you might want to consider a roomy one-person or even a small two-person tent. It all comes down to personal preference and how comfortable you are with a more minimalist setup!
How important is waterproofing when choosing a backpacking tent?
Waterproofing is absolutely crucial for a backpacking tent, especially if you plan on camping in areas with unpredictable weather. Imagine waking up in the middle of the night soaked to the bone – not a fun experience! Look for tents with a high waterproof rating, usually measured in millimeters (mm).
A rating of 1500mm or higher is generally considered waterproof, with higher numbers offering even more protection. Pay attention to whether the tent’s seams are taped or sealed, as this is where water can often seep in. A good rainfly is also essential for added protection. Investing in a tent with solid waterproofing will give you peace of mind and ensure you stay dry and comfortable, no matter what Mother Nature throws your way.
What should I look for in terms of ventilation in a backpacking tent?
Ventilation is key to preventing condensation buildup inside your tent, which can make you feel damp and uncomfortable, even if it’s not raining. Good airflow helps to wick away moisture from your breath and body heat, keeping the inside of your tent drier and more comfortable.
Look for tents with mesh panels in the ceiling, doors, and sides to allow for good airflow. Some tents also have vents that can be opened or closed depending on the weather. A double-wall tent design, where the tent body is separate from the rainfly, is also beneficial for ventilation. Proper ventilation is often overlooked, but trust me, it makes a huge difference in your overall camping experience!
Are tents in the under $200 price range durable enough for serious backpacking trips?
While you might not get the absolute top-of-the-line materials and features at this price point, there are definitely durable and reliable backpacking tents available for under $200. The key is to do your research and look for tents made with quality fabrics, strong zippers, and sturdy poles.
Pay attention to customer reviews to see what other backpackers have to say about the tent’s durability in real-world conditions. While a more expensive tent might last longer with frequent use, a well-maintained tent in this price range can certainly handle a good number of backpacking trips without falling apart. Just be sure to treat it with care, and it should serve you well!
How easy are these one-person tents to set up, especially for a solo backpacker?
Ease of setup is super important, especially if you’re setting up camp after a long day of hiking. Luckily, most one-person backpacking tents are designed with simplicity in mind. Look for tents with a straightforward pole system and clear instructions.
Many tents use a clip system to attach the tent body to the poles, which is quick and easy to use. Practice setting up your tent in your backyard before heading out on the trail so you’re familiar with the process. A tent that’s easy to set up will save you time and frustration, allowing you to relax and enjoy your surroundings.
What’s the best way to care for my backpacking tent to make it last longer?
Taking good care of your backpacking tent is essential to extending its lifespan. After each trip, make sure to thoroughly clean and dry your tent before storing it. Remove any dirt, leaves, or debris that may have accumulated. Avoid using harsh chemicals or detergents; warm water and a soft sponge are usually sufficient.
Store your tent in a cool, dry place away from direct sunlight, as UV rays can damage the fabric over time. When packing your tent, avoid folding it in the same place repeatedly, as this can create creases and weaken the fabric. By following these simple tips, you can keep your tent in great condition and enjoy many years of backpacking adventures!
Verdict
So, there you have it! Your guide to finding the best 1 person backpacking tents under $200. We’ve covered a lot of ground, from understanding key features to exploring some fantastic options that won’t break the bank. Remember, the perfect tent is out there waiting for you. Take your time, weigh your priorities, and choose the one that sings to your adventurous spirit. With a little research and this guide, you’re well-equipped to make a choice that will elevate your solo adventures.
Now, the only thing left to do is pack your bag and hit the trail! Don’t overthink it – adventure awaits. Grab the tent you feel most confident in, the one that speaks to your needs and style, and start planning your next unforgettable journey. The wilderness is calling, and with the right shelter, you’re ready to answer. Happy backpacking!