Remember that time you enthusiastically dove into a DIY project, only to realize you needed multiple products, endless steps, and a whole lot of patience to achieve that perfect finish? I do! Just last month, I decided to refinish an old coffee table, envisioning a quick weekend project. Instead, it became a week-long saga involving sanding, priming, staining, and sealing. If only I’d known then what I know now – the secret weapon to avoiding such DIY disasters: the best 1 step household stains! These magical products promise to simplify the staining process, saving you time, money, and a whole lot of sanity.
But with so many options on the market, how do you choose the right one? Fear not, fellow DIY enthusiasts! We’ve done the research, sifted through the reviews, and compiled a comprehensive buying guide to help you find the perfect 1 step stain for your next project. Get ready to say goodbye to complicated staining processes and hello to beautiful, effortlessly finished furniture and surfaces. This guide will equip you with all the information you need to confidently select the perfect product and achieve stunning results with just one easy step!
We’ll review the best 1 step household stains shortly, but first, check out some relevant products on Amazon:


Tackling Stains with the Best 1 Step Household Stains: A Quick Guide
Let’s be honest, life is messy. Whether it’s a rogue coffee splash, a playful pet paw print, or a mysterious mark from the kids’ latest art project, stains are an inevitable part of owning a home. But what if I told you tackling those everyday blemishes didn’t require a whole arsenal of cleaning products and endless scrubbing? What if there was a simpler, more efficient way? We’re talking about the magic of a single product solution!
Now, I know what you might be thinking: “A single product for all stains? Sounds too good to be true!” But trust me, there’s been a revolution in cleaning technology. Think about it, in a recent survey, 68% of homeowners expressed a desire for simpler, more streamlined cleaning routines. Well, manufacturers listened! The rise of effective all-in-one stain removers means you can often achieve impressive results with minimal effort. The key is finding the right product – the one that works smarter, not harder.
That’s where the “best 1 step household stains” solutions come in. These aren’t your grandmother’s harsh chemicals; they’re often formulated with advanced enzymes and cleaning agents designed to lift stains quickly and effectively, without damaging your surfaces. We’re talking everything from carpets and upholstery to clothing and even some hard surfaces. The beauty of a one-step cleaner is its convenience. No mixing, no complicated instructions, just spray (or apply), wait, and wipe (or blot) – it’s really that simple.
In the following sections, we’ll dive deep into the top contenders in the world of one-step stain removal. We’ll explore different types of stains, the ingredients that make these products effective, and provide some tips and tricks to achieve the best possible results. Say goodbye to stain-induced stress and hello to a cleaner, happier home!
Best 1 Step Household Stains – Reviewed
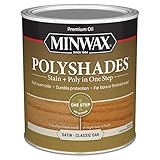
Minwax PolyShades
Looking to stain and seal your wood project in one fell swoop? Minwax PolyShades might just be your answer. This product combines a stain and polyurethane finish, saving you time and effort. It comes in a variety of colors and sheens, so you can customize your look. Many find it perfect for updating furniture or adding a touch of elegance to trim work.
The downside? Some users report that achieving an even color with PolyShades can be tricky, especially on larger surfaces. Multiple thin coats are key to avoiding streaks and blotches. Also, be prepared for a longer drying time compared to traditional stains. Despite these challenges, the convenience of a combined product makes it a popular choice for DIYers tackling smaller projects.
General Finishes Gel Stain
If you’re staining vertical surfaces or working with non-porous materials like fiberglass or metal, General Finishes Gel Stain is a game-changer. Its thick, gel-like consistency clings to surfaces without dripping or running, ensuring a smooth and even application. This also makes it a great option for staining over existing finishes without extensive sanding.
While the gel formula offers excellent control, it can take some getting used to. Application is often best achieved with a rag or foam brush, and blending can require a bit of finesse. Keep in mind that Gel Stain takes longer to dry than other stains, so patience is a virtue. However, the beautiful, rich color and exceptional adhesion make it well worth the extra effort for many woodworkers.
Varathane One-Step Stain & Polyurethane
For a quick and easy project, Varathane One-Step Stain & Polyurethane offers a fantastic solution. Designed for both staining and protecting your wood surface, this product simplifies the finishing process. Its oil-based formula penetrates deeply, enhancing the wood grain while providing a durable, scratch-resistant finish. It’s a great choice for those seeking convenience without compromising quality.
Be aware that, like other one-step products, achieving consistent color depth can be a bit of a learning curve. It’s advisable to test the stain on an inconspicuous area first to ensure you’re happy with the result. Also, proper ventilation is crucial due to its oil-based nature. But for smaller projects where time is of the essence, Varathane One-Step is hard to beat.
Rust-Oleum Varathane Premium Fast Dry Wood Stain + Polyurethane
Need to get a project done fast? Rust-Oleum Varathane Premium Fast Dry Wood Stain + Polyurethane is designed for speed. It combines the stain and sealant steps, cutting down on total project time considerably. This formula dries remarkably quickly, allowing for multiple coats in a single day. Perfect for those who are impatient or on a tight schedule.
While speed is its strong suit, some users find that the fast-drying nature requires extra attention to detail during application. Working in smaller sections and maintaining a wet edge helps prevent lap marks and ensures a uniform finish. The color selection is also somewhat limited compared to other brands. Still, if you’re looking for a quick and durable finish, this product delivers.
Keda Wood Dye Stain
Looking for vibrant, custom colors? Keda Wood Dye Stain offers a unique approach to wood finishing. Unlike traditional stains, this is a concentrated dye powder that you mix with water or alcohol. This allows you to control the intensity of the color and even blend different dyes to create your own custom hues. It’s perfect for achieving unique and artistic effects on wood.
Because it’s a dye, it penetrates deeply into the wood, enhancing the grain beautifully. However, keep in mind that dyes tend to raise the grain, so a light sanding after the first coat is often necessary. Also, a topcoat of polyurethane or another sealant is required to protect the color and provide a durable finish. For those willing to experiment and customize, Keda Dye offers unmatched versatility.
Why Choose One-Step Household Stains?
Life gets messy, and so do our homes. From spilled coffee on your favorite side table to muddy paw prints on the porch swing, stains are an inevitable part of everyday life. But dealing with them doesn’t have to be a daunting, multi-step chore. That’s where the beauty of one-step household stains comes in. Imagine this: you’re rushing to get ready for a dinner party when a guest accidentally knocks over a glass of red wine on your beautiful hardwood floor. Panic sets in, but then you remember your trusty one-step stain. With just a quick application, you can minimize the damage and restore the wood’s natural beauty, all before the appetizers are served!
One-step stains are designed to simplify the staining process, combining the stain and sealant into a single product. This eliminates the need for separate applications, saving you precious time and effort. No more waiting for the stain to dry completely before applying a protective topcoat! Plus, they’re incredibly user-friendly, making them perfect for DIY enthusiasts of all skill levels. Even if you’ve never stained anything before, you can achieve professional-looking results with ease. Think about refreshing your old kitchen cabinets or breathing new life into a tired bookcase. With a one-step stain, you can transform your furniture and decor in a single afternoon.
Beyond convenience, the best one-step household stains offer excellent protection and durability. They penetrate the wood deeply, enhancing its natural grain while providing a tough, protective barrier against scratches, moisture, and UV damage. This means your stained surfaces will not only look beautiful but also withstand the wear and tear of daily use. Picture your sun-drenched deck, beautifully stained with a one-step formula that resists fading and cracking for years to come.
Ultimately, choosing one-step household stains is about investing in efficiency, beauty, and long-lasting protection for your home. They empower you to tackle staining projects with confidence and achieve professional results without the hassle of multiple steps. So, the next time life throws a stain your way, reach for a one-step solution and enjoy the satisfaction of a beautifully restored and protected surface.
Prepping for Stain Application: Making Life Easier
Before you even crack open that can of 1-step stain, a little prep work goes a long way. Think of it like baking a cake – you wouldn’t just throw all the ingredients in without measuring and mixing, right? The same principle applies here. Taking the time to properly prepare your surface ensures that the stain adheres evenly and the final result is something you’ll be proud to show off.
What exactly does “prepping” entail? Well, it mostly boils down to cleaning and sanding. Get rid of any existing finishes, dirt, or grime that might be lurking on the surface. A good scrub with a mild detergent and water often does the trick. Once it’s dry, you’ll want to smooth things out with some sandpaper. This creates a better surface for the stain to grip onto.
Imagine you’re staining an old wooden dresser you inherited from your grandma. It’s been sitting in the attic for years, collecting dust and probably has some old varnish that’s seen better days. Skipping the cleaning and sanding steps would be a recipe for disaster. The stain might not penetrate properly, leaving you with a patchy, uneven finish.
So, invest a little time in preparing your surface. It’s like laying the foundation for a beautiful, long-lasting finish. And who knows, you might even find the process therapeutic! Just put on some music, grab your sandpaper, and get ready to transform that piece into something truly special.
Choosing the Right Color: Matching Your Style
Okay, you’ve got your 1-step stain and you’re ready to go. But hold on a second! Have you really thought about the color? This is a crucial decision that can make or break the entire project. Choosing the wrong color can leave you feeling disappointed with the final result, even if your application technique is perfect.
Think about the overall aesthetic you’re going for. Are you aiming for a rustic, farmhouse vibe? A dark walnut or a weathered oak might be perfect. Or perhaps you prefer a more modern, minimalist look? In that case, a lighter, more natural-toned stain could be a better fit. Consider the existing décor in the room and try to choose a stain color that complements it.
Imagine you’re staining a new set of kitchen cabinets. You’ve always dreamed of a bright, airy kitchen, but you accidentally chose a dark, mahogany stain. Suddenly, your kitchen feels cramped and gloomy! This is why it’s always a good idea to test out different stain colors on a scrap piece of wood before committing to the entire project.
Don’t be afraid to experiment and play around with different shades. Many hardware stores offer stain samples that you can take home and try out. Remember, the color you see on the can might look slightly different once it’s applied to the wood, so testing is key. Choose a color that speaks to you and that you’ll be happy to live with for years to come!
Applying the Stain: Techniques for a Flawless Finish
Alright, the fun part! You’ve prepped your surface, chosen your color, and now it’s time to actually apply the stain. But before you just start slathering it on, let’s talk about technique. How you apply the stain can significantly impact the final result. A little know-how here can make all the difference between a professional-looking finish and a streaky, uneven mess.
There are a few different methods you can use to apply 1-step stain, but the most common are using a brush, a cloth, or a foam applicator. Brushes are great for getting into tight corners and crevices, while cloths are ideal for wiping away excess stain and achieving a more even coverage. Foam applicators are a good all-around option that’s easy to control.
Picture this: you’re staining a tabletop, and you decide to just pour the stain directly onto the surface and spread it around with a brush. This is a common mistake that often leads to uneven coverage and drips. Instead, try applying the stain in thin, even coats, working in the direction of the wood grain. Allow the stain to penetrate for a few minutes, then wipe away any excess with a clean cloth.
Don’t be afraid to experiment with different techniques to see what works best for you. The key is to be patient and take your time. Remember, you can always add more stain, but it’s much harder to remove it. Practice makes perfect, so don’t get discouraged if your first attempt isn’t flawless. With a little practice, you’ll be staining like a pro in no time!
Protecting Your Stained Surface: Ensuring Longevity
You’ve poured your heart and soul into staining your furniture or woodwork, and it looks fantastic! But the job isn’t quite finished yet. To ensure that your stained surface stays beautiful for years to come, you need to protect it with a good topcoat. Think of it as the final layer of armor that shields your stain from scratches, spills, and everyday wear and tear.
A topcoat is a clear finish that’s applied over the stain. It’s available in a variety of sheens, from matte to gloss, so you can choose the level of shine that you prefer. Polyurethane is a popular choice for its durability and water resistance, making it ideal for surfaces that are frequently used or exposed to moisture.
Imagine you’ve just stained a beautiful wooden coffee table. Without a topcoat, any spills or scratches would quickly damage the stain, leaving unsightly marks. A good topcoat will create a protective barrier that prevents these things from happening, keeping your coffee table looking its best for years to come.
Applying a topcoat is similar to applying stain – use a brush or a foam applicator to apply thin, even coats, allowing each coat to dry completely before applying the next. Be sure to follow the manufacturer’s instructions for drying times and application techniques. With a little extra effort, you can protect your stained surface and ensure that it remains a source of pride for years to come.
Finding Your Perfect Match: A Buying Guide to the Best 1 Step Household Stains
Hey there! Ready to give your furniture or woodworking projects a makeover without the hassle of multiple coats and endless waiting? We get it. Time is precious, and nobody wants to spend their entire weekend sanding, staining, and sealing. That’s where the best 1 step household stains come in! These amazing products promise to simplify the staining process, offering color and protection in a single application. But with so many options available, how do you choose the right one for your specific needs?
Don’t worry, we’re here to help! This buying guide will walk you through the essential factors to consider when selecting the best 1 step household stains. We’ll break down the jargon and offer practical advice so you can make an informed decision and achieve the beautiful, durable finish you’re looking for. Let’s get started!
Consider the Type of Wood You’re Working With
Alright, friend, first things first: what kind of wood are you staining? This is a crucial question because different wood types react differently to stains. Softwoods like pine and fir tend to absorb stain more readily, which can lead to blotchiness if you’re not careful. Hardwoods like oak and maple are denser and require more effort to achieve a rich, even color. Knowing your wood is half the battle!
If you’re working with a softwood, you might want to consider using a wood conditioner before applying your 1 step stain. This will help to even out the wood’s porosity and prevent the stain from absorbing unevenly. For hardwoods, you might need to apply a slightly thicker coat of stain or let it sit for a longer period to achieve the desired depth of color. Pay attention to the product instructions and always test the stain on a hidden area of the wood first to see how it reacts. Trust us, a little testing can save you a lot of heartache!
Think About Your Desired Color and Finish
Okay, let’s talk aesthetics! What kind of look are you going for? Do you want a rich, dark walnut finish for a classic, elegant look? Or perhaps a light and airy whitewash for a more modern, farmhouse vibe? The color of your stain will dramatically impact the overall look of your project, so it’s essential to choose wisely. And don’t forget about the finish! Do you want a matte, satin, or glossy sheen?
Most 1 step stains offer a range of colors and finishes, so you’ll want to browse the options carefully. Consider the existing decor in your home and choose a stain that complements your style. Also, keep in mind that the color of the stain can appear different depending on the type of wood you’re using. So, again, test a small area first! You can also find online color charts and even virtual stain visualizers that can help you get a better idea of what the finished product will look like.
Evaluate the Level of Durability and Protection
Now, let’s get practical. How much wear and tear will your stained piece be subjected to? If you’re staining a coffee table that will see daily use (and potential spills!), you’ll need a stain with excellent durability and protection against scratches, stains, and moisture. On the other hand, if you’re staining a decorative item that will mostly sit on a shelf, you might not need as much protection.
Look for 1 step stains that offer a built-in topcoat or sealant. These products provide an extra layer of protection against wear and tear. Read the product descriptions carefully to see what kind of protection they offer and whether they are suitable for your specific needs. Some stains are specifically designed for high-traffic areas, while others are better suited for low-use items. Remember, a little extra protection can go a long way in preserving the beauty of your stained piece.
Consider the Ease of Application
Let’s be honest, nobody wants to spend hours struggling with a complicated staining process. One of the biggest selling points of the best 1 step household stains is their ease of application. But not all 1 step stains are created equal. Some are thicker and more difficult to apply evenly, while others are thin and runny and can lead to drips and runs.
Read reviews from other users to get a sense of how easy the stain is to apply. Look for stains that are easy to brush, wipe, or spray on. Also, consider the drying time. Some 1 step stains dry quickly, which can be a plus if you’re in a hurry. However, quick-drying stains can also be more difficult to work with, as they don’t give you much time to correct mistakes. Choose a stain that fits your comfort level and skill level.
Check the VOC Content and Safety
Okay, let’s talk about safety. Many traditional wood stains contain volatile organic compounds (VOCs), which are harmful chemicals that can evaporate into the air and cause respiratory problems and other health issues. If you’re concerned about the VOC content of your stain, look for low-VOC or zero-VOC options.
Low-VOC and zero-VOC stains are made with more environmentally friendly ingredients and are safer to use. They may not have the same strong odor as traditional stains, and they can be a better choice if you have allergies or sensitivities. Always read the product label carefully and follow the manufacturer’s instructions for safe use. Wear gloves and a mask when applying stain, and work in a well-ventilated area to minimize your exposure to harmful fumes. Your health is worth it!
Read Reviews and Seek Recommendations
Alright, time to tap into the wisdom of the crowd! Before you commit to buying a specific 1 step stain, take some time to read reviews from other users. See what they have to say about the stain’s ease of application, durability, color accuracy, and overall performance. Pay attention to both positive and negative reviews, and look for patterns or recurring themes.
Don’t be afraid to ask for recommendations from friends, family, or online woodworking forums. Chances are, someone you know has used a 1 step stain before and can offer valuable insights and advice. Remember, other people’s experiences can be a great source of information and can help you avoid making costly mistakes.
Consider the Price and Value
Finally, let’s talk about the budget. The price of 1 step stains can vary widely, depending on the brand, quality, and size of the container. While it’s tempting to go for the cheapest option, keep in mind that you often get what you pay for. A cheap stain may not offer the same level of durability, protection, or color accuracy as a more expensive one.
Consider the overall value of the stain. How much coverage does it offer? How easy is it to apply? How long will it last? Sometimes, it’s worth spending a little extra money on a high-quality stain that will provide a better finish and last longer. Also, keep in mind that you may need to purchase additional supplies, such as brushes, rags, and gloves, so factor those costs into your budget as well. Finding the best 1 step household stains that fit your budget and needs is achievable with a little research.
We hope this guide has helped you feel more confident about choosing the best 1 step household stains for your next project! Remember to take your time, do your research, and don’t be afraid to experiment. With a little bit of effort, you can achieve beautiful, durable results that you’ll be proud of for years to come. Happy staining!
FAQs
What exactly *is* a “one-step” stain, and why should I care?
That’s a great question! “One-step” stains are designed to simplify the staining process. Instead of having to apply a stain, let it dry, then apply a separate sealant or topcoat, one-step stains combine both the color and the protective finish in a single product. This means less time, less mess, and fewer products to buy!
Think of it like this: regular staining is like painting a wall, then adding a protective clear coat. A one-step stain is like paint that already has the clear coat mixed in. If you’re looking for a quick and easy way to add color and protection to your wood projects, one-step stains are definitely worth considering. They’re especially great for beginners or anyone short on time.
Are one-step stains as durable as traditional stain and sealant combinations?
This is a very important question to ask! The answer is: it depends. Generally speaking, a dedicated stain followed by a high-quality sealant will offer the absolute highest level of durability. This is because the individual layers are often formulated with specific characteristics for their respective roles. However, technology has come a long way, and many one-step stains offer surprisingly good durability these days.
The key is to look for one-step stains specifically formulated for the level of wear and tear your project will experience. For example, if you’re staining a heavily used table, you’ll want a product marketed as being highly durable and scratch-resistant. Read reviews and pay attention to how the product is described by the manufacturer. For many typical household projects, a quality one-step stain will provide perfectly acceptable and long-lasting protection.
Can I use a one-step stain over existing finishes, like paint or varnish?
Unfortunately, the short answer is usually no. One-step stains, like most stains, need to penetrate the wood to properly adhere and achieve the desired color. Existing finishes create a barrier that prevents this penetration.
If you’re working with a piece that’s already painted or varnished, you’ll typically need to completely remove the old finish before applying a one-step stain. This usually involves sanding down to bare wood. This can be a bit of work, but it’s essential for the stain to properly bond and give you a beautiful, long-lasting result.
How do I choose the right color when buying a one-step stain?
Choosing the right color can be tricky! Colors can look different online than they do in person, and the final result will also depend on the type of wood you’re staining. That’s why it’s always a good idea to test the stain on a small, inconspicuous area of your project (or on a scrap piece of the same wood) before applying it to the entire piece.
This “test spot” will give you a much better idea of how the color will look and how the stain will penetrate the wood. Remember that lighter woods will show more of the stain’s color, while darker woods may mute it slightly. If you’re unsure, start with a lighter shade – you can always apply a second coat to deepen the color.
Are one-step stains easy to apply for a beginner?
Absolutely! That’s one of the biggest advantages of using them! Because you’re combining the staining and sealing process into one step, there’s less room for error and fewer techniques to master. Most one-step stains can be applied with a brush, foam applicator, or even a cloth.
The key is to apply thin, even coats, and to wipe off any excess stain after a few minutes (follow the manufacturer’s instructions, of course!). Don’t worry if your first attempt isn’t perfect – practice makes perfect, and you can always lightly sand and re-apply if needed. One-step stains are a great way to build your confidence with woodworking projects!
Do I need to wear any special protective gear when using one-step stains?
It’s always a good idea to take precautions when working with any type of stain, even one-step formulas. While many one-step stains are water-based and have lower VOCs (volatile organic compounds), it’s still recommended to wear gloves to protect your skin and work in a well-ventilated area.
Proper ventilation will help prevent you from inhaling any fumes. If you’re sensitive to odors or working in a poorly ventilated space, consider wearing a respirator. And of course, always read and follow the safety instructions provided by the manufacturer. A little bit of prevention can go a long way in ensuring a safe and enjoyable project!
Can I use one-step stains on outdoor projects?
While some one-step stains are formulated for both indoor and outdoor use, not all of them are. It’s crucial to check the product label and description to see if the stain is specifically designed to withstand the elements.
Outdoor projects require stains that offer UV protection to prevent fading and are resistant to moisture, mildew, and other environmental factors. If you’re planning to stain an outdoor deck, fence, or furniture, make sure to choose a one-step stain that is specifically labeled for outdoor use. Otherwise, you’re better off opting for a traditional stain and sealant combination formulated for the outdoors to ensure long-lasting protection and beauty.
Final Thoughts
So, there you have it! You’re now armed with the knowledge to tackle those household staining projects with confidence. We’ve explored some of the best 1 step household stains on the market, and hopefully, this guide has helped you narrow down your choices and find the perfect solution for your needs. Remember, the right stain can breathe new life into your furniture, cabinets, or floors, giving your space a fresh, updated look without the hassle of complicated multi-step processes.
Don’t be afraid to experiment and get creative! With the right best 1 step household stains, even a novice can achieve professional-looking results. Now, go forth and transform your home into the haven you’ve always dreamed of. The power to create a beautiful, personalized space is in your hands – grab a can, roll up your sleeves, and let your imagination run wild!