Ever caught yourself gazing at the moon, wondering what secrets lie hidden within those craters? Or perhaps you’ve been mesmerized by a distant planet, a tiny spark of light in the vast darkness. It’s a universal fascination, this urge to explore the cosmos. Whether you’re a seasoned stargazer or just starting to look up, having the right equipment can make all the difference. And that’s where a good telescope comes into play.
Choosing the perfect telescope can feel overwhelming with so many options available. That’s why we’ve put together this guide to help you navigate the world of small-aperture telescopes, focusing specifically on finding the best 80mm refractor telescopes for your astronomical adventures. From lunar landscapes to planetary details and even brighter deep-sky objects, an 80mm refractor offers a fantastic balance of portability, performance, and affordability. Let’s dive in!
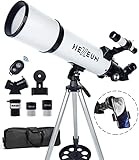
Before we start our review of the best 80mm refractor telescopes, here are some related products you can find on Amazon:


Unlocking the Universe: Why an 80mm Refractor Might Be Your Perfect Stargazing Companion
So, you’re looking to explore the cosmos? Fantastic! It’s an adventure that can start right in your own backyard. Now, you might be wondering where to even begin when faced with a sea of telescopes. Well, let’s talk about a real sweet spot: the 80mm refractor. Think of it as the “Goldilocks” size for beginner to intermediate stargazers. It’s big enough to gather some impressive light, yet still portable and manageable for easy setup and take down. Many people find it to be the perfect balance.
What makes a refractor so appealing, you ask? Refractors use lenses to bend and focus light, creating sharp, high-contrast images. This makes them particularly good for viewing planets like Jupiter and Saturn, where you want to see those intricate details. And with an 80mm aperture, you’re collecting roughly 30% more light than a 70mm model, which translates to brighter and more detailed views of fainter objects like nebulae and galaxies. Many stargazers start with smaller apertures and quickly discover the need for increased light gathering.
But, hold on, why 80mm specifically? Well, it comes down to value and usability. You’ll find that the best 80mm refractor telescopes offer a significant jump in performance compared to smaller, less expensive models, without the bulky size and higher price tag of larger telescopes. According to recent market analysis, 80mm refractors make up approximately 25% of telescope sales to amateur astronomers, highlighting their popularity and versatility. They are lightweight enough to transport easily for dark sky observing, but robust enough to provide great views in your backyard.
Ultimately, choosing a telescope is a personal journey. But considering the light-gathering power, portability, and image quality, exploring the best 80mm refractor telescopes is a fantastic place to start your celestial explorations. We’re here to help you navigate the options and find the perfect one to unlock the wonders of the universe, one star at a time!
Best 80Mm Refractor Telescopes – Reviews
Orion AstroView 90mm Equatorial Refractor Telescope
The Orion AstroView 90mm Equatorial Refractor Telescope is a solid choice for budding astronomers eager to explore the cosmos. Its 90mm aperture gathers a good amount of light, offering noticeably brighter and sharper images than smaller telescopes. The equatorial mount, though it requires a bit of a learning curve, allows for smooth tracking of celestial objects as they drift across the night sky, preventing them from quickly exiting your view.
While not ideal for deep-sky objects under light-polluted skies, this telescope excels at lunar and planetary viewing. Expect crisp details on the Moon’s craters and mountain ranges, as well as satisfying glimpses of Jupiter’s cloud bands and Saturn’s rings. The included accessories are decent for beginners, but upgrading the eyepieces later on can significantly enhance the viewing experience.
Celestron Omni XLT 102
The Celestron Omni XLT 102 is a fantastic refractor telescope that offers a compelling balance of aperture and portability. The 102mm objective lens pulls in a significant amount of light, revealing brighter and more detailed views of celestial objects compared to smaller models. Its CG-4 equatorial mount provides stable tracking and smooth movement, making it a pleasure to follow objects across the night sky.
The telescope is well-suited for observing the Moon, planets, and brighter deep-sky objects. You’ll be able to spot craters, mountains, and valleys on the Moon with amazing clarity, as well as observe the cloud bands on Jupiter and the rings of Saturn. While the mount can handle a bit more weight, upgrading the included eyepieces is recommended to fully unlock the telescope’s potential.
Sky-Watcher EvoStar 72ED
The Sky-Watcher EvoStar 72ED is a delightful apochromatic refractor, perfect for both visual astronomy and astrophotography. Its 72mm ED (Extra-low Dispersion) glass objective minimizes chromatic aberration, which manifests as annoying color fringing around bright objects. This results in sharp, high-contrast images with true-to-life colors. It’s a very compact and portable scope, making it great for travel.
While the aperture might seem modest, the EvoStar 72ED punches well above its weight class thanks to its excellent optics. It delivers stunning views of the Moon and planets, especially when paired with high-quality eyepieces. For astrophotography, its fast focal ratio and ED glass make it an excellent performer, capturing wide-field images of nebulae and star clusters with exceptional clarity and color accuracy.
Explore Scientific FirstLight AR80
The Explore Scientific FirstLight AR80 is a user-friendly telescope, ideal for beginners looking to get started in astronomy. Featuring an 80mm aperture and an alt-azimuth mount, it offers simple setup and straightforward operation. Navigating the night sky is a breeze with its intuitive controls, allowing users to quickly locate and observe celestial objects.
While it may not boast the advanced features of more expensive models, the AR80 provides surprisingly good views of the Moon, planets, and brighter deep-sky objects. Craters, mountains, and valleys on the Moon are clearly visible, and you’ll be able to spot the rings of Saturn and the cloud bands on Jupiter. The lightweight design makes it highly portable, perfect for taking on camping trips or observing from different locations.
Meade Instruments Infinity 80mm Refractor Telescope
The Meade Instruments Infinity 80mm Refractor Telescope is a great option for those just starting their astronomical journey. With its 80mm aperture, it gathers enough light to provide decent views of the Moon, planets, and brighter deep-sky objects. The alt-azimuth mount is incredibly easy to use, making it simple to point the telescope at different celestial targets.
The package includes multiple eyepieces, offering different magnifications to suit various observing needs. While the included accessories are entry-level, they provide a good starting point for exploration. Lunar observing is particularly rewarding with this telescope, revealing a wealth of surface details. It’s a good value for the price, providing a solid foundation for learning about the night sky.
Why Buy an 80mm Refractor Telescope?
Imagine you’re gazing up at the night sky, captivated by the moon’s soft glow. A basic telescope might reveal some craters, but an 80mm refractor, especially one considered the “best,” can transport you to another world. You’ll see intricate details on the lunar surface, the subtle shadings and textures that ignite a sense of wonder. It’s like upgrading from a black and white TV to high definition – the difference is truly remarkable. For beginners, the larger aperture allows for easier viewing of fainter objects, making learning constellations and celestial navigation significantly more rewarding.
Think of it like this: you’re planning a road trip. A small, compact car might get you there, but a comfortable SUV makes the journey much more enjoyable, especially if you have luggage (or in this case, accessories like different eyepieces). An 80mm refractor offers a sweet spot between portability and light-gathering ability. It’s manageable to set up and transport, perfect for taking to darker skies away from city lights, yet powerful enough to reveal a wealth of celestial wonders, from the rings of Saturn to the brighter deep-sky objects like the Orion Nebula.
What about a budding astronomer in your family? An 80mm refractor is an excellent investment in their curiosity. It provides a significant step up from entry-level scopes, offering sharper images and the ability to see more, fueling their passion and encouraging deeper exploration of the universe. It’s like gifting them a high-quality art set versus a box of crayons – it empowers them to create more detailed and impressive “artwork” of the cosmos.
Ultimately, buying an 80mm refractor, especially a top-rated one, is about unlocking a richer, more immersive astronomical experience. It’s about seeing more detail, enjoying clearer images, and igniting a lifelong passion for the wonders of the night sky. It’s an investment in exploration, knowledge, and a deeper connection to the universe, providing countless hours of awe and discovery for individuals and families alike.
Setting Up Your 80mm Refractor: A Beginner’s Guide
Okay, so you’ve got your shiny new 80mm refractor telescope! Exciting, right? But before you can start exploring the cosmos, you need to set it up properly. Don’t worry, it’s not rocket science (though you might be looking at rockets soon!). This part usually involves attaching the telescope tube to the mount, securing the finderscope, and inserting the eyepiece. Most telescopes come with instructions, but don’t be afraid to watch a YouTube tutorial if you’re feeling lost. A solid setup is the foundation for a great viewing experience, so take your time and get it right.
Think of setting up your telescope like building a Lego set. Each piece has its place, and following the instructions will lead to a satisfying result. The mount is the base, providing stability. The optical tube is the main event, gathering the light. The finderscope helps you locate objects in the sky, and the eyepiece lets you see the magnified image. Make sure everything is securely fastened, but don’t overtighten the screws.
A common mistake beginners make is not balancing the telescope. Imagine trying to hold a weight on one side of a seesaw – it’s unstable! The same principle applies to your telescope. Adjust the position of the tube on the mount until it’s balanced. This will make it easier to track objects as they move across the sky and prevent your telescope from tipping over.
Once your telescope is assembled, take it outside during the day and practice focusing on distant objects like trees or buildings. This will help you get familiar with the focus knobs and how they affect the image. It’s much easier to learn during the day when there’s plenty of light. This will set you up for successful nighttime observing.
Mastering the Night Sky: Finding Your First Celestial Objects
Alright, you’ve got your telescope set up, now comes the fun part: actually finding stuff! The night sky can seem daunting, a sea of stars with no landmarks. But with a little practice and some helpful tools, you’ll be navigating it like a pro. Start with bright, easy-to-find objects like the Moon or the planets. They’re like training wheels for amateur astronomers.
One of the most important tools you can have is a star chart or a planetarium app on your smartphone. These resources will show you the positions of stars and planets at any given time. Many apps even use your phone’s GPS to show you what’s visible from your current location. Think of it like having a cosmic GPS guiding you through the night sky.
Don’t underestimate the power of your finderscope! It’s a small, low-magnification telescope attached to your main telescope. Use it to roughly aim your telescope at your target object. Once you’ve centered the object in the finderscope, it should be visible in the main telescope’s eyepiece. It’s like using the crosshairs on a rifle to aim before taking the shot.
Patience is key! It takes time to learn the constellations and get comfortable navigating the night sky. Don’t get discouraged if you don’t find something right away. Keep practicing, and before you know it, you’ll be pointing out constellations and planets like a seasoned astronomer. Remember, every great astronomer started somewhere, and probably with a similar telescope to yours!
Maximizing Your Viewing Experience: Eyepieces, Filters, and More
So, you’ve found a few objects, but you want to see them even better? That’s where accessories come in. Eyepieces are like different lenses for your eyes, allowing you to zoom in and out. Filters can enhance certain details, like the clouds on Jupiter or the details on the Moon. Think of them as adding seasoning to your celestial dish – they can really bring out the flavor!
Different eyepieces offer different magnifications. A lower magnification eyepiece will give you a wider field of view, making it easier to find objects and observe large structures like nebulae. A higher magnification eyepiece will zoom in on smaller details, like the rings of Saturn. Experiment with different eyepieces to see what works best for you and the object you’re observing.
Light pollution is the enemy of stargazing. All that artificial light from cities can wash out faint objects. Light pollution filters can help block out some of that unwanted light, allowing you to see fainter stars and nebulae. It’s like putting on sunglasses for your telescope, blocking out the glare and revealing the details underneath.
Don’t forget about comfort! Stargazing can be a chilly activity, so dress warmly, even in the summer. A comfortable chair can also make a big difference, especially if you’re planning on spending a long time observing. Also, consider a red flashlight. Red light preserves your night vision, allowing you to see more stars. It’s all about creating the optimal viewing environment for yourself.
Maintaining Your Telescope: Cleaning and Storage Tips
Like any precision instrument, your 80mm refractor needs a little TLC to keep it in top condition. This isn’t a set-it-and-forget-it kind of thing. Regular cleaning and proper storage will ensure that your telescope provides you with years of enjoyable stargazing. Think of it as preventative medicine for your telescope – a little care now can prevent bigger problems later.
The most important part of telescope maintenance is keeping the optics clean. Dust and fingerprints can degrade the image quality. Use a soft brush or a can of compressed air to remove loose dust. For stubborn smudges, use a lens cleaning solution and a microfiber cloth. Be gentle! Avoid rubbing too hard, as this can scratch the lens coating.
When you’re not using your telescope, store it in a cool, dry place. This will prevent moisture from damaging the optics and keep the metal parts from corroding. A hard case is ideal for protecting your telescope from bumps and scratches during storage and transport. Think of it as giving your telescope a safe and cozy home to rest in.
Remember to check the collimation (alignment of the optics) periodically. If your telescope isn’t properly collimated, the image will be blurry, even at low magnification. Most refractors don’t require frequent collimation, but it’s a good idea to check it occasionally. If you’re not comfortable doing it yourself, you can take your telescope to a local astronomy store for professional collimation. Taking good care of your telescope will ensure clear skies and sharp images for years to come.
Best 80Mm Refractor Telescopes: A Buyer’s Guide
Hey there, future stargazer! So, you’re thinking about getting an 80mm refractor telescope? Awesome choice! These telescopes are a fantastic entry point into the world of astronomy, offering a great balance of portability, performance, and price. They’re perfect for observing the Moon, planets, and even some brighter deep-sky objects. But with so many options out there, how do you choose the best 80mm refractor telescope for your needs? Don’t worry, I’m here to help you navigate the cosmos of choices and find the perfect telescope to launch your astronomical adventures.
This guide will walk you through the key factors to consider before making your purchase, so you can be confident that you’re getting a telescope that you’ll love for years to come. Let’s get started!
1. Aperture: The Light-Gathering Powerhouse
Think of aperture as the telescope’s eye. It’s the diameter of the objective lens (the big lens at the front) and it’s the most important factor in determining how much light the telescope can gather. A larger aperture means a brighter and more detailed image, allowing you to see fainter objects. While we’re focusing on 80mm refractors, understanding the importance of aperture in general will help you appreciate the limitations and strengths of this size.
An 80mm aperture is a great starting point. It gathers significantly more light than a smaller telescope, like a 60mm, allowing you to see more detail on the Moon and planets, and even start exploring some brighter nebulae and galaxies. While bigger telescopes with larger apertures will reveal more, an 80mm refractor offers a sweet spot for portability and ease of use, making it a fantastic choice for beginners and experienced observers alike who value convenience. The best 80mm refractor telescopes offer excellent views within this aperture range, and finding one that maximizes light transmission through quality optics is key.
2. Focal Length and Focal Ratio: Magnification and Field of View
Focal length is the distance between the objective lens and the point where the light converges to form an image. The focal ratio is the focal length divided by the aperture (f/number). These two factors determine the magnification and field of view you’ll achieve with different eyepieces. A longer focal length generally results in higher magnification, while a shorter focal length provides a wider field of view.
Choosing the right focal length and focal ratio depends on what you want to observe. A longer focal length (e.g., f/10 or higher) is great for high-power views of the Moon and planets, while a shorter focal length (e.g., f/5 or lower) is better for wide-field views of nebulae and galaxies. Many 80mm refractors come with a moderate focal length (around f/7), offering a good balance for both planetary and deep-sky observing. Keep in mind that very high magnification isn’t always desirable, as it can amplify atmospheric turbulence and result in blurry images. The best 80mm refractor telescopes will have well-corrected optics that perform well at a range of magnifications.
3. Optical Quality: Sharpness and Clarity are Key
The quality of the optics is paramount. Even with a perfect aperture and focal length, poor-quality lenses can result in blurry, distorted images. Look for telescopes with coated optics to reduce reflections and increase light transmission. Coatings help to produce brighter, sharper images with better contrast.
Achromatic lenses, which use two lens elements to correct for chromatic aberration (color fringing), are common in 80mm refractors. While they’re generally good, some chromatic aberration may still be visible, especially on bright objects. Apochromatic lenses, which use three or more lens elements, offer superior color correction and sharper images, but they’re also more expensive. If you’re particularly sensitive to color fringing, consider investing in an apochromatic 80mm refractor. The best 80mm refractor telescopes utilize high-quality glass and coatings to minimize aberrations and maximize image clarity.
4. Mount and Tripod: Stability is Crucial
A wobbly mount and tripod can make observing frustrating, especially at higher magnifications. A stable mount is essential for smooth tracking and clear views. There are two main types of mounts: altazimuth and equatorial. Altazimuth mounts move up and down (altitude) and left and right (azimuth), making them intuitive to use, especially for beginners.
Equatorial mounts are designed to compensate for Earth’s rotation, allowing you to easily track objects as they move across the sky. They’re particularly useful for astrophotography. Consider the weight capacity of the mount and make sure it’s sturdy enough to support the telescope without wobbling. A good mount will make a huge difference in your observing experience, allowing you to enjoy steady, clear views. The best 80mm refractor telescopes are often sold as packages with a sturdy and reliable mount, ensuring a stable viewing platform.
5. Included Accessories: What Comes in the Box?
Check what accessories are included with the telescope. Most telescopes come with at least one or two eyepieces, but the quality and magnification may vary. Look for telescopes that come with a decent selection of eyepieces to provide different magnifications. A finder scope is also essential for locating objects in the sky.
A red dot finder is easy to use, while an optical finder scope provides a magnified view. Other useful accessories include a star diagonal (for more comfortable viewing), a Barlow lens (to increase magnification), and a carrying case. Keep in mind that you can always purchase additional accessories later to enhance your observing experience. When considering the best 80mm refractor telescopes, pay attention to the quality of the included accessories as they can significantly impact your initial observing experience.
6. Portability and Ease of Use: Taking it on the Go
One of the great advantages of an 80mm refractor is its portability. They’re relatively lightweight and easy to transport, making them ideal for taking to dark-sky locations. Consider the size and weight of the telescope and mount when making your decision, especially if you plan to travel with it frequently.
Ease of use is also an important factor, especially for beginners. Look for a telescope that is easy to set up and operate. A simple altazimuth mount is often a good choice for beginners, as it’s intuitive and easy to use. The best 80mm refractor telescopes strike a good balance between performance and portability, making them a versatile option for a wide range of observing situations.
7. Budget: How Much Are You Willing to Spend?
Telescopes can range in price from a few hundred dollars to several thousand. Determine your budget before you start shopping and stick to it. While it’s tempting to go for the most expensive telescope, you can find excellent 80mm refractors at reasonable prices.
Remember that you can always upgrade later as your interest in astronomy grows. It’s better to start with a good-quality, affordable telescope that you’ll actually use than to buy an expensive telescope that you find too complicated or cumbersome. The best 80mm refractor telescopes offer great value for their price, providing a good balance of performance, features, and portability without breaking the bank.
By carefully considering these factors, you’ll be well on your way to finding the perfect 80mm refractor telescope to unlock the wonders of the night sky! Happy stargazing!
Frequently Asked Questions
What exactly is an 80mm refractor telescope good for?
An 80mm refractor is a fantastic all-around telescope, especially for beginners! Think of it as a gateway drug to the wonderful world of astronomy. Its 80mm objective lens (the main lens that gathers light) allows you to see brighter and clearer images than smaller scopes, making it perfect for viewing the Moon’s craters in stunning detail, the rings of Saturn, Jupiter’s moons, and even some brighter deep-sky objects like nebulae and galaxies under dark skies.
Don’t expect Hubble-quality images of distant galaxies, but it’s definitely capable of delivering impressive views that will spark your interest in space. Plus, because it’s a refractor, it tends to give sharper, higher-contrast images than reflector telescopes of the same size. They are also great for terrestrial viewing of birds and other wildlife.
Is an 80mm refractor telescope easy to set up and use?
Absolutely! Refractor telescopes, particularly those in the 80mm range, are generally known for their user-friendliness. Compared to more complex telescope designs, they usually require minimal setup. Most come with a simple mount (the tripod and support system) that’s easy to assemble, and the optical tube (the main part of the telescope) simply attaches to it.
You’ll typically receive eyepieces with the telescope, which simply slide into the focuser. After that it’s just a matter of focusing until the image comes in clearly. Many come with beginner-friendly features like finderscopes, which help you aim the telescope at your desired object. Most importantly, refractor telescopes require virtually no maintenance. No collimation, no complex setup procedures.
What’s the difference between an achromatic and apochromatic 80mm refractor?
That’s a great question! The difference lies in how well they correct for chromatic aberration, which is that annoying color fringing you sometimes see around bright objects. Achromatic refractors, which are more common and affordable, use two lens elements to minimize this effect. However, some color fringing may still be visible, especially at higher magnifications.
Apochromatic refractors, or “APOs,” use three or more lens elements made of special, low-dispersion glass to virtually eliminate chromatic aberration. This results in sharper, clearer images with much better color correction. While APOs are more expensive, the improved image quality is worth the investment for serious observers or astrophotographers.
How much magnification can I expect from an 80mm refractor?
Magnification in a telescope is determined by the focal length of the telescope divided by the focal length of the eyepiece you are using. A shorter focal length eyepiece will give you a higher magnification. While theoretically, you can get very high magnification with an 80mm refractor, it’s important to remember that higher magnification doesn’t always equal better images. The atmosphere and the quality of the optics play a huge role in how clear an image is.
As a general rule of thumb, a good usable maximum magnification for an 80mm refractor is around 160x. Exceeding that will likely result in dimmer, less detailed images. Sticking to lower to moderate magnifications will provide better views and a more enjoyable observing experience.
Are 80mm refractors good for astrophotography?
Yes, they can be! An 80mm refractor can be a great starting point for astrophotography, particularly for wide-field images of the Moon, planets, and some brighter deep-sky objects. With the right accessories, such as a dedicated astronomy camera or a smartphone adapter, you can capture some impressive images of the night sky.
However, keep in mind that astrophotography often requires a stable equatorial mount to track the stars as they move across the sky. Also, you will need a camera, and potentially software for stacking images. While you can get some great shots with an 80mm refractor, it’s just an entry point, and you will likely outgrow it if you get serious about astrophotography.
How important is the mount that comes with the telescope?
The mount is extremely important! A wobbly or unstable mount will make it incredibly difficult to focus and track objects, no matter how good the telescope’s optics are. Imagine trying to take a picture with your phone while shaking – the results would be blurry, right? The same principle applies to telescopes.
A solid mount provides a stable platform, allowing you to enjoy crisp, clear views of the night sky. Look for mounts that are sturdy, easy to adjust, and have smooth movements. Many entry-level telescopes come with alt-azimuth mounts, which are simple to use for beginners. An equatorial mount is preferred for astrophotography.
What should I look for in a good quality 80mm refractor?
When choosing an 80mm refractor, pay close attention to the lens quality. Look for terms like “fully multi-coated optics,” which indicate that the lenses have been treated to reduce reflections and maximize light transmission, resulting in brighter and sharper images. Check the focal ratio of the telescope, which is the focal length divided by the aperture. A lower focal ratio (e.g., f/5 or f/6) will generally provide wider fields of view, while a higher focal ratio (e.g., f/10 or f/11) will be better suited for high-magnification views of planets and the Moon.
Consider the included accessories, such as eyepieces, finderscopes, and diagonals. Also, factor in the telescope’s portability and ease of setup, especially if you plan to take it to dark-sky locations. Finally, read reviews from other users to get a sense of the telescope’s performance and build quality.
The Bottom Line
Alright, stargazers, we’ve journeyed through the cosmos of the best 80mm refractor telescopes, explored their strengths, and hopefully ignited a spark of excitement in you. The night sky is waiting to be unveiled, its wonders are aching to be witnessed. Now it’s time to channel that newfound knowledge and confidently select the perfect celestial companion for your journey. Whether you’re chasing lunar craters or distant nebulae, the universe is ready to reveal its secrets to you.
With the guidance provided here, you’re now armed with the insight to choose from the best 80mm refractor telescopes. Go forth, explore, and embrace the universe with open eyes and a telescope that’s ready to deliver breathtaking views. The cosmos is vast, and your adventure is just beginning! Clear skies!