Remember that time you were cycling, and the wind felt like a brick wall? Your arms ached, your back was screaming, and you felt like you were working harder than everyone else just to maintain the same speed? I’ve been there! I distinctly remember one particularly brutal stretch of road where I was fighting the wind, wishing I could somehow magically morph into a more aerodynamic shape. That’s when I started seriously researching ways to cheat the wind and improve my cycling efficiency. The quest led me down a rabbit hole of aero equipment, and eventually, to exploring the world of aerobars.
If you’re nodding along, feeling that familiar pain of wind resistance and wanting a faster, more comfortable ride, you’re in the right place! We’ve put together a comprehensive guide to help you find the best aerobar bike handlebars for your needs. Whether you’re a seasoned triathlete looking to shave seconds off your time or a recreational cyclist seeking a more efficient and comfortable riding position, we’ll explore the features, benefits, and considerations to help you make an informed decision and unlock your cycling potential.
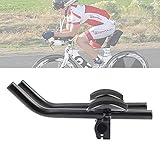
We’ll review the best aerobar bike handlebars shortly, but first, check out some relevant products on Amazon:


Ready to Fly? Finding the Best Aerobar Bike Handlebars
So, you’re thinking about adding aerobars to your bike? That’s fantastic! Whether you’re chasing personal bests in triathlons, tackling long-distance cycling events, or simply looking to squeeze a bit more speed out of your local group ride, aerobars can be a game-changer. They shift your position, allowing you to become more streamlined and reduce wind resistance, ultimately translating into faster times and less fatigue. It’s like adding a turbocharger to your engine, but with your body as the engine! In fact, studies show that using aerobars can reduce aerodynamic drag by as much as 20-30%, which can mean a significant speed increase.
But with so many options on the market, choosing the right set of aerobars can feel a little overwhelming. Do you go for integrated designs? Clip-on models? What about adjustability, comfort, and compatibility with your existing bike? Don’t worry, we’re here to help you navigate the world of aero extensions and make the process a whole lot easier. Think of this as your friendly guide to finding the best aerobar bike handlebars for your specific needs and riding style.
One of the first things to consider is how you plan to use them. Are you a dedicated triathlete looking for every last second advantage? Or are you primarily a road cyclist who wants the option to tuck into a more aero position on longer solo rides? Your answer to this question will greatly influence the type of aerobar that’s best suited for you. We’ll dive into the different types, from simple clip-on bars that offer versatility, to more specialized integrated systems designed for maximum aerodynamic efficiency.
We’ll break down the key features to look for, discuss the pros and cons of different materials, and highlight some of the top-rated options currently available. By the end of this article, you’ll have a solid understanding of what makes a great aerobar setup and be well-equipped to choose the best aerobar bike handlebars to help you achieve your cycling goals. So, buckle up (or rather, tuck in!), and let’s get started!
The Best Aerobar Bike Handlebars
Profile Design Sonic Ergo 35a Aerobar
The Profile Design Sonic Ergo 35a is a fantastic choice for cyclists looking to dip their toes into the world of aerobars without breaking the bank. These bars offer a great balance of comfort, adjustability, and aerodynamics. The Ergo armrests are particularly noteworthy, providing excellent support and reducing pressure points during long rides. Installation is straightforward, and the overall build quality is solid, making these bars a reliable addition to any road bike.
While not the lightest option on the market, the Sonic Ergo 35a provides exceptional value for the price. The adjustability of the armrests and extensions allows for a personalized fit, catering to a wide range of rider preferences. Whether you’re training for a triathlon or simply seeking a more comfortable and aerodynamic position on the road, these aerobars are a worthwhile investment.
Vision Metron TFA Aerobar
The Vision Metron TFA is a top-tier aerobar designed for serious athletes seeking every possible advantage. These bars boast a sleek, aerodynamic profile and lightweight carbon construction, resulting in noticeable speed gains. The integrated design minimizes drag, while the adjustability options allow for fine-tuning to achieve the perfect aerodynamic position. This premium aerobar will transform your bike.
Beyond its performance benefits, the Vision Metron TFA exudes quality and craftsmanship. The carbon layup is expertly executed, and the attention to detail is evident in every aspect of the design. While the price point reflects its high-end status, the Metron TFA is a worthwhile investment for cyclists who demand the best and are committed to maximizing their performance.
Zipp Vuka Aero Integrated Carbon Bar
The Zipp Vuka Aero is more than just an aerobar; it’s an entire cockpit system engineered for maximum speed and integration. The one-piece carbon construction creates a stiff and aerodynamic platform, while the ergonomic design promotes comfort during long hours in the aero position. Internal cable routing keeps things clean and further reduces drag, making this bar a true speed weapon.
Installation of the Zipp Vuka Aero requires patience and expertise due to its integrated nature, but the end result is a seamless and visually stunning cockpit. The adjustability options allow for dialing in the perfect fit, and the overall performance is unmatched. For cyclists seeking the ultimate in aerodynamics and integration, the Zipp Vuka Aero is the pinnacle of aerobar technology.
Profile Design T4+ Carbon Aerobar
The Profile Design T4+ Carbon Aerobar offers a superb blend of performance, comfort, and value. Featuring a lightweight carbon base bar and adjustable extensions, these bars provide a comfortable and aerodynamic position without sacrificing versatility. The F-35 armrests are plush and supportive, making long rides in the aero position much more enjoyable.
The T4+ Carbon strikes an impressive balance between weight, stiffness, and compliance, resulting in a responsive and comfortable ride. The adjustability of the extensions and armrests allows for a customized fit, while the carbon construction helps to dampen road vibrations. Whether you’re a seasoned triathlete or a recreational cyclist looking to improve your speed, the Profile Design T4+ Carbon is an excellent choice.
3T Revo Ltd Aerobar
The 3T Revo Ltd aerobar distinguishes itself with its unique design and focus on real-world aerodynamics. Unlike traditional aerobars, the Revo places the base bar grips on the leading edge, which 3T claims reduces turbulence and improves handling. The carbon fiber construction ensures a lightweight and stiff platform for efficient power transfer.
Beyond its unconventional design, the 3T Revo Ltd offers excellent adjustability and comfort. The armrests are well-padded and provide ample support, while the extensions can be easily adjusted to find the optimal riding position. The Revo Ltd is a bold and innovative choice for cyclists seeking a unique aerodynamic solution and improved handling in the aero position.
Why Invest in Aerobar Bike Handlebars?
Imagine yourself on a long, open road, battling the wind and fatigue. Your body aches, your neck is stiff, and you’re fighting to maintain a decent speed. Now, picture yourself in the same scenario, but this time, you’re comfortably tucked into an aerodynamic position on your bike, your forearms resting on supportive pads, the wind whipping past you. That’s the power of aerobar bike handlebars! They offer a revolutionary change to your riding experience, transforming long, grueling rides into more efficient and enjoyable adventures.
Beyond just comfort, aerobars drastically improve your aerodynamics. By allowing you to assume a more streamlined posture, they significantly reduce wind resistance, enabling you to travel faster with the same amount of effort. Think of it like this: you’re essentially cheating the wind! This advantage is particularly noticeable on flat stretches and rolling hills, where you can maintain higher speeds with less strain. Investing in the best aerobar bike handlebars is like unlocking a hidden gear in your cycling performance.
Perhaps you’re training for a triathlon or a long-distance cycling event. Every second counts! Aerobars become an indispensable tool, helping you conserve energy and shave precious time off your personal best. Even if you’re not a competitive athlete, the benefits extend to recreational riders. A more comfortable and efficient ride means you can go further, explore new routes, and simply enjoy the scenery without feeling completely drained at the end of the day.
So, ditch the discomfort and embrace the speed and efficiency that aerobar bike handlebars offer. The best aerobar bike handlebars aren’t just an accessory; they’re an investment in your cycling enjoyment, performance, and overall riding experience. They will allow you to take your cycling to the next level, transforming your rides from strenuous struggles into smooth, exhilarating adventures.
Aerobar Handlebar Materials: Decoding the Durability
Let’s talk materials, because let’s face it, your aerobar handlebars are going to take a beating. You’re leaning on them, pushing off them during climbs, and trusting them to keep you stable at high speeds. The most common materials you’ll find are aluminum alloy and carbon fiber. Aluminum is a fantastic option if you’re on a budget or new to the sport. It’s strong, durable, and can handle a lot of stress without breaking the bank. Think of it like your trusty old workhorse – reliable and ready for anything.
Now, carbon fiber is the flashy sports car of aerobar materials. It’s incredibly lightweight, which means you’ll save energy and improve your overall speed. It also offers superior vibration damping, making those long rides a whole lot more comfortable. Imagine cruising over chip seal without feeling every bump. However, carbon fiber is more expensive and can be more susceptible to damage from impacts. Think of it as an investment – a worthwhile one if you’re serious about performance.
Consider your riding style and budget when choosing a material. If you’re a casual rider doing shorter distances, aluminum is a great choice. But if you’re racing, tackling Ironman distances, or just want the best possible performance, carbon fiber is worth the splurge. Remember to always inspect your handlebars regularly, regardless of the material, for any signs of damage.
Beyond aluminum and carbon, you might encounter titanium in some high-end options. Titanium offers a great balance of strength, weight, and durability, but it’s typically the most expensive option. Ultimately, the best material for you depends on your individual needs and priorities. Don’t be afraid to do your research and compare different options before making a decision.
Adjustability is Key: Finding Your Perfect Fit
One size definitely does NOT fit all when it comes to aerobar handlebars. You need to be able to adjust the height, width, and reach to find the perfect fit for your body and riding style. Imagine trying to run a marathon in shoes that are too small – not fun, right? The same principle applies to your aerobars. Poor fit can lead to discomfort, fatigue, and even injuries.
Think about how your arms naturally rest when you’re in an aero position. Are your shoulders hunched up? Are your wrists bent at an awkward angle? These are signs that your aerobars need adjusting. Many aerobars offer stack height adjustment, allowing you to raise or lower the armrests to find the most comfortable position.
Width adjustment is also crucial. You want your arms to be close enough together to be aerodynamic, but not so close that you feel cramped. Look for aerobars with adjustable armrest width. Reach adjustment allows you to fine-tune the distance between your saddle and your armrests. Experiment with different positions to find what feels most natural and sustainable.
Take the time to experiment with different adjustments until you find your “sweet spot.” This might involve a few rides and some minor tweaks. Consider working with a bike fitter who can help you optimize your position. A professional can analyze your riding style and make recommendations based on your individual needs. A proper bike fit is an investment in your comfort and performance that will pay off in the long run.
Integrating Electronics: GPS Mounts and More
Let’s face it, most of us aren’t just riding to feel the wind in our hair (though that’s definitely a perk!). We rely on GPS devices, heart rate monitors, and other electronics to track our performance and navigate our routes. Aerobar handlebars can be a great place to mount these devices, but you need to consider the integration options. Imagine trying to glance at your GPS screen while simultaneously navigating a busy intersection.
Some aerobars come with integrated GPS mounts, which are designed to seamlessly hold your device in a secure and aerodynamic position. This can be a great option if you want a clean and streamlined look. Other aerobars offer compatibility with third-party mounts, allowing you to choose the mount that best suits your specific device. Think about whether you prefer a mount that sits directly in front of you or one that’s positioned to the side.
Consider the size and weight of your electronics when choosing a mounting option. A bulky GPS device might wobble on a flimsy mount, which can be distracting and even dangerous. Look for mounts that are sturdy and designed to handle the weight of your device. Also, think about how easily you can access your device while riding. You want to be able to glance at the screen without having to take your hands off the aerobars for too long.
Ultimately, the best way to integrate electronics into your aerobar setup is to think about your specific needs and preferences. Do you prioritize aerodynamics, accessibility, or ease of installation? Once you know what you’re looking for, you can choose a mounting option that works perfectly for you. Remember to always prioritize safety when using electronics while riding.
Maintenance and Care: Extending the Life of Your Aerobars
Just like any other part of your bike, your aerobar handlebars require regular maintenance to keep them in top condition. Think of it like taking care of your car – you wouldn’t expect it to run smoothly if you never changed the oil, right? The same principle applies to your aerobars. Neglecting them can lead to premature wear and tear, and even potentially dangerous situations.
Start by regularly cleaning your aerobars with a mild soap and water solution. This will remove dirt, grime, and sweat that can corrode the metal or damage the carbon fiber. Avoid using harsh chemicals or abrasive cleaners, as these can scratch the surface or weaken the material. Imagine using a scouring pad on a delicate piece of furniture – that’s the equivalent of using harsh chemicals on your aerobars.
Inspect your aerobars regularly for any signs of damage, such as cracks, dents, or loose bolts. Pay particular attention to the areas around the clamps and mounting points. If you notice any damage, stop using the aerobars immediately and consult with a qualified bike mechanic. Ignoring a crack in your carbon fiber handlebars is like ignoring a warning light on your car’s dashboard – it could lead to a much bigger problem down the road.
Finally, make sure to properly torque all the bolts on your aerobars according to the manufacturer’s specifications. Over-tightening can damage the bolts or the handlebars themselves, while under-tightening can cause the handlebars to slip or come loose. Invest in a torque wrench and learn how to use it properly. Taking care of your aerobars will not only extend their lifespan but also ensure your safety and enjoyment on the road.
The Ultimate Guide to Finding the Best Aerobar Bike Handlebars
Hey there, fellow cyclist! Ready to slice through the wind and shave some serious time off your next ride or triathlon? Upgrading to aerobar bike handlebars can make a HUGE difference, but with so many options out there, it’s easy to get lost in the jargon and technical specs. That’s where I come in. Think of me as your friendly neighborhood bike expert, here to guide you through the process of choosing the best aerobar bike handlebars for your specific needs.
This isn’t just about buying a fancy piece of equipment; it’s about enhancing your performance, improving your comfort, and ultimately, enjoying your cycling experience even more. So, let’s dive into the key things to consider before you make that purchase, and you’ll be well on your way to a faster, more efficient ride. Let’s get started!
Fit and Adjustability: Making Sure They Feel Like an Extension of You
Alright, first and foremost, let’s talk about fit. There’s no point in having the flashiest, most aerodynamic handlebars if they don’t fit you properly. Think of it like trying to wear shoes that are two sizes too small. You might look the part, but you’ll be miserable and underperform. With aerobar bike handlebars, it’s all about finding something that allows you to maintain a comfortable and sustainable aerodynamic position.
Look for handlebars with a good range of adjustability. Can you adjust the armrests for height and width? Can you slide the extensions forward and backward? These adjustments are crucial for dialing in the perfect fit, so you can maximize your power output while minimizing strain on your back, shoulders, and neck. Some even allow you to tilt the extensions which can be a game changer! Remember, comfort equals speed. The more comfortable you are in your aero position, the longer you can hold it, and the faster you’ll go.
Aerodynamics: Cutting Through the Wind Like a Knife
Obviously, the main reason you’re even considering aerobar bike handlebars is for the aerodynamic advantage. It’s the name of the game! But not all aerobars are created equal when it comes to wind resistance. Some are designed with sleek, airfoil shapes to minimize drag, while others are more basic in their design.
Research different aerobar shapes and materials. Carbon fiber is generally more aerodynamic than aluminum, but it also comes with a higher price tag. Consider what kind of riding you’ll be doing. If you’re primarily focused on time trials or triathlons where every second counts, investing in the most aerodynamic option might be worthwhile. But if you’re just looking to add some aero benefits to your training rides, a less expensive option might suffice. Remember to look for wind tunnel testing data if available, but also consider real-world reviews from other cyclists, as wind tunnel results don’t always perfectly translate to the road.
Material and Weight: Finding the Sweet Spot Between Strength and Speed
The material your aerobar bike handlebars are made from plays a significant role in their weight, stiffness, and overall performance. Carbon fiber and aluminum are the two most common choices, each with its own set of pros and cons.
Carbon fiber is renowned for its lightweight properties and exceptional stiffness, which translates to better power transfer and a more responsive feel. However, it’s also more expensive and can be more susceptible to damage from crashes. Aluminum is a more budget-friendly option that’s still relatively lightweight and very durable. It might not be quite as stiff as carbon fiber, but it can handle a lot of abuse. Consider your budget and riding style when making your decision. If you’re a competitive cyclist looking for every possible advantage, carbon fiber might be the way to go. If you’re more concerned with durability and value, aluminum is a solid choice.
Compatibility: Ensuring a Seamless Integration With Your Bike
Before you get too excited about a particular set of aerobar bike handlebars, make sure they’re actually compatible with your bike. This seems obvious, but it’s a common mistake. The most important thing to check is the diameter of your handlebars. Most road bikes have handlebars with a diameter of 31.8mm, but there are other sizes out there, so it’s crucial to double-check.
You also need to consider the type of stem your bike has and whether the aerobars will be compatible with it. Some aerobars are designed to clamp directly onto the base bar, while others require a specific type of stem. Finally, think about your bike’s cabling. Will the aerobars interfere with your brake or shift cables? Some aerobars have internal cable routing to help keep things clean and aerodynamic, but this can also make installation more complicated. Always check the manufacturer’s specifications and consult with a bike mechanic if you’re unsure about compatibility.
Comfort: Avoiding Numbness and Pain on Long Rides
As I mentioned earlier, comfort is key when it comes to aerobar bike handlebars. If you’re not comfortable in your aero position, you won’t be able to hold it for long, and you won’t reap the benefits of increased aerodynamics. So, what makes a set of aerobars comfortable?
First, consider the shape and padding of the armrests. Are they wide enough to support your forearms comfortably? Are they made from a material that won’t irritate your skin? Second, think about the grip. Are the extensions easy to hold onto? Do they provide enough support for your hands? And lastly, make sure the handlebars are the right width for your shoulders. Aerobars that are too wide or too narrow can cause discomfort and even pain in your shoulders, neck, and back. Remember, try to find a set that lets you feel supported and relaxed, even after hours in the saddle.
Ease of Installation: Minimizing Headaches and Maximizing Riding Time
Let’s be honest, nobody wants to spend hours wrestling with complicated instructions and fiddly bolts when they could be out riding. The ease of installation is a factor often overlooked but it’s important to consider, especially if you’re not a seasoned mechanic.
Look for aerobar bike handlebars that come with clear and concise instructions. Some manufacturers even provide helpful videos to guide you through the process. Consider how the handlebars attach to your base bar. Are they easy to clamp on and adjust? Do they require any special tools? If you’re not comfortable installing the aerobars yourself, it’s always best to take them to a professional bike mechanic. It’s better to pay a little extra for professional installation than to risk damaging your bike or the aerobars themselves. A professional can also help you dial in the fit to ensure you’re getting the most out of your new setup.
Price: Balancing Performance With Your Budget
Finally, let’s talk about price. Aerobar bike handlebars can range from relatively affordable to incredibly expensive. It’s important to set a budget before you start shopping and to stick to it as closely as possible.
Consider what features are most important to you. If you’re a competitive cyclist looking for every possible advantage, you might be willing to spend more on a high-end set of carbon fiber aerobars. But if you’re just looking to add some aero benefits to your training rides, a more affordable option might suffice. Don’t be afraid to shop around and compare prices from different retailers. You can often find great deals online or at your local bike shop. And remember, the most expensive aerobar bike handlebars aren’t always the best. Focus on finding a set that fits well, is comfortable, and meets your specific needs, regardless of the price tag.
Frequently Asked Questions
What exactly *are* aerobars, and why would I want them?
Aerobars, also known as triathlon or time trial bars, are essentially extensions that attach to your existing handlebars. They allow you to adopt a more aerodynamic position by bringing your arms closer together and allowing you to tuck your head lower. This significantly reduces wind resistance, making you faster and more efficient, especially during long rides or races.
Think of it like this: imagine trying to run with a parachute attached to you. Now imagine removing the parachute! That’s the kind of difference aerobars can make. If you’re looking to improve your speed and endurance in cycling, particularly in triathlon or time trial events, aerobars are definitely worth considering. They’re not just for pros either; even casual cyclists can benefit from the increased comfort and efficiency they provide on longer rides.
Are aerobars difficult to install? Do I need special tools?
The installation process for aerobars can vary depending on the specific model you choose and the type of handlebars you already have. Generally, most aerobars come with detailed instructions and require only basic tools like Allen wrenches (hex keys). Some models might require a torque wrench to ensure proper tightening and prevent damage to your carbon fiber handlebars (if you have them).
Don’t worry if you’re not a seasoned mechanic! There are tons of helpful videos online that demonstrate the installation process step-by-step. If you’re still feeling unsure, your local bike shop will happily install them for you for a small fee. It’s always best to err on the side of caution, especially when dealing with components that affect your safety and performance.
Will aerobars fit my current bike? What should I look for in terms of compatibility?
Most aerobars are designed to be compatible with a wide range of road bikes, but it’s always a good idea to double-check before making a purchase. The most important factor to consider is the diameter of your handlebars. Aerobars typically clamp onto the handlebar, and they come in different sizes to fit various diameters. Measure your handlebar diameter where the aerobars will be mounted, and make sure the aerobars you choose are compatible.
Also, think about how much space you have on your handlebars for mounting. If you have a lot of accessories like a GPS, lights, or a bell, you might need to reposition them or choose aerobars that have a more compact design. Don’t hesitate to consult the manufacturer’s website or ask a bike shop professional for advice on compatibility. It’s far better to be safe than sorry!
How do I get used to riding with aerobars? It seems a little scary!
It’s perfectly normal to feel a bit apprehensive about riding with aerobars for the first time! The key is to start slowly and gradually get accustomed to the new position. Begin by practicing in a safe, traffic-free area like a park or bike path. Focus on maintaining your balance and getting comfortable with steering while in the aero position.
Avoid using aerobars in situations where you need quick access to your brakes, like in heavy traffic or on steep descents. As you gain confidence, you can gradually incorporate them into your regular rides. Remember, practice makes perfect! With a little patience and perseverance, you’ll be cruising in the aero position in no time.
What’s the difference between clip-on aerobars and integrated aerobars? Which one is right for me?
Clip-on aerobars are the most common type, and they attach to your existing handlebars using clamps. They’re a great option if you want to add aerobars to your current bike without making any major modifications. Integrated aerobars, on the other hand, are designed as part of a complete handlebar system. They offer a cleaner, more aerodynamic look but typically require replacing your entire handlebar setup.
The best choice for you depends on your budget, goals, and the type of riding you do. If you’re just starting out with aerobars or want a more budget-friendly option, clip-ons are an excellent choice. If you’re a serious triathlete or time trialist and want the ultimate in aerodynamics and performance, integrated aerobars might be worth the investment.
What are the key features I should look for when choosing aerobars?
When selecting aerobars, consider a few key features. First, adjustability is crucial. Look for models that allow you to adjust the length, width, and height of the armrests to find the most comfortable and aerodynamic position for your body. Comfort is also paramount, especially for long rides. Padded armrests and comfortable extensions can make a big difference.
Also, consider the material of the aerobars. Carbon fiber is lightweight and strong, but it’s also more expensive. Aluminum is a more budget-friendly option that still offers good performance. Finally, pay attention to the overall design and aesthetics. Choose aerobars that complement the look of your bike and that you’ll be happy to ride with for years to come.
How much do aerobars typically cost?
The price of aerobars can vary greatly depending on the brand, materials, and features. Entry-level clip-on aerobars can start as low as $50-$100, while high-end carbon fiber models can cost several hundred dollars or more. Integrated aerobars are generally more expensive than clip-ons, often costing upwards of $500.
Remember that price isn’t everything! While it’s tempting to go for the cheapest option, it’s often worth investing in a higher-quality set of aerobars that will provide better comfort, adjustability, and durability. Consider your budget, your riding goals, and read reviews from other cyclists to make an informed decision. You don’t have to break the bank to get a good set of aerobars that will enhance your cycling experience.
Final Words
So, there you have it! We’ve taken a deep dive into the world of aerobar bike handlebars, exploring the top contenders and equipping you with the knowledge to choose the perfect fit for your needs. Whether you’re chasing personal bests, gearing up for a triathlon, or simply seeking more comfort and efficiency on long rides, remember that the right aerobars can truly transform your cycling experience. Think about your riding style, your budget, and the features that resonate most with you.
Now, it’s time to put that knowledge to work! Don’t be afraid to experiment and find the best aerobar bike handlebars that unlock your full potential on the road. The finish line is within reach, and with the right gear, you’ll be crossing it faster and feeling stronger than ever before. Get out there, embrace the challenge, and enjoy the ride!