Remember that sinking feeling when your car refuses to start? It happened to me just last week. I was rushing to pick up my daughter from soccer practice when click, click, click – nothing. Dead battery. Panic started to set in, but thankfully, a kind neighbor had jumper cables. And that got me thinking: everyone should have a set of these lifesavers in their car. But you don’t need to break the bank! Finding the best battery jumper cables under $20 is totally possible, and can save you from a ton of stress and potentially expensive towing fees.
That’s why we put together this guide. We’ve scoured the market to find the top contenders that offer reliable performance without emptying your wallet. We’ll walk you through our reviews, highlighting the pros and cons of each set, and share a handy buying guide to help you choose the perfect pair for your needs. Get ready to say goodbye to battery-related anxiety and hello to peace of mind, all while staying within your budget and finding the best battery jumper cables under $20.
We’ll review the best battery jumper cables under $20 shortly, but first, check out some relevant products on Amazon:


Stuck? Don’t Panic: Finding the Best Battery Jumper Cables Under $20
We’ve all been there. That sinking feeling when you turn the key and… nothing. Just a sad little click, or worse, complete silence. Dead battery. It’s inconvenient, embarrassing, and can throw a wrench in your entire day. But before you call a tow truck or flag down a stranger, there’s a simple solution: jumper cables. Having a set of your own is like carrying a little bit of roadside assistance right in your trunk.
Now, you might be thinking, “Jumper cables? Aren’t those expensive?” Not necessarily! You can absolutely find reliable and effective options without breaking the bank. In fact, we’re diving into the world of the best battery jumper cables under $20. It might seem like a tight budget, but it’s totally achievable to find cables that will get you back on the road. According to a recent survey, over 60% of drivers have needed a jump start at some point, so you’re definitely not alone!
Choosing the right jumper cables involves a bit more than just grabbing the cheapest ones you see. You’ll want to consider things like gauge (the thickness of the wire), length, and the quality of the clamps. Thicker gauge cables are generally better for larger vehicles and can transfer more power efficiently. And while longer cables offer more flexibility in positioning the cars, they can also be more prone to voltage drop. Finding the right balance of these factors is key to getting the most bang for your buck.
Our goal here is to guide you through the options and help you find the perfect set of budget-friendly jumper cables. We’ll be looking at various models, comparing their features, and providing you with the information you need to make an informed decision. So, let’s get started and make sure you’re prepared for that inevitable dead battery moment!
Best Battery Jumper Cables Under $20 – Reviews
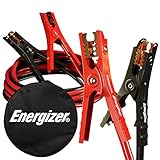
AmazonBasics Jumper Cable – 10 Feet, 10-Gauge
These AmazonBasics cables get the job done without breaking the bank. Ten feet offers enough reach for most jump-start situations, so you won’t have to perfectly position the cars nose-to-nose. The 10-gauge wire is suitable for smaller vehicles like compact cars and motorcycles. Just don’t expect them to start up a truck or SUV with a completely dead battery.
While they’re affordable and convenient, remember you get what you pay for. The clamps are on the smaller side and made of lighter-duty metal, which may make them tricky to attach to some battery terminals. If you are looking for a reliable, budget-friendly option for occasional use on smaller vehicles, these are a great fit. But for tougher jobs, consider an upgrade.
EPAuto Heavy Duty Booster Cable – 12 Feet, 8-Gauge
The EPAuto Heavy Duty Booster Cables provide a bit more oomph compared to cheaper options. The 8-gauge wire means they can handle slightly larger engines and more depleted batteries. The twelve-foot length is also a plus, giving you even more flexibility in positioning the vehicles. Overall, it is a solid step up in performance.
However, the term “heavy duty” might be a bit generous. While better than the AmazonBasics 10-gauge, these aren’t going to compare to professional-grade cables. The clamp quality is decent, but they can still feel a bit flimsy. Consider these a good middle-ground for those who want better performance without spending a fortune.
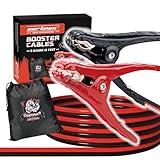
CARTMAN 12 Feet 8 Gauge Booster Cable
The CARTMAN 8 Gauge Booster Cables is another solid choice in the budget-friendly category. The 12-foot length gives you the reach you need in various jump-starting scenarios. The carrying bag is a nice bonus, helping to keep your trunk organized. It ensures that you always have the tools necessary to jumpstart a vehicle when necessary.
Although the 8-gauge wire should be sufficient for most standard vehicles, bear in mind its limitation. While they’ll likely work for sedans and smaller SUVs, attempting to jump start larger trucks or vehicles with completely drained batteries might be a challenge. Consider this set a reliable, everyday option for most drivers.
TOPDC Jumper Cables 12 Feet 8 Gauge
The TOPDC jumper cables offer a balance between price and performance. The 8-gauge wire is a good compromise for most family cars and small SUVs, and the 12-foot length is convenient. The included carrying case makes for tidy storage in your vehicle’s trunk.
While not the absolute beefiest cables on the market, they’re a noticeable step up from thinner, cheaper options. The clamps offer a decent grip on battery terminals, but the plastic coating isn’t the thickest. For occasional use and jump-starting reasonably sized engines, they’re a reliable choice.
Camco 55023 Heavy-Duty Jumper Cables – 12 Feet, 10-Gauge
The Camco Heavy-Duty Jumper Cables provide a dependable solution for your jump-starting needs. The 10-gauge wire is adequate for jump-starting smaller vehicles and provides a boost when you need it. The 12 feet in length gives you ample reach between vehicles, and its clamps are durable for long-term use.
While considered “heavy-duty,” these are more suited for smaller engines. Users should consider upgrading to thicker gauge cables for larger vehicles or those with high-capacity batteries. The clamps are decent, but may require some maneuvering for secure placement. They are a practical choice for car owners seeking a reliable, entry-level jumper cable.
Why Every Car Owner Needs Jumper Cables Under $20
Imagine this: you’re running late for a crucial meeting, or perhaps you’re parked in a dimly lit lot after a late-night event. You turn the key, and…nothing. Just a disheartening click. Your battery’s dead. In that moment of frustration and panic, wouldn’t you be relieved to know you had a set of jumper cables tucked away in your trunk? For under $20, that peace of mind is easily attainable.
Investing in the best battery jumper cables under $20 is a practical decision that can save you from frustrating situations, costly towing fees, and relying on the unpredictable kindness of strangers. Think of it as a small insurance policy for your car. Having your own set allows you to jumpstart your car quickly and efficiently, getting you back on the road and on with your day.
Plus, let’s be honest, roadside assistance can take a while to arrive, and relying on someone else to jumpstart your car can be awkward or inconvenient. With your own set of jumper cables, you’re self-sufficient and empowered to handle the situation yourself. The best affordable options are often lightweight and compact, making them easy to store in your trunk without taking up much space.
Ultimately, buying battery jumper cables under $20 is a smart investment in your own safety, convenience, and peace of mind. It’s a small price to pay for the assurance that you can handle a dead battery situation quickly and efficiently, allowing you to get back to what matters most. Don’t wait for that dreaded “click” to happen to you – be prepared and equip your car with this essential tool today!
Understanding Cable Gauge and Length
Ever wondered why some jumper cables look thicker than others? That’s all about the cable gauge. Think of it like the size of a pipe carrying water; a thicker pipe (lower gauge number) can carry more water (more current) faster. For jumper cables, a lower gauge means a stronger cable, capable of jump-starting larger vehicles with bigger batteries. If you only need to jump-start a small car, a higher gauge (like 8 or 10) might suffice, but for SUVs or trucks, you’ll want a lower gauge like 4 or 6.
But it’s not just about thickness; length matters too! Imagine trying to jump-start a car parked nose-to-nose with another in a tight parking spot. Shorter cables might not reach, leaving you stranded and frustrated. A longer cable gives you more flexibility in positioning the vehicles, making the jump-starting process smoother and safer.
So, how do you choose the right gauge and length combination? Consider the types of vehicles you might need to jump-start. If you own a small sedan and only foresee needing to jump-start similar cars, a higher gauge and shorter length might work. But if you have a larger vehicle, or often help friends with bigger cars, opt for a lower gauge and a longer length to be prepared for any situation.
Ultimately, finding the sweet spot between gauge and length ensures you have reliable jumper cables that can handle the job without being cumbersome to store. Don’t just grab the cheapest option; consider the potential scenarios you might encounter and choose accordingly.
Safety Features to Look For
Jumping a car battery can be a little nerve-wracking, especially if you’re not a car expert. That’s why safety features on your jumper cables are crucial. Think of them as built-in safeguards to protect you, your car, and the car you’re jump-starting. One common feature is surge protection. This prevents any sudden power spikes from damaging your car’s sensitive electronics. Imagine a scenario where a surge fries your car’s computer – not fun!
Another important safety feature to look for is insulation quality. The clamps and cables should be well-insulated to prevent accidental shocks. Picture yourself wrestling with tangled cables in the rain; you definitely want to be protected from any stray electrical current. Good insulation gives you peace of mind and minimizes the risk of injury.
Beyond the basic insulation, consider cables with polarity protection. Some cables have a feature that prevents you from connecting them incorrectly (positive to negative, and vice-versa). Hooking up the cables wrong can lead to sparks, damage to the batteries, or even worse. Polarity protection makes the process foolproof, even for beginners.
Finally, don’t overlook the clamp design. Look for clamps that are easy to grip and have strong clamping force. Imagine trying to clamp onto a corroded battery terminal with flimsy clamps; it’s a recipe for frustration. Sturdy clamps that make a solid connection are essential for a successful and safe jump-start.
Storage and Portability Considerations
Jumper cables are great to have, but if they’re a tangled mess taking up valuable trunk space, they become more of a nuisance than an asset. Think about where you’ll be storing your cables. Are you limited on trunk space in a compact car, or do you have ample room in an SUV? This will influence the type of storage bag you want.
Look for jumper cables that come with a durable and compact carrying case. A good case keeps the cables organized, prevents tangling, and protects them from dirt and moisture. Imagine trying to untangle a knotted mess of cables on a freezing winter morning – a proper storage bag can save you a lot of time and hassle.
Consider the weight and size of the cables themselves. Some cables are bulky and heavy, making them less convenient to carry around. Lighter, more flexible cables are easier to manage and store, especially if you frequently switch them between vehicles. Think about who will be using the cables; if it’s someone with limited strength or mobility, lighter cables are definitely preferable.
Also, think about the climate you live in. If you experience harsh winters, you might want a case that’s waterproof or at least water-resistant to protect the cables from corrosion. And make sure the case is easy to open and close, even with gloves on. A little forethought about storage and portability can make a big difference in how often you actually use your jumper cables.
Testing and Maintenance Tips
Just like any other car accessory, jumper cables require occasional maintenance to ensure they’re ready when you need them. Think of it as giving them a little TLC to keep them in top working condition. One important step is to regularly inspect the cables and clamps for any signs of damage, such as cracks, frayed wires, or corrosion. Imagine finding a large gash in your cables when you desperately need to jump-start your car; regular inspection can help you spot these issues before they become a problem.
Keep the clamps clean and free of corrosion. Corrosion can impede the flow of electricity and prevent the cables from working effectively. You can use a wire brush or sandpaper to gently remove any corrosion buildup. Picture yourself trying to jump-start a car with corroded clamps; you might get frustrated by a weak connection and multiple failed attempts.
Test the cables periodically to ensure they’re still working properly. You can do this by using a multimeter to check the continuity of the cables. If the multimeter shows a break in the circuit, it means there’s a problem with the cable. Don’t wait until you’re stranded to find out your cables are faulty.
Finally, store the cables properly when not in use. Avoid storing them in direct sunlight or extreme temperatures, as this can damage the insulation. Keep them in their carrying case to protect them from dust, moisture, and other contaminants. A little bit of regular maintenance can help extend the lifespan of your jumper cables and ensure they’re always ready to rescue you (or someone else) from a dead battery.
Finding the Best Battery Jumper Cables Under $20: A Budget-Friendly Guide
Hey there, fellow car owner! Ever been stranded with a dead battery? It’s the worst, right? We’ve all been there. That helpless feeling while you wait for roadside assistance, all the while your schedule crumbling before your eyes. Well, here’s a little secret: you can equip yourself to handle that situation yourself, and on a tight budget! We’re talking about battery jumper cables. And you don’t need to break the bank to get a decent set.
This guide is all about helping you find the best battery jumper cables under $20. We’ll break down the important stuff to look for, so you can choose a set that’s safe, reliable, and gets you back on the road without emptying your wallet. Think of me as your friendly neighborhood car guru, guiding you through the world of affordable jumper cables. Let’s dive in!
Gauge (Thickness is Key!)
Think of gauge like the size of a water pipe. The lower the gauge number, the thicker the cable, and the more power it can carry. For jumper cables, this is super important because you need enough juice to jump-start a car. Generally, for smaller cars, a 10-gauge cable might do the trick in a pinch. But honestly, for most vehicles and to be on the safe side, you should aim for 6-gauge or even 4-gauge if you can find them within your budget. Remember, skimping on gauge can mean a cable that gets hot, doesn’t transfer enough power, or worse, damages your car’s electrical system.
Imagine trying to fill a swimming pool with a garden hose. It’ll take forever, right? That’s like using too thin a cable. A thicker cable is like using a fire hose – much faster and more efficient. So, while you’re searching for the best battery jumper cables under $20, prioritize gauge. It’s the single most important factor in getting your car started quickly and safely. Don’t get fooled by fancy packaging; look at the gauge number!
Cable Length (Reach for Convenience)
Length matters! You want cables long enough to easily connect your car to another vehicle, even if the batteries aren’t perfectly aligned. A good rule of thumb is to aim for at least 12 feet. This gives you some flexibility in positioning the cars. Shorter cables might seem like a good deal, but they can be a real pain if you have to maneuver both cars into awkward positions just to make a connection. And nobody wants to be stuck wrestling with short cables in the rain or snow!
Think about parking situations. Sometimes, you can’t park right next to the car giving you the jump. Maybe there’s a curb, another car, or simply not enough space. Longer cables bridge that gap. While searching for the best battery jumper cables under $20, consider where you usually park. Do you parallel park often? Do you have a smaller car that could easily give a jump to a larger one? That 12-foot minimum is a lifesaver in those situations.
Clamp Quality (Grip and Conductivity)
The clamps are what connect the cables to the battery terminals. They need to be strong, have a good grip, and conduct electricity efficiently. Look for clamps made of copper or copper-coated material. Copper is an excellent conductor. Also, check the spring tension. The clamps should have a firm grip on the terminals, ensuring a solid connection. Weak clamps that slip off easily are frustrating and dangerous.
Imagine trying to hold onto a slippery bar of soap with weak hands. That’s what it’s like using cheap, flimsy clamps. They won’t stay put, and you’ll struggle to get a good connection. Good clamps have teeth or serrated edges to bite into the battery terminal, providing a secure hold. When hunting for the best battery jumper cables under $20, don’t overlook the clamp quality. It’s the point of contact, so it needs to be reliable. Also check to make sure the cable is crimped securely to the clamp.
Insulation (Safety First!)
The insulation around the cables is crucial for safety. It protects you from electric shock and prevents the cables from short-circuiting if they come into contact with the car’s metal frame. Look for cables with thick, durable insulation made of PVC or a similar material. The insulation should be able to withstand extreme temperatures without cracking or melting.
Think about the conditions you might be using the jumper cables in. Hot summer days can melt cheap insulation, and freezing winter temperatures can make it brittle. A good insulation will protect you in all sorts of weather. Make sure the insulation is free of any cuts or abrasions before using the cables. And of course, never use damaged cables. Safety should always be your top priority, so while you look for the best battery jumper cables under $20, don’t compromise on insulation quality. It’s your buffer against electrical hazards.
Polarity Protection (Avoid Costly Mistakes)
Connecting the jumper cables incorrectly (reversing the polarity) can cause serious damage to your car’s electrical system. Some jumper cables come with built-in polarity protection, which prevents you from making this mistake. This is a fantastic feature, especially if you’re not experienced with jump-starting cars. However, polarity protection is rare to find on jumper cables under $20.
Even without built-in protection, there are a few ways to avoid making this mistake. First, always carefully check the polarity markings on the battery terminals (+ for positive, – for negative). Second, most jumper cables have color-coded clamps (red for positive, black for negative). Match the colors to the terminals. Finally, take your time and double-check everything before connecting the cables. When searching for the best battery jumper cables under $20, keep an eye out for this feature but be prepared to manually check.
Portability (Storage Matters)
Jumper cables are only useful if you have them when you need them. That means they need to be easy to store in your car. Look for cables that come with a carrying case or bag. This keeps them organized and prevents them from getting tangled or damaged. A compact carrying case also makes it easier to store the cables in your trunk without taking up too much space.
Imagine rummaging through your trunk in the dark, trying to untangle a mess of cables while it’s raining. Not fun! A carrying case makes everything much easier. You can quickly grab the cables and get to work. Also, a carrying case protects the cables from dirt, moisture, and other debris that can shorten their lifespan. When shopping for the best battery jumper cables under $20, consider the portability factor. It can make a big difference in convenience.
Brand Reputation and Reviews (Do Your Homework)
Even on a tight budget, it’s worth checking the brand reputation and reading online reviews before buying jumper cables. Some brands are known for producing reliable, high-quality products, while others are notorious for selling cheap, unreliable junk. Reading reviews from other car owners can give you valuable insights into the performance and durability of the cables.
Think of it like this: you wouldn’t buy a used car without checking its history, right? Same goes for jumper cables. A little research can save you from buying a set that falls apart after the first use. Look for reviews that mention things like cable quality, clamp strength, ease of use, and overall satisfaction. While finding the best battery jumper cables under $20, consider the wisdom of the crowd. Other people’s experiences can help you make an informed decision. Be wary of brands you’ve never heard of that boast unrealistic claims. A well-established brand, even with slightly fewer features, is often a safer bet.
FAQs
Are jumper cables under $20 really powerful enough to jump-start my car?
Absolutely! While the higher-end, more expensive jumper cables often boast thicker gauges and higher amperage ratings, don’t underestimate the power of a good set of budget-friendly cables. Many of the jumper cables in the under $20 range are perfectly capable of jump-starting a standard car, SUV, or even a light truck, especially if your battery isn’t completely dead and just needs a little boost. They’re designed to provide sufficient power to get you back on the road.
The key is to ensure you connect them properly and allow sufficient time for the charge to transfer. Remember that these budget-friendly options may not be ideal for extremely large vehicles, vehicles with very depleted batteries, or in very cold weather. However, for most everyday situations, they can definitely do the trick!
What gauge of jumper cable should I look for in this price range?
When searching for jumper cables under $20, you’ll typically find options ranging from 8-gauge to 12-gauge. A lower gauge number indicates a thicker cable, which means it can carry more current and offer better performance. For most standard vehicles, a 10-gauge or 8-gauge cable should be sufficient for occasional jump-starts.
If you have a larger vehicle like a truck or SUV, or if you live in a region with extremely cold winters, you might want to prioritize an 8-gauge option if you can find it. Even with a 12-gauge cable, you can still jump-start your car, but it might take a little longer for the charge to transfer. The goal is to find a balance between affordability and the power needed to get your vehicle running smoothly again.
Are shorter jumper cables as effective as longer ones?
While shorter jumper cables might seem less convenient, they can actually be more effective in some ways. Because the electricity travels a shorter distance, there’s less resistance, meaning more of the power gets to your car’s battery. This is especially true with lower-gauge cables, where minimizing resistance becomes even more important.
Of course, you need to consider the practical aspect of positioning your vehicles close enough together. Shorter cables require the cars to be closer, which might not always be possible depending on the parking situation. If you anticipate needing to jump-start your car in tight spaces, longer cables might be a better choice, even if they’re slightly less efficient.
How do I make sure I’m using the jumper cables safely?
Safety is paramount when dealing with car batteries! First, always consult your car’s owner’s manual for specific jump-starting instructions and any safety precautions. Before connecting the cables, ensure both vehicles are turned off and in park (or neutral for manual transmissions) with the parking brakes engaged. Visually inspect the cables for any damage, such as frayed wires or loose connections.
When connecting the cables, follow the correct sequence meticulously to avoid sparks and potential damage to your electrical systems. Typically, you’ll connect the positive (red) clamp to the positive terminal of the dead battery, then the other positive clamp to the positive terminal of the good battery. Next, connect the negative (black) clamp to the negative terminal of the good battery, and finally, connect the remaining negative clamp to a grounded metal part of the car with the dead battery, away from the battery itself. Double-check all connections before starting the good car and attempting to jump-start the other one.
What should I do if the jumper cables spark when I connect them?
A small spark when connecting the final ground clamp is normal, but excessive sparking can indicate a problem. If you notice excessive sparking, immediately disconnect the cables in the reverse order you connected them. Review the connection sequence and ensure you’re connecting to the correct terminals and a suitable grounding point.
Double-check that the clamps are making good contact with the terminals or grounding point and that they are not corroded. If the sparking persists after rechecking everything, it’s best to consult a mechanic or professional to diagnose the issue. Continuing to try jump-starting the car with excessive sparking could potentially damage your car’s electrical system.
How long should I wait after connecting the jumper cables before trying to start the car?
After connecting the jumper cables correctly, allow a few minutes for the good battery to transfer some charge to the dead battery. A general recommendation is to wait between 2 to 5 minutes. This gives the dead battery a small boost, increasing the chances of a successful jump-start.
During this waiting period, you can start the good car and let it idle. This helps to provide a more stable and powerful charge to the dead battery. After the waiting period, try starting the car with the dead battery. If it doesn’t start right away, wait a few more minutes and try again. Avoid cranking the engine for extended periods, as this can overheat the starter motor.
How long will jumper cables under $20 last?
The lifespan of jumper cables under $20 can vary depending on the quality of materials, frequency of use, and how well they are stored and maintained. While they may not last as long as more expensive, heavy-duty cables, they can still provide years of reliable service with proper care.
To extend their lifespan, avoid exposing them to extreme temperatures or direct sunlight for prolonged periods. Store them in a cool, dry place, and keep them neatly coiled to prevent damage to the wires. Regularly inspect the cables and clamps for any signs of wear and tear, such as fraying, cracks, or corrosion. If you notice any damage, replace the cables promptly to ensure safe and effective jump-starting.
The Bottom Line
So, there you have it! You’re now armed with the knowledge to snag some of the best battery jumper cables under $20 that will be your trusty sidekick when your car decides to take an unexpected nap. No more waiting around for a tow truck or relying on the kindness of strangers. You’ve got this!
Don’t let the fear of a dead battery hold you back from your next adventure. Go out there and explore, knowing you’re prepared. Choose the best battery jumper cables under $20 for your needs, toss them in your trunk, and hit the road with confidence. You’re ready to take on anything!