Remember that time you decided to upgrade your car’s stereo, picturing yourself cruising down the highway with crystal-clear sound blasting your favorite tunes? Maybe you even splurged on some top-of-the-line speakers and a fancy new head unit. But then, reality hit during the installation process. A tangled mess of wires, confusing connectors, and a growing sense of dread started to creep in. Suddenly, your dream audio upgrade turned into a frustrating nightmare. It’s a tale we’ve all heard, or even lived, which is why having the right tools and accessories is as vital as the sound equipment you’re installing. This is where we step in to guide you through the world of car audio wiring.
Fear not, fellow music enthusiasts! We understand the struggle, and we’re here to help you navigate the maze of car audio wiring harnesses. In this comprehensive guide, we’ll explore the essential components needed to seamlessly connect your new stereo system, focusing on the best car audio wiring harnesses for stereo. We’ve carefully researched and reviewed the top options on the market, taking into account factors like compatibility, ease of installation, and overall quality. Get ready to transform your car audio experience without the stress and confusion!
We’ll review the best car audio wiring harnesses for stereo shortly, but first, check out some relevant products on Amazon:


Untangling the Wire Jungle: Your Guide to Stereo Bliss
Ever tried upgrading your car stereo only to be met with a tangled mess of wires that looks like a rainbow threw up in your dashboard? Yeah, we’ve all been there. Swapping out your factory stereo for that shiny new model with booming bass and crystal-clear highs should be an exciting experience, not a frustrating one that leaves you wondering if you accidentally joined a support group for automotive electrical engineers. That’s where car audio wiring harnesses come to the rescue, making the installation process significantly smoother and less prone to hair-pulling.
Think of wiring harnesses as translators. Your new stereo speaks a different language (electrically, that is) than your car’s original wiring. The harness acts as the Rosetta Stone, converting the connections so everything plays nicely together. This simple piece of tech saves you from cutting, splicing, and potentially damaging your car’s factory wiring, which is a HUGE win. In fact, improperly wired aftermarket stereos are a leading cause of electrical issues in vehicles after modifications, costing car owners thousands of dollars annually.
Choosing the right harness, however, is key. You wouldn’t wear hiking boots to a black-tie event, right? Similarly, the best car audio wiring harnesses for stereo are designed specifically for your vehicle’s make, model, and year. This ensures a perfect fit and eliminates any guesswork. There are universal options out there, but a vehicle-specific harness is almost always the better choice.
So, whether you’re a seasoned audiophile looking to fine-tune your sound system or a complete newbie just wanting a little more oomph in your daily commute, understanding the role of wiring harnesses is crucial. Consider this your friendly guide to navigating the world of car audio wiring, helping you choose the best car audio wiring harnesses for stereo so you can crank up the tunes and enjoy the ride.
Top 5 Best Car Audio Wiring Harnesses For Stereo
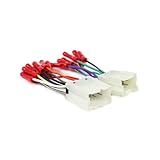
Metra 70-1761 Receiver Wiring Harness
The Metra 70-1761 is a lifesaver when installing a new radio in many Toyota, Lexus, and Scion vehicles. It makes connecting your aftermarket head unit a breeze, eliminating the need to cut or splice into your car’s original wiring. The color-coded wires match industry standards, which simplifies the wiring process and helps prevent frustrating mistakes. This harness is designed to be a direct plug-and-play solution, saving you time and ensuring a clean, professional-looking installation.
This harness is a favorite because it’s so easy to use and generally reliable. It’s a simple, straightforward solution that avoids the mess and potential headaches of manually wiring everything. While it might not be the flashiest product, its functionality and ease of use make it a solid choice for anyone upgrading their car stereo system in a compatible vehicle.
Scosche CR03B Wiring Harness
If you’re swapping out the factory radio in a Chrysler, Dodge, or Jeep, the Scosche CR03B wiring harness is definitely worth considering. It allows you to connect your new stereo without having to cut the factory wires, preserving your vehicle’s original wiring. Color-coded wires make the installation process much smoother, matching aftermarket radio wiring diagrams for easy identification and connection.
The Scosche CR03B simplifies the installation, but it’s always good to double-check the wire colors against your radio’s manual. Some users suggest that the wire gauge could be slightly thicker, but overall, it’s a dependable harness that gets the job done efficiently and effectively. It’s a great option for anyone who wants a quick and clean stereo installation.
Axxess AX-GMCL2 Data Interface
The Axxess AX-GMCL2 Data Interface isn’t just a wiring harness; it’s a smart solution for modern GM vehicles. It not only connects your aftermarket radio, but it also retains important factory features like OnStar, steering wheel controls, and warning chimes. This interface essentially translates the digital signals from your car’s computer system to the analog signals your new radio needs.
For anyone installing a new radio in a GM vehicle with OnStar or steering wheel controls, this interface is a must-have. It allows you to enjoy your new stereo without sacrificing the convenience and safety features you’re used to. While it might require a bit more setup than a basic wiring harness, the benefits of retaining those factory features are well worth the effort.
PAC Radio Replacement Interface RP4-CH11
The PAC RP4-CH11 is a powerful interface specifically designed for Chrysler vehicles. It goes beyond simple wiring by allowing you to retain factory features like steering wheel controls, amplifier turn-on, and even factory navigation integration (if applicable). It handles the complex communication between your car’s computer system and your aftermarket radio.
This interface is a fantastic choice for anyone who wants to upgrade their Chrysler’s stereo system without losing the features they’ve come to rely on. While it may require some programming and configuration, the PAC RP4-CH11 provides a seamless integration experience that makes your new radio feel like it was always meant to be there.
Crux SWRGM-57 Radio Replacement Interface
The Crux SWRGM-57 Radio Replacement Interface offers a comprehensive solution for upgrading the radio in select GM vehicles. It handles the necessary wiring connections, while also retaining important factory features such as steering wheel controls, OnStar, and even the factory amplifier. This interface ensures a smooth transition when installing your new aftermarket receiver.
If you want to maintain the functionality of your GM vehicle’s factory features after installing a new radio, the Crux SWRGM-57 is a strong contender. It streamlines the installation process and integrates seamlessly with your car’s existing systems. Keep in mind that proper programming is crucial for optimal performance, but the result is a well-integrated aftermarket stereo that feels like a factory upgrade.
Why Car Audio Wiring Harnesses Are a Must-Have for Your Stereo Upgrade
Imagine finally upgrading your car’s sound system. You’ve got that shiny new stereo, itching to blast your favorite tunes. But wait, you can’t just plug it in, can you? That’s where a car audio wiring harness comes to the rescue! Think of it as a translator between your car’s existing electrical system and your new stereo. It creates a safe and reliable connection, preventing you from having to cut or splice any of your car’s original wiring. This is especially important in modern cars with complex electrical systems, where tampering with the factory wiring can trigger error codes or even void warranties.
Without a wiring harness, you’re looking at a potentially messy and time-consuming DIY job involving a lot of wire stripping, soldering, and hoping you got the connections right. One wrong move and you could damage your new stereo or even worse, fry your car’s electrical system. A wiring harness takes all the guesswork out of the equation. It’s a plug-and-play solution that allows for a seamless installation, saving you both time and frustration. Plus, it makes it incredibly easy to revert back to your factory stereo if you ever decide to sell the car or just want to go back to the original setup.
Investing in one of the best car audio wiring harnesses for stereo is a small price to pay for the peace of mind and convenience it offers. These harnesses are specifically designed for your car’s make and model, ensuring a perfect fit and proper electrical compatibility. They often come with color-coded wires and detailed instructions, making the installation process straightforward, even for beginners. Think of it as buying insurance for your new sound system and your car’s electrical health.
Ultimately, a car audio wiring harness is the key to a clean, professional, and hassle-free stereo installation. It protects your car’s wiring, simplifies the installation process, and ensures optimal sound quality. So, before you start dreaming of booming bass and crystal-clear highs, remember to add a wiring harness to your shopping list. Your car, your new stereo, and your ears will thank you!
Understanding Wire Gauge and Its Impact
Ever wondered why some audio installations sound fantastic and others sound like a muffled mess, even with the same speakers? A huge part of that is wire gauge. Think of wire gauge like plumbing for your audio system. A skinny pipe restricts water flow, and a skinny wire restricts electrical current. Using too thin a wire for your speakers means they won’t get the power they need, resulting in weak sound and potential damage to your amplifier.
Choosing the right gauge is all about matching the wire size to the power your amplifier is sending and the distance the signal needs to travel. For example, if you’re running a high-powered amplifier to speakers far away, say in a truck’s extended cab, you’ll need a thicker gauge like 12 or even 10 gauge. But for a low-power system in a small car with short wire runs, 16 gauge might be sufficient.
It’s also crucial to consider the type of wire you’re using. Copper is king in the audio world because it’s an excellent conductor. Steer clear of cheaper, “copper-clad aluminum” (CCA) wires. While they might save you a few bucks upfront, they don’t conduct electricity as efficiently as pure copper, leading to signal loss and potential overheating. Think of it as choosing between a high-speed internet connection and dial-up – the difference is noticeable!
Ultimately, taking the time to understand wire gauge and choosing the right wire for your setup is an investment in sound quality and the longevity of your audio equipment. A properly wired system delivers cleaner, more powerful audio, and prevents headaches down the road. It’s like building a solid foundation for your dream audio experience.
Harness Compatibility: Matching Your Car and Head Unit
Navigating the world of car audio harnesses can feel like deciphering a secret code, especially when you’re trying to match your car’s existing wiring to a new head unit. The key is to understand that every car manufacturer has its own wiring standards, and head units also come with their specific connectors. This is where compatibility comes in. A harness acts as a translator, bridging the gap between these two systems.
Imagine trying to plug a European appliance into a US outlet – it simply won’t work without an adapter. A car audio harness functions similarly, ensuring that the power, speaker, and other essential connections are properly aligned. Using the wrong harness, or attempting to “wing it” and cut and splice wires directly, can lead to all sorts of problems, from blown fuses to short circuits and even damage to your car’s electrical system.
One crucial factor is to verify the specific make, model, and year of your car. Many websites and online retailers offer harness finders that allow you to input this information and identify the correct harness for your vehicle. It’s also worth checking online forums specific to your car model. Other owners often share their experiences and recommendations regarding head unit and harness pairings.
Before purchasing a harness, double-check the pin configuration and wiring diagram. Comparing the harness’s diagram to your car’s factory wiring diagram is a good way to ensure compatibility. While many harnesses are “plug-and-play,” meaning they directly connect to your car’s wiring without modification, it’s always best to be sure. A little bit of research upfront can save you a lot of frustration and potential damage later.
Installation Tips and Best Practices
Installing a car audio wiring harness might seem daunting, but with a bit of planning and the right tools, it can be a manageable DIY project. First, always disconnect your car’s battery before starting any wiring work. This prevents accidental short circuits and protects both you and your vehicle. Think of it as flipping the main breaker before working on your home’s electrical system.
Next, take your time and follow the harness’s instructions carefully. Most harnesses come with color-coded wires that correspond to specific functions (power, ground, speakers, etc.). Match these wires to the corresponding wires on your head unit’s wiring harness. Using butt connectors or soldering and heat shrinking connections is generally recommended for a secure and reliable connection. Avoid simply twisting wires together and wrapping them in electrical tape, as this creates a weak connection that is prone to corrosion and failure.
Organization is key. Keep your wiring neat and tidy by using zip ties or electrical tape to bundle the wires together. This not only makes the installation look professional but also prevents the wires from getting tangled or snagged on anything behind the dashboard. It’s like organizing your toolbox – everything is easier to find and use when it’s in its place.
Finally, test your installation before reassembling everything. Once you’ve connected the harness and head unit, reconnect the battery and turn on the ignition. Check to make sure the head unit powers on, the speakers are working, and all functions (radio, CD player, Bluetooth, etc.) are operating correctly. If everything checks out, you can proceed to reassemble the dashboard. If not, double-check your connections and consult the wiring diagrams to identify any potential issues.
Avoiding Common Wiring Mistakes
Even with the best harness and intentions, it’s easy to make mistakes when wiring a car audio system. One of the most common errors is misidentifying wires, especially power and ground. Connecting the power wire to a ground can cause a short circuit, blowing fuses or even damaging your head unit. Double-check your wiring diagrams and use a multimeter to verify the polarity of the wires before making any connections. Think of it like proofreading a document – a quick check can catch errors that might otherwise slip through.
Another common pitfall is using the wrong size connectors. Butt connectors, for instance, come in different sizes to accommodate different wire gauges. Using a connector that’s too small can result in a loose or unreliable connection, while using one that’s too large can damage the wire. Choose connectors that are appropriately sized for the wires you’re using.
Neglecting proper grounding is another frequent mistake. A good ground connection is essential for a clean and stable audio signal. Make sure the ground wire is securely connected to a clean, bare metal surface on the car’s chassis. Avoid grounding to painted surfaces or plastic components, as these can impede the flow of electricity. A poor ground can introduce noise and distortion into your audio system, making it sound muddy or weak.
Finally, resist the temptation to rush the installation. Take your time, double-check your work, and don’t be afraid to ask for help if you’re unsure about something. There are plenty of online resources, forums, and videos that can provide guidance and assistance. Remember, a little patience and attention to detail can go a long way in ensuring a successful and enjoyable car audio installation.
Finding The Best Car Audio Wiring Harnesses For Stereo: A Buyer’s Guide
Hey there, music lover! So, you’re looking to upgrade your car stereo, huh? Awesome! Getting that perfect sound in your ride is a game-changer. But before you dive in and start blasting your favorite tunes, let’s talk about something super important: the wiring harness. It might not be the most glamorous part of the upgrade, but trust me, choosing the right one is crucial for a smooth installation and a happy listening experience. Think of it as the unsung hero of your car audio system.
We’ve all been there, staring at a tangled mess of wires, wondering which goes where. That’s where a good car audio wiring harness comes in. It simplifies the whole process, making it safer and less frustrating. This guide is here to walk you through everything you need to know to pick the best car audio wiring harnesses for stereo for your specific needs. Let’s get started and turn up the volume on your car audio knowledge!
1. Vehicle Compatibility: Making Sure It Fits Like a Glove
First things first, you absolutely need to make sure the wiring harness is compatible with your specific car make, model, and year. It’s like trying to put a square peg in a round hole – it just won’t work, and you’ll end up with a lot of frustration (and potentially damaged electronics). Check the harness manufacturer’s compatibility chart or use an online vehicle fit guide. These tools are lifesavers and will prevent you from buying something that’s completely useless to you.
Imagine spending hours trying to figure out why your new stereo isn’t working, only to realize the harness was never designed for your car in the first place. Been there, done that! It’s a waste of time, money, and a whole lot of patience. A little research upfront will save you a huge headache later. Compatibility is king, so make sure you’ve got this one covered before moving on. This ensures you will find the best car audio wiring harnesses for stereo in your search.
2. Connector Type: Matching the Puzzle Pieces
The connector type is another critical factor. You need to ensure that the harness connectors match the connectors on your car’s factory wiring and your new stereo. There are various types of connectors out there, and using the wrong one can lead to a very bad day involving cut wires, electrical tape, and a whole lot of confusion. Standard harnesses use common connector types, but some vehicles have proprietary systems.
Think of it like trying to plug a European appliance into an American outlet without an adapter. Sparks might fly, and nothing good will come of it. Carefully examine the connectors on your existing wiring and your new stereo. Compare them to the harness you’re considering. If they don’t match, you’ll need an adapter or a different harness altogether. Mismatched connectors are a recipe for disaster, so pay close attention to this one.
3. Wiring Gauge: Size Matters When It Comes to Power
The wiring gauge refers to the thickness of the wires in the harness. A thicker wire (lower gauge number) can handle more current. For a basic stereo upgrade, a standard gauge harness might be fine. However, if you’re planning on installing a powerful amplifier or running multiple speakers, you’ll need a harness with a heavier gauge wiring to prevent overheating and ensure optimal performance.
It’s like trying to water your garden with a tiny straw – you won’t get enough water to where it needs to go. Skimping on the wiring gauge can lead to voltage drops, distorted sound, and even damage to your equipment. Consult the specifications of your new stereo and amplifier to determine the appropriate wiring gauge. When in doubt, it’s always better to go with a slightly heavier gauge than you think you need.
4. Harness Features: Bells and Whistles or Essential Extras?
Some wiring harnesses come with extra features that can make the installation process even easier and enhance the functionality of your new stereo. For example, some harnesses include pre-wired connections for steering wheel controls, backup cameras, or other aftermarket accessories. Others may have built-in noise filters to eliminate unwanted interference. Consider what features are important to you and look for a harness that offers them.
Imagine having to run separate wires for your steering wheel controls when the harness could have done it for you. It’s just adding unnecessary work and complexity to the project. Think about your future upgrade plans as well. If you think you might want to add a backup camera down the road, it’s worth investing in a harness that supports it now. These little extras can make a big difference in the long run. This way, you will know the key features to look for when shopping for the best car audio wiring harnesses for stereo.
5. Build Quality: Durability for the Long Haul
The quality of the materials and construction of the wiring harness is essential. Look for a harness made from durable, heat-resistant materials with secure connections. Cheap harnesses can be prone to corrosion, fraying, and loose connections, which can lead to all sorts of problems down the road. A well-built harness will last for years and provide a reliable connection for your stereo.
It’s like buying a cheap pair of shoes that fall apart after a few weeks. You might save a few bucks upfront, but you’ll end up having to replace them sooner than you think. Inspect the harness carefully before you buy it. Look for signs of shoddy construction, such as thin wires, flimsy connectors, or poor insulation. A little extra investment in a high-quality harness will pay off in the long run.
6. Ease of Installation: Making Life Easier
Let’s be honest, no one wants to spend hours wrestling with a complicated wiring harness. Look for a harness that is designed for easy installation, with clear labeling and straightforward instructions. Some harnesses even come with pre-stripped wires and color-coded connectors, which can save you a lot of time and effort. A good harness will make the installation process as painless as possible.
Imagine trying to assemble a piece of furniture with instructions written in a foreign language. It’s frustrating, confusing, and likely to end in disaster. Read reviews from other users to get an idea of how easy the harness is to install. Look for harnesses that come with detailed instructions and helpful diagrams. A little bit of planning and preparation can save you a lot of headaches later.
7. Price vs. Value: Striking the Right Balance
Of course, price is always a factor when making any purchase. However, it’s important to remember that the cheapest option isn’t always the best. A cheap wiring harness might save you a few dollars upfront, but it could end up costing you more in the long run if it fails prematurely or causes damage to your stereo. Consider the features, quality, and ease of installation when evaluating the value of a wiring harness.
It’s like buying a generic brand of cereal versus a name-brand one. The generic might be cheaper, but it might not taste as good or have the same nutritional value. Weigh the cost against the benefits and choose a harness that offers the best value for your money. Sometimes, spending a little extra upfront will save you a lot of headaches and expenses down the road. Ultimately, finding the best car audio wiring harnesses for stereo involves balancing your budget with your needs and expectations.
FAQ
What exactly is a car audio wiring harness, and why do I need one?
Think of a car audio wiring harness as a translator between your new stereo and your car’s existing electrical system. It’s basically a plug-and-play adapter that allows you to connect your aftermarket receiver without having to cut or splice any of your car’s factory wiring. This is a big deal because cutting wires can void warranties and make it difficult to revert back to the original stereo later on.
Using a harness simplifies the installation process dramatically. Instead of spending hours deciphering wiring diagrams and carefully connecting individual wires, you simply plug the harness into your car’s existing connector and then connect the other end to your new stereo. It’s a cleaner, safer, and much less frustrating way to upgrade your car audio system. Plus, if you ever decide to sell your car, you can easily reinstall the original stereo without any hassle.
How do I know which wiring harness is right for my car and stereo?
Finding the right wiring harness is all about compatibility. The easiest way to ensure you get the right one is to use an online vehicle fit guide. Most retailers that sell harnesses have these tools on their websites. Just enter your car’s make, model, and year, and it’ll show you a list of compatible harnesses. Make sure to double-check the information, though, as there can be slight variations depending on the specific trim level.
Another important factor is to know the make and model of your stereo. The harness needs to have the correct connector for your new receiver. Many harnesses are designed to work with a wide range of stereos from different manufacturers, but it’s always a good idea to verify compatibility before making a purchase. Check the product description or contact the seller if you’re unsure.
Can I install a wiring harness myself, or should I hire a professional?
Installing a wiring harness is generally a DIY-friendly project, especially if you’re comfortable with basic car maintenance and have a little patience. Most harnesses come with pretty clear instructions, and there are tons of helpful videos online that walk you through the process step-by-step. Just take your time, be careful, and double-check your connections.
However, if you’re not confident working with electrical systems or if you’re dealing with a more complex installation, it’s always a good idea to hire a professional installer. They have the experience and tools to get the job done quickly and safely, and they can also help you troubleshoot any issues that might arise. The cost might be worth the peace of mind, especially if you’re concerned about damaging your car’s electrical system.
What is a CAN bus adapter, and do I need one?
CAN bus (Controller Area Network) adapters are becoming increasingly common in modern cars. These adapters allow your aftermarket stereo to communicate with your car’s computer system. Many newer vehicles use the CAN bus system to control various functions, such as steering wheel controls, factory amplifiers, and even parking sensors.
If your car has any of these features, you’ll likely need a CAN bus adapter to retain them when you install an aftermarket stereo. Without it, you might lose functionality like the ability to control the volume from your steering wheel or the use of your factory-installed amplifier. The adapter acts as a translator, allowing your new stereo to understand and use the signals from your car’s computer system.
What’s the difference between a standard wiring harness and a data harness?
A standard wiring harness is typically used for simpler stereo installations in older vehicles. It provides the basic connections for power, ground, speakers, and illumination. It’s a straightforward plug-and-play solution that allows you to connect your new stereo without cutting any wires, but it doesn’t usually support advanced features.
A data harness, on the other hand, is more advanced and is designed for newer vehicles with complex electrical systems. It often includes a CAN bus interface, which allows the stereo to communicate with the car’s computer. This is necessary to retain features like steering wheel controls, factory amplifiers, and other integrated systems. Data harnesses are more expensive, but they’re essential for a seamless integration in modern cars.
What should I do if my new stereo isn’t working after installing the wiring harness?
First, don’t panic! It’s common to encounter a few snags during an installation. The first thing to check is all of your connections. Make sure that all the plugs are securely connected and that no wires are loose or damaged. Sometimes a simple loose connection can cause the whole system to fail.
Next, double-check the wiring diagram for both your stereo and the wiring harness. Make sure that each wire is connected to the correct corresponding wire. A misplaced wire can cause all sorts of problems. If you’re still having trouble, consult the troubleshooting section of your stereo’s manual or contact the manufacturer’s support team. They might be able to offer specific advice based on your model.
Are there any special tools I need to install a car audio wiring harness?
Fortunately, you don’t need a ton of fancy tools to install a car audio wiring harness. However, a few basic tools will definitely make the job easier and safer. You’ll need a wire stripper/crimper to properly connect wires if any splicing is required (though most harnesses are plug-and-play). A screwdriver set (both Phillips and flathead) will be essential for removing the old stereo and securing the new one.
A test light or multimeter can also be helpful for verifying that you’re getting power to the correct wires. And don’t forget some electrical tape or heat shrink tubing to insulate any exposed connections. Having these tools on hand will make the installation process smoother and help you avoid any potential electrical issues.
Final Thoughts
So, there you have it! We’ve journeyed through the world of the best car audio wiring harnesses for stereo, dissecting the details and highlighting the top contenders. Now you’re armed with the knowledge to choose the perfect wiring harness that will seamlessly connect your new stereo and unlock a world of sonic possibilities in your ride. Remember, this isn’t just about wires and connections; it’s about building a sound system that reflects your personality and elevates your driving experience.
Don’t let this information sit idle! Dive in, do a little more digging if you need to, and then confidently select the wiring harness that speaks to you. Trust your gut, because the right choice is out there waiting to be made. With the right tools and a little DIY spirit, you’ll be cruising with crystal-clear audio in no time. Get ready to crank it up and enjoy the ride!