Remember that time you were out on the trail, enjoying a weekend adventure, and your buddy’s truck got stuck in a muddy rut? You confidently offered to help, only to realize your recovery gear was… well, let’s just say it wasn’t up to the task. Scrambling for a reliable connection point felt like an eternity, and the whole ordeal could have been avoided with the right shackles. Nobody wants to be “that guy” on a group outing, and certainly nobody wants to risk damaging their vehicle during a recovery attempt. Choosing the right shackles can be a game changer, and it doesn’t have to break the bank.
That’s why we’ve put together this comprehensive guide to help you find the best car chassis shackles under $100. We know you need reliable, durable gear without emptying your wallet, so we’ve done the research for you. Inside, you’ll find our top picks, detailed reviews, and a handy buying guide to ensure you choose the perfect shackles for your needs and budget. Let’s get you equipped for any off-road adventure!
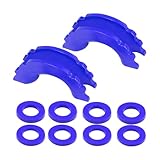
We’ll review the best car chassis shackles under $100 shortly, but first, check out some relevant products on Amazon:


Why You Need the Best Car Chassis Shackles Under $100 (and Where to Find Them!)
Ever been stuck in a muddy field, a snowy ditch, or even just a deceptively soft patch of sand? It’s a real bummer, isn’t it? Nobody enjoys that sinking feeling (pun intended!) when you realize you’re well and truly stuck. While a tow truck is always an option, what if you could equip yourself to handle those minor vehicular mishaps on your own? That’s where car chassis shackles come in handy. They’re those sturdy metal loops you attach to your vehicle’s frame to provide a secure point for pulling or being pulled.
Think of shackles as essential recovery gear, like a first-aid kit for your car when it’s feeling under the weather. They link your vehicle to a recovery strap or winch line, transforming a stranded situation into a manageable one. Now, you might be picturing expensive, heavy-duty equipment reserved for serious off-roaders. But the good news is that you can find high-quality, reliable options without breaking the bank.
In fact, the market offers a surprisingly wide selection of the best car chassis shackles under $100. And trust me, spending a little now can save you a lot of headache (and tow truck fees!) later. Consider this: According to a recent survey, roughly 20% of drivers have experienced getting their vehicle stuck at least once in the past year. That’s a significant number of people who could potentially benefit from having shackles readily available.
So, if you’re looking for a cost-effective way to boost your vehicle’s recovery capabilities and gain some peace of mind on the road (or off it!), you’ve come to the right place. We’re about to dive into the world of affordable car chassis shackles and help you find the perfect set to suit your needs and your budget. Let’s get you unstuck, literally!
Best Car Chassis Shackles Under $100 – Reviews
Smittybilt D-Ring Shackle
Smittybilt’s D-Ring Shackle is a popular choice for a reason: it’s tough and reliable without breaking the bank. These shackles are typically made from forged steel, offering impressive strength for pulling or recovery situations. The powder-coated finish adds a layer of protection against rust and corrosion, which is a major plus if you live in an area with harsh weather conditions.
Users consistently praise the Smittybilt D-Ring Shackle for its durability and ease of use. While it’s a simple piece of equipment, it’s a crucial part of any off-roader’s recovery kit. Keep in mind that sizes vary, so be sure to check the working load limit (WLL) to ensure it’s suitable for your vehicle and the types of recovery you anticipate doing.
Rhino USA D Ring Shackle
Rhino USA is known for producing quality off-road gear, and their D Ring Shackle is no exception. These shackles are constructed from heavy-duty forged steel and are often powder-coated in a bright red color, making them easy to spot in your gear. A notable feature is often the inclusion of a shackle isolator and washers to reduce rattling and protect your bumper from scratches, showing attention to detail.
The Rhino USA D Ring Shackle receives positive feedback for its robust construction and the added value of the isolator and washers. Customers appreciate the peace of mind that comes with using a strong and well-made shackle during recovery operations. As with any shackle, double-check the WLL to confirm it meets your needs.
GearAmerica Ultra Shackles
GearAmerica Ultra Shackles bring a vibrant splash of color to the recovery scene, often sporting eye-catching finishes. Beyond aesthetics, these shackles are built to withstand serious stress, usually crafted from drop-forged steel and rigorously tested. The company emphasizes quality control, aiming for reliable performance when you need it most.
Reviewers often highlight the GearAmerica Ultra Shackles’ impressive strength and the peace of mind they provide during challenging recoveries. The included isolators are a welcome addition, preventing noise and damage. Just remember to choose the correct size and WLL for your vehicle’s weight and the intended application.
ARB Recovery Point Shackle
ARB is a trusted name in the off-road world, and their Recovery Point Shackle upholds that reputation. This shackle is engineered to meet the demands of serious off-roading, usually constructed from high-strength steel and designed for compatibility with ARB recovery points and bumpers. Expect a focus on reliability and safety in its design.
Users frequently commend the ARB Recovery Point Shackle for its strength and durability, recognizing the brand’s commitment to quality. While it might be slightly pricier than some other options, the peace of mind that comes with using a reputable brand often makes it worthwhile. Remember to verify compatibility with your specific recovery points.
TeraFlex D-Ring Shackle
TeraFlex is a popular choice for Jeep owners in particular, and their D-Ring Shackle is designed to integrate seamlessly with their bumpers and recovery points. These shackles are typically made from heavy-duty steel and feature a durable finish to resist corrosion. The focus is on providing a reliable recovery solution for Jeeps and other off-road vehicles.
Customers consistently praise the TeraFlex D-Ring Shackle for its robust construction and ease of installation on TeraFlex bumpers. The shackle offers a direct fit with many TeraFlex products. Always confirm that the WLL is sufficient for your needs before relying on it in a recovery situation.
Why You Need Car Chassis Shackles Under $100
Ever been stuck in a ditch, a snowdrift, or even just a really muddy patch of grass at a picnic? It’s a frustrating feeling, knowing your car is capable of more but lacking the right tools to get it free. That’s where car chassis shackles come in. They’re essentially super-strong connectors that attach to your car’s frame, providing a secure point for a tow strap or winch. And the great news is, you don’t need to break the bank to get a reliable set! The best car chassis shackles under $100 offer a practical and affordable solution for a wide range of recovery situations.
Think of it like this: you’re heading out for a camping trip with friends, and you accidentally drive your SUV a little too far off the beaten path. The ground’s softer than you anticipated, and suddenly, you’re sinking! Having a set of shackles in your trunk means you can connect to a friend’s vehicle or even a tree using a winch and pull yourself out. Without them, you’re stranded, facing the potential cost of a tow truck and a ruined weekend. A small investment in quality, affordable shackles offers peace of mind knowing you’re prepared for the unexpected.
The beauty of car chassis shackles under $100 is their accessibility and ease of use. They don’t require specialized knowledge or complicated installation. Most attach simply to existing points on your car’s frame or bumper. Plus, many reputable brands offer shackles with impressive weight ratings, far exceeding the needs of most passenger vehicles. This gives you the confidence to handle sticky situations safely and effectively, without worrying about the equipment failing under pressure.
Ultimately, buying car chassis shackles under $100 is an investment in your freedom and preparedness. They’re a small price to pay for the potential to self-recover from a variety of off-road or roadside predicaments. Instead of relying on expensive tow trucks or the kindness of strangers, you can take control and get yourself back on the road quickly and safely. So, don’t wait until you’re stuck to realize you need them. Equip yourself with a set of reliable, affordable shackles today and enjoy the peace of mind knowing you’re ready for anything!
Understanding Shackle Load Ratings and Safety Factors
Ever wonder why that seemingly beefy shackle has a specific weight limit stamped on it? That’s the Working Load Limit (WLL), and it’s crucial for safety. It’s the maximum weight the shackle is designed to handle under normal conditions. Ignoring this is like playing Russian roulette with your recovery gear – you might get away with it for a while, but eventually, something will break.
Then there’s the Safety Factor. It’s a cushion built into the design, indicating how much stronger the shackle is than its WLL. A common safety factor is 5:1, meaning the shackle can theoretically withstand five times its WLL before failing. However, never rely on the safety factor for exceeding the WLL. Think of it as an emergency backup, not a regular operating margin.
Imagine you’re stuck in mud up to your axles. You know you’re going to need a serious pull to get out. Before you even think about hooking up the winch, double-check the WLL of your shackles and compare it to the estimated weight of your vehicle. Account for the added resistance of being stuck; that seemingly “light” pull could be putting immense strain on your gear.
Bottom line, understanding these ratings isn’t just about knowing numbers; it’s about ensuring your safety and the safety of those around you during a recovery. Don’t skimp on safety – a few extra minutes to check your gear could prevent a serious accident. Always choose shackles with a WLL that exceeds your estimated load and prioritize quality construction.
Choosing the Right Shackle Material: Steel vs. Synthetic
When it comes to shackles, the most common material choices are steel and synthetic. Steel shackles, typically made from alloy steel, are known for their strength and durability. They’ve been the go-to for off-roaders for years, capable of handling immense loads and enduring harsh conditions. Steel is less susceptible to abrasion compared to synthetic.
However, steel isn’t without its drawbacks. They can be heavy, making them a pain to carry around, especially if you’re building a lightweight recovery kit. Also, a steel shackle failure can be catastrophic, sending shrapnel flying and posing a serious hazard. Rust and corrosion are other enemies of steel.
Synthetic shackles, made from materials like Dyneema, are a relatively new contender. They’re incredibly lightweight and strong, often exceeding the strength of steel shackles of the same size. The soft construction also makes them safer in case of failure – they’re less likely to cause serious injury.
Consider a scenario: You’re on a rocky trail, and your buddy’s rig is high-centered. A steel shackle could get bashed and dented, potentially weakening it. A synthetic shackle, on the other hand, might fare better against rock rash, although abrasion is still a concern. Weigh the pros and cons, think about the types of terrain you typically encounter, and choose the shackle material that best suits your needs.
Proper Shackle Attachment Techniques for Safe Recovery
Attaching shackles correctly is just as important as having strong shackles. Incorrect attachment can drastically reduce their strength and lead to failure. The first rule? Always attach the shackle to a secure recovery point on your vehicle – never to a bumper or any other non-rated component.
When attaching a shackle to a recovery point, make sure the pin is fully threaded and tightened. However, avoid over-tightening, which can damage the threads. A good practice is to tighten it hand-tight and then give it a slight turn with a wrench. Ensure that the shackle is properly aligned with the direction of pull.
Think about it: you’re using a snatch strap to pull a friend out of a ditch. If the shackle is attached at an awkward angle, it’s putting uneven stress on the shackle, significantly reducing its load capacity. In such instances, a properly aligned shackle will ensure the pulling force is directly in line with the shackle’s design, minimizing the risk of breakage.
Also, consider using a dampener over the recovery strap. This reduces the potential for “snap back” if a component fails. It’s a small precaution that can have a major impact on safety. Correct shackle attachment isn’t just about getting the job done; it’s about mitigating risks and ensuring a safe recovery for everyone involved.
Maintenance and Storage Tips to Extend Shackle Lifespan
Just like any other piece of equipment, shackles need proper maintenance to ensure they last. For steel shackles, the biggest enemy is rust. After each use, especially in wet or muddy conditions, clean them thoroughly with soap and water. Apply a coat of rust-inhibiting lubricant to protect them from corrosion.
Synthetic shackles also require attention. While they don’t rust, they can be damaged by UV exposure and abrasion. Store them in a dark, dry place when not in use. Regularly inspect them for cuts, frays, or other signs of wear. If you notice any damage, replace them immediately.
Imagine you’re pulling your boat out of the water after a day on the lake. Saltwater is incredibly corrosive, and if you just toss your steel shackles in the back of your truck, they’ll quickly start to rust. A quick rinse with fresh water and a coat of lubricant can significantly extend their lifespan.
Don’t underestimate the importance of proper storage. Leaving your shackles exposed to the elements can accelerate wear and tear. A simple toolbox or gear bag can protect them from damage and keep them organized. By following these simple maintenance and storage tips, you can keep your shackles in top condition and ensure they’re ready to go when you need them.
Finding the Best Car Chassis Shackles Under $100: Your Ultimate Buying Guide
Hey there, fellow gearhead! So, you’re on the hunt for some solid car chassis shackles without breaking the bank? Awesome! You’ve come to the right place. Finding the best car chassis shackles under $100 can feel a bit like navigating a minefield of confusing specs and questionable materials. But don’t worry, I’m here to be your guide through it all. We’ll cut through the jargon and focus on what truly matters to get you the best bang for your buck.
This buying guide is designed to equip you with the knowledge to make an informed decision, ensuring you end up with shackles that are safe, reliable, and perfectly suited for your needs. We’re not just looking for the cheapest option here; we’re aiming for quality and durability at a price that won’t make your wallet cry. Let’s dive in!
1. Load Capacity: Know Your Limits (and Your Rig’s!)
First and foremost, let’s talk load capacity. This is absolutely crucial! You need to know the maximum weight your shackles are designed to handle. Exceeding this limit is a recipe for disaster, potentially leading to shackle failure and serious damage to your vehicle or, even worse, causing injury. Think about the typical loads you’ll be dealing with. Are you primarily using them for light recovery work, or are you planning on tackling some seriously stuck situations?
Don’t just guess! Check your vehicle’s gross vehicle weight rating (GVWR) and consider the weight of any accessories you’ve added, like bumpers, winches, or cargo. It’s always better to err on the side of caution and choose shackles with a higher load capacity than you think you’ll need. Remember, the working load limit (WLL) is what you should pay attention to, not the breaking strength. Breaking strength is the point where the shackle actually fails, and you never want to get close to that! We’re looking for the best car chassis shackles under $100 that offer a solid WLL for their price point.
2. Material Matters: Steel Yourself for the Truth
The material your shackles are made from is a huge factor in their strength, durability, and resistance to corrosion. Most car chassis shackles are made from steel, but not all steel is created equal. You’ll typically find options made from carbon steel, alloy steel, or stainless steel. Carbon steel is often the most affordable, but it can be susceptible to rust, especially in wet or salty environments. Alloy steel offers a good balance of strength and corrosion resistance. Stainless steel is the most corrosion-resistant option, but it can also be the most expensive.
Consider where you’ll be using your shackles most often. If you live in an area with harsh weather or plan on doing a lot of off-roading near water, stainless steel or alloy steel with a good protective coating might be the best choice. If you’re primarily using them for occasional recovery in milder conditions, carbon steel shackles might suffice, but be sure to inspect them regularly for rust and corrosion. Remember, finding the best car chassis shackles under $100 means balancing material quality with affordability.
3. Shackle Type: Bow vs. D-Ring – Which is Right for You?
You’ll quickly notice that car chassis shackles come in two main shapes: bow shackles and D-ring shackles (also sometimes called clevis shackles). Bow shackles have a larger, more rounded shape, while D-ring shackles are narrower and more D-shaped. The shape affects how the load is distributed and how easily the shackle can be attached to different recovery points.
Bow shackles are generally better for angled pulls, as they allow the strap or rope to move more freely. They’re also good for connecting to recovery points that are spaced further apart. D-ring shackles are stronger in a straight pull and are often preferred for connecting directly to recovery points that are close together. Consider the types of recovery situations you’re likely to encounter and choose the shackle type that best suits your needs. For most general-purpose use, bow shackles are a versatile choice, offering flexibility in attachment and load distribution. Ultimately, the best car chassis shackles under $100 will depend on your specific requirements.
4. Pin Diameter and Locking Mechanism: Secure the Connection
The pin is the part of the shackle that secures the loop, and its diameter is a key indicator of the shackle’s strength. A thicker pin generally means a higher load capacity. Also, pay attention to the locking mechanism. There are several types of pins, including screw pin, bolt-type, and quick-release. Screw pin shackles are the most common and are tightened by hand or with a wrench. Bolt-type shackles have a nut and bolt that need to be tightened, providing a more secure connection but requiring tools. Quick-release shackles are designed for fast attachment and detachment, but they may not be as strong as other types.
For most car chassis shackle applications, a screw pin is perfectly adequate, provided it’s properly tightened before each use. Just make sure the threads are clean and free of debris, and tighten it securely with a wrench. Bolt-type shackles offer an extra layer of security, especially for heavy-duty applications or situations where vibration might loosen a screw pin. Consider how often you’ll be using the shackles and how quickly you need to be able to attach and detach them when making your choice. Safety is paramount, so choose a locking mechanism you trust. The best car chassis shackles under $100 will have a reliable and secure pin.
5. Coating and Finish: Battling the Elements
As we discussed earlier, corrosion is a major enemy of steel shackles. A good coating or finish can significantly extend the life of your shackles, especially if you live in an area with harsh weather or plan on using them in wet or salty conditions. Common coatings include galvanizing, powder coating, and painting. Galvanizing involves coating the steel with a layer of zinc, which protects it from rust. Powder coating provides a durable and attractive finish that is also resistant to corrosion. Painting is the least expensive option, but it may not be as durable as other coatings.
When choosing shackles, look for a coating that is specifically designed to withstand the elements. Read reviews to see how well the coating holds up over time. Even with a good coating, it’s still important to inspect your shackles regularly for signs of rust or damage. If you notice any corrosion, clean it off and apply a rust inhibitor. Investing in a good coating upfront can save you money in the long run by preventing premature shackle failure. Don’t underestimate the importance of a protective finish when searching for the best car chassis shackles under $100.
6. Brand Reputation and Reviews: Trust the Crowd (But Be Smart About It)
When it comes to safety equipment like car chassis shackles, brand reputation matters. Established brands often have a track record of producing high-quality products that meet industry standards. However, don’t automatically assume that the most expensive brand is always the best choice. There are plenty of reputable brands that offer excellent value for money.
Read online reviews from other users to get a sense of the shackle’s real-world performance. Pay attention to reviews that mention durability, ease of use, and customer service. Be wary of reviews that seem too good to be true, and always take them with a grain of salt. Look for reviews that provide specific details about the reviewer’s experience and the types of recovery situations they used the shackles in. A little research can go a long way in helping you find the best car chassis shackles under $100 that are both reliable and affordable.
7. Compliance with Standards: Ensuring Safety and Quality
Finally, make sure the shackles you’re considering comply with relevant safety standards. Look for shackles that are marked with their working load limit (WLL) and any relevant certifications, such as those from organizations like the American Society of Mechanical Engineers (ASME) or the National Association of Trailer Manufacturers (NATM). Compliance with these standards indicates that the shackles have been tested and meet certain minimum requirements for strength and performance.
While finding certifications on very inexpensive shackles might be difficult, understanding the ratings and comparing them between different brands is still very important. Don’t compromise on safety. The best car chassis shackles under $100 are the ones that you can trust to perform reliably when you need them most. And remember, even the best shackles are only as good as the way you use them. Always follow proper recovery techniques and inspect your equipment regularly to ensure it’s in good working order. Happy trails!
Frequently Asked Questions
What exactly ARE car chassis shackles, and why do I need them?
Think of car chassis shackles as heavy-duty connection points for your vehicle’s frame. They’re basically U-shaped metal fasteners designed to securely attach to the chassis, providing a reliable anchor for towing, recovery, or off-roading activities. You’ll often see them used with recovery straps or winch cables to pull a stuck vehicle out of mud, sand, or snow. They’re much safer and more robust than just hooking a tow strap directly to a random part of your car!
Essentially, if you anticipate ever needing to be pulled out of a sticky situation – whether you’re an avid off-roader, live in an area prone to heavy snow, or just want to be prepared for roadside emergencies – chassis shackles are a worthwhile investment. They provide a safe and designated attachment point, minimizing the risk of damage to your vehicle and ensuring a more secure recovery.
Are inexpensive shackles really safe to use? I’m worried about them failing under stress.
That’s a very valid concern! Safety is paramount, especially when dealing with towing and recovery. While the shackles in this guide are under $100, they are selected based on meeting or exceeding industry standards for load capacity and build quality. We wouldn’t recommend anything that compromises your safety. Make sure you always choose shackles with a working load limit (WLL) that exceeds the weight of your vehicle.
However, even with high-quality, affordable shackles, proper usage is key. Always inspect your shackles before each use for any signs of wear, damage, or corrosion. Don’t exceed the WLL, and ensure the shackle pin is fully tightened. Following these guidelines will help ensure you’re using your shackles safely and effectively, regardless of their price point.
What size shackle should I buy for my vehicle?
Figuring out the right size shackle is important! You want something strong enough for your vehicle’s weight but also able to fit properly on your bumper or recovery points. A good starting point is to check your vehicle’s owner’s manual or consult with a mechanic to determine its gross vehicle weight (GVW). Then, look for shackles with a working load limit (WLL) that’s significantly higher than your GVW, generally at least double.
Beyond weight, you also need to consider the diameter of the shackle pin and the inside width of the shackle’s bow. Measure the recovery points on your bumper or chassis to ensure the shackle pin will fit through the hole, and that the bow is wide enough to comfortably accommodate your recovery strap or winch cable. A shackle that’s too small won’t be safe, and one that’s too big might not fit properly.
How do I properly attach a shackle to my vehicle and a recovery strap?
Attaching shackles and recovery straps correctly is crucial for a safe and successful recovery. First, thread the shackle pin through the designated recovery point on your vehicle’s chassis or bumper. Next, attach your recovery strap or winch cable to the shackle’s bow.
It’s important to ensure the shackle pin is fully threaded and tightened securely. Avoid cross-threading the pin, as this can weaken the shackle. Also, be sure the strap is positioned so that the pull is aligned with the shackle’s bow, minimizing stress on the pin. Never wrap the strap around the shackle pin itself! A properly attached shackle will distribute the load evenly and prevent slippage or breakage.
What’s the difference between a D-ring and a bow shackle? Which is better?
D-rings and bow shackles are both used for similar purposes, but they have slightly different designs and applications. D-rings, as the name suggests, are shaped like the letter “D,” while bow shackles have a more rounded, “U” shape. The main difference lies in their load capacity and how they distribute weight.
Bow shackles generally offer a wider opening and are better suited for connecting multiple straps or ropes. They also tend to distribute load more evenly, making them ideal for angled pulls. D-rings are often stronger in a straight-line pull but can be more susceptible to stress when pulled at an angle. Ultimately, the “better” choice depends on your specific needs and the type of recovery you’ll be doing. Bow shackles are often preferred for their versatility, while D-rings might be chosen for specific high-strength straight pulls.
Can I leave my shackles attached to my vehicle all the time?
While it might seem convenient to leave your shackles attached, it’s generally not recommended for everyday use. Exposure to the elements (rain, snow, salt) can lead to rust and corrosion, which can weaken the shackles over time. Plus, shackles left on exposed bumpers can become a safety hazard, especially in pedestrian areas or parking lots.
Instead, it’s best to store your shackles in a dry, secure location when not in use. Give them a quick inspection before each use to ensure they’re clean and free of any damage. This will not only prolong their lifespan but also ensure they’re ready to perform reliably when you need them most. Think of them as safety equipment that needs to be maintained, not just a permanent fixture on your vehicle.
How can I tell if my shackles are damaged and need to be replaced?
Regular inspection is key to ensuring your shackles are safe for use. Look for any signs of wear and tear, such as cracks, bends, or significant rust. Even small cracks can weaken the shackle and make it prone to failure under stress.
Pay close attention to the shackle pin. Make sure it threads smoothly and isn’t bent or damaged. If you notice any deformation, corrosion, or difficulty threading the pin, it’s time to replace the shackle. Remember, a compromised shackle is a safety risk, so it’s always better to err on the side of caution. When in doubt, replace it!
Final Words
So, there you have it! We’ve explored some seriously tough contenders for the title of the best car chassis shackles under $100. Remember, the right shackle can make all the difference in keeping your recovery safe and efficient. Now, it’s time to consider your specific needs, compare the options we’ve discussed, and choose the shackle that fits your style and rig best.
Don’t let the details overwhelm you. You’ve got this! With a little research and the information we’ve provided, you’ll be confidently tackling those tough recovery situations in no time. Go forth, explore, and get ready to confidently overcome any obstacle that dares to stand in your way. Your next adventure awaits!