It’s October, which means pumpkin spice everything, spooky movie marathons, and frantic costume planning! You’ve nailed down your outfit, sorted out the makeup, but what about your nails? Are they ready to complete the look? This year, skip the basic black and embrace the sparkle. Nothing elevates a Halloween costume quite like dazzling nails, and thankfully, the options are endless.
Finding the perfect sparkle for your spooky season manicure can be a bit overwhelming, with so many glitters on the market. That’s why we’ve put together this guide to help you discover the best halloween nail art glitters to take your manicure from drab to fab. Get ready to explore our reviews and buying guide, designed to help you find the perfect glitters for your eerie-sistibly stylish Halloween nails!
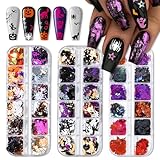
Before we start our review of the best halloween nail art glitters, here are some related products you can find on Amazon:


Get Ready to Sparkle: Finding Your Perfect Halloween Glitter
Halloween is just around the corner, and you know what that means: time to unleash your inner ghoul (or glam goddess)! While costumes are definitely a focal point, let’s not forget the often-overlooked detail that can truly elevate your look: your nails! This year, we’re going beyond basic black polish and diving headfirst into the dazzling world of glitter. After all, what better way to celebrate the spooky season than with a touch of sparkle?
From subtle shimmers to full-on glitter explosions, nail art has become a major trend, especially around Halloween. Did you know that searches for ‘halloween nail art’ increase by over 300% in October? That’s a whole lot of people looking to upgrade their manicure game! And with so many options available, it can be tricky to find the perfect glitters to match your costume or just add a bit of festive fun to your everyday style.
That’s where we come in! We’ve scoured the internet and tried and tested countless products to bring you the ultimate guide to the best halloween nail art glitters. Whether you’re a nail art newbie or a seasoned pro, we’ll help you navigate the glitter galaxy and find the perfect shades, textures, and application techniques to create mesmerizing manicures that will turn heads at every Halloween party.
So, ditch the dull digits and prepare to get glittering! We’re about to unveil our top picks for the best halloween nail art glitters, offering everything from classic spooky colors to unexpected shimmer combinations. Get ready to create some nail magic that’s sure to make your Halloween look unforgettable!
The Best Halloween Nail Art Glitters
Moon Glow Intense Glitter Halloween Nail Art Set
This glitter set is a fantastic pick for adding some spooky sparkle to any Halloween manicure. The range of colors, including classic orange, black, and shimmering purples, makes it easy to create everything from subtly festive accents to bold, head-turning designs. The glitter particles themselves are finely milled, which allows for smooth application and prevents a chunky, uneven finish. Plus, the intensity of the glitter is seriously impressive; you’ll get a lot of shimmer with just a small amount of product!
This set offers excellent versatility for all skill levels. Whether you’re a nail art novice or a seasoned pro, you’ll appreciate the ease of use and the vibrant results. It works well encapsulated in gel, acrylic, or even pressed into regular nail polish while it’s still wet. Cleanup is relatively simple, and the staying power is excellent when paired with a quality top coat. This set is a reliable choice for anyone wanting to achieve professional-looking Halloween nails at home.
Born Pretty Holographic Skull Nail Glitter Flakes
These skull-shaped glitter flakes are an absolute must-have for anyone wanting to elevate their Halloween nail art. The holographic finish catches the light beautifully, creating a mesmerizing, almost otherworldly effect. The skulls themselves are delicate enough to lay flat on the nail, avoiding that bulky feeling that can sometimes come with larger glitters. They’re the perfect touch for adding a touch of gothic glam to your spooky season look.
Application is straightforward, whether you choose to encapsulate them in gel or acrylic, or simply press them onto a tacky nail polish base. The holographic effect is truly stunning in person, and they look fantastic paired with dark, vampy colors like deep reds, blacks, and purples. Consider sealing them with a generous layer of top coat to ensure they stay put and maintain their dazzling shine.
Glitter Planet Bio Chunky Halloween Glitter Mix
This chunky glitter mix screams Halloween fun! The vibrant array of shapes and colors – think pumpkins, bats, ghosts, and shimmering stars in orange, black, green, and purple – is undeniably festive. What truly sets this mix apart is that it’s made with biodegradable glitter, making it a more eco-conscious choice for adding some sparkle to your nails (and your conscience!).
While chunky glitters can sometimes be tricky to work with, this mix is relatively easy to apply with a wax pen or dotting tool. Consider using a glitter primer or a tacky base coat to help the larger pieces adhere properly. The result is a playful, eye-catching manicure that’s perfect for Halloween parties and spooky season celebrations. Plus, knowing that you’re using a more sustainable product makes this glitter mix even more appealing.
Beetles Halloween Spider Web Nail Art Glitter
These spider web glitters are perfect for achieving intricate Halloween nail art with minimal effort. The fine, almost thread-like strands of glitter create a realistic spider web effect that adds a touch of spooky elegance to your nails. The glitter itself is highly reflective, so even a small amount can make a big impact.
Using these glitters is surprisingly simple. You can either sprinkle them onto a tacky base coat or carefully place individual strands using tweezers or a dotting tool. The finished look is incredibly impressive, especially when paired with a dark or contrasting nail polish color. Seal everything with a good top coat to keep the spider web design intact and ensure a long-lasting, salon-worthy manicure.
Modelones Luminous Glow in The Dark Halloween Glitter
This glow-in-the-dark glitter is the ultimate Halloween nail art showstopper. Imagine stepping into a dimly lit room and your nails suddenly lighting up with an eerie, otherworldly glow! This glitter works best when charged with light, and the brighter the light source, the more intense the glow. It’s perfect for adding a fun and unexpected twist to your Halloween look.
Beyond the novelty factor, this glitter is also surprisingly versatile. It can be used in a variety of designs, from subtle accents to full-nail coverage. Simply apply it over your base color and seal it with a top coat. The glow-in-the-dark effect is truly mesmerizing, and it’s guaranteed to turn heads at any Halloween gathering.
Why You Absolutely NEED Halloween Nail Art Glitters This Year!
Let’s be honest, who doesn’t love a little sparkle, especially when it comes to Halloween? We’re talking about the one night a year where it’s not only acceptable, but encouraged, to go all-out with your creativity. Think about it: you’ve spent hours perfecting your costume, from ghostly makeup to meticulously chosen accessories. But what about your nails? They’re an essential part of the overall look, and they deserve a touch of that spooky, shimmering magic. Halloween nail art glitters are the perfect, effortless way to elevate your costume and add that final, unforgettable detail.
Imagine you’re heading to a Halloween party dressed as a glamorous witch. Your velvet dress is stunning, your hat is perfectly askew, but your plain nails are… well, plain. Now picture the same outfit, but this time, your nails are adorned with the best Halloween nail art glitters – a swirling mix of deep purples, iridescent greens, and tiny silver stars. Suddenly, you’re not just a witch, you’re the witch – the one everyone is talking about. It’s all about those small details that make a big impact, and glitter is your secret weapon.
Beyond the visual appeal, using Halloween nail art glitters is incredibly fun and empowering. It’s a simple DIY project that allows you to express your creativity and embrace the spooky spirit. Whether you’re a seasoned nail artist or a complete beginner, applying glitter is easy and instantly transforms your nails into mini works of art. Plus, think of the compliments you’ll receive! Everyone will be asking where you got your nails done, and you can proudly say you created them yourself.
Finally, consider the cost-effectiveness. Instead of shelling out a fortune for a professional manicure, you can achieve stunning Halloween-themed nails at home for a fraction of the price. The best Halloween nail art glitters are affordable, long-lasting, and can be used year after year. So, why not invest in a few pots of sparkly goodness and let your nails become the ultimate Halloween accessory? This year, dare to sparkle!
Glitter Application Techniques for Spooktacular Nails
Ever struggled with glitter ending up everywhere except on your nails? You’re not alone! One technique that helps is the “sponge method.” Apply a thin layer of nail glue or a sticky base coat, then dab the glitter onto your nail with a makeup sponge. This concentrates the glitter exactly where you want it, preventing a messy fallout. Think of it like precision painting for your nails – instead of a brush, you’re using a sponge to stamp on the sparkle.
Another application method that works wonders is the “pour-over” technique. Place your finger over a small container or sheet of paper, then gently pour the glitter over your nail. This is particularly effective for full glitter coverage. The excess glitter falls into the container, minimizing waste and mess. Imagine you’re decorating a mini Halloween cupcake with sprinkles; the pour-over method is similar!
For intricate designs, a fine-tipped brush is your best friend. Use a brush dampened with a bit of topcoat or nail art glue to precisely place individual glitter pieces. This is perfect for creating glitter accents, outlines, or even detailed Halloween-themed images on your nails, like tiny spiderwebs or bats. It’s like using a calligraphy pen, but instead of ink, you’re wielding sparkling glitter!
Finally, don’t underestimate the power of layering. Start with a base color that complements your glitter, then apply a thin layer of glitter. Seal it with a topcoat. For added sparkle, apply another layer of glitter and another topcoat. This builds dimension and gives your nails a professional, salon-worthy finish. Think of it as layering clothing for a stylish outfit – each layer adds depth and interest to the overall look.
Selecting the Right Glitter Color Palette for Halloween
Choosing the right colors can make or break your Halloween nail art. Classic Halloween hues like black, orange, and purple are always a safe bet, but don’t be afraid to experiment! Think about what kind of Halloween vibe you want to convey. Are you going for spooky and gothic, or cute and whimsical? A gothic look might lean towards deeper reds, blacks, and silvers, while a playful design could incorporate brighter oranges, greens, and even pastel purples.
Consider your costume! Your nails can be the perfect accessory to complete your Halloween look. If you’re dressing up as a witch, a deep green glitter with hints of black and purple would be fantastic. For a fairy costume, iridescent or holographic glitter in pastel shades would add a touch of magic. Coordinate your glitter colors with your costume’s palette to create a cohesive and eye-catching ensemble.
Think about contrasting colors. Pairing contrasting shades can create a striking visual effect. For example, bright orange glitter on a black base can really pop. Or, consider using a dark purple glitter on a silver or white base for a more subtle but equally stunning look. Experiment with different combinations to find what works best for you. Consider using a color wheel if you’re feeling lost for ideas.
Don’t forget about metallic glitters! Gold, silver, and bronze can add a touch of elegance and sophistication to your Halloween nail art. A touch of gold glitter on a deep red or black base can instantly elevate your look, making it perfect for a Halloween party or a night out. Metallic glitters also pair well with matte polishes for a unique and modern contrast.
Creative Halloween Nail Art Ideas Featuring Glitter
Let your imagination run wild with Halloween nail art! A simple yet effective idea is a glitter gradient. Start with a dark base color, like black or deep purple, and gradually add more glitter towards the tips of your nails, creating a sparkling ombre effect. This is a great way to incorporate glitter without being too overwhelming. Imagine the night sky gradually filling with stars – that’s the effect you’re aiming for!
Consider using glitter to create spooky silhouettes. Paint your nails with a light base color, such as white or pale gray, and then use black glitter to create silhouettes of bats, spiders, or ghosts. You can use stencils or freehand the designs. This is a fun and easy way to add a touch of Halloween flair to your nails without being too intricate. Think of it as a spooky shadow puppet show on your fingertips.
For a more glamorous look, try creating glitter French tips. Paint your nails with a neutral base color, and then use a glitter polish to create a sparkling French tip. This is a chic and sophisticated way to incorporate glitter into your Halloween look. Experiment with different glitter colors, such as gold, silver, or even a holographic glitter, for a truly eye-catching effect. This is a grown-up and gorgeous take on Halloween sparkle.
Don’t be afraid to mix and match different glitters! Combine chunky glitter with fine glitter for added dimension and texture. Or, use different colors of glitter to create a multi-colored effect. The possibilities are endless! Just be sure to apply a thick topcoat to seal in the glitter and create a smooth finish. Think of it as creating a Halloween-themed mosaic on your nails – the more variety, the better!
Maintaining Your Glittery Halloween Manicure
Protect your hard work! Once you’ve created your dazzling Halloween nail art, it’s crucial to protect it. Apply a high-quality topcoat every few days to prevent chipping and peeling. This will help keep your glittery creation looking its best for as long as possible. Consider it like applying sunscreen to protect your skin – a topcoat shields your nail art from everyday wear and tear.
Avoid harsh chemicals. Household cleaners and nail polish removers can be tough on your manicure. Wear gloves when cleaning or doing dishes to protect your nails from exposure to harsh chemicals. When removing your nail polish, use an acetone-free remover to prevent drying out your nails and cuticles. Your nails are like delicate works of art, so treat them with care!
Keep your nails hydrated. Regularly apply cuticle oil to keep your nails and cuticles healthy and hydrated. Healthy nails are less prone to breakage, which means your manicure will last longer. Dry cuticles can also make your manicure look less polished, so keeping them moisturized is essential. Think of it like watering a plant – hydration keeps your nails strong and vibrant.
Be gentle with your nails. Avoid picking at your nail polish or using your nails as tools. This can damage your manicure and weaken your nails. When removing glitter polish, use a soak-off method to avoid damaging your nails. Soak cotton balls in nail polish remover, place them on your nails, and wrap them in foil for a few minutes. This will help loosen the glitter and make it easier to remove without scraping or pulling. Remember, your nails are jewelry, not tools!
Spooktacular Sparkle: Your Guide to the Best Halloween Nail Art Glitters!
Hey ghoulfriends! Halloween is creeping closer, and you know what that means – it’s time to unleash your inner nail artist and create some seriously spooky manicures! But with so many glitters shimmering on the market, how do you choose the perfect ones to bring your Halloween nail art visions to life? Don’t worry, I’m here to help!
This guide is your ultimate resource for navigating the world of Halloween nail art glitters. We’ll dive into all the important factors to consider, so you can confidently choose the best glitters for your boo-tiful creations. Get ready to sparkle and shine this Halloween season!
Glitter Size: From Subtle Shimmer to Chunky Charm
Okay, let’s talk size! Glitter particles come in a whole range of sizes, from super fine dust to chunky flakes. Think about the overall look you’re going for. Do you want a delicate, ethereal shimmer, or a bold, in-your-face sparkle? Fine glitters are amazing for creating a subtle, all-over shimmer or for blending into gradients. They’re also less likely to feel gritty on your nails.
On the other hand, chunky glitters are perfect for making a statement! They add texture and dimension to your nail art. You can use them to create fun accent nails, glitter tips, or even to fill in spooky shapes like pumpkins or bats. Just keep in mind that chunky glitters can sometimes require a thicker top coat to fully encapsulate them and prevent them from snagging. Finding the best halloween nail art glitters often depends on the project you have in mind.
Glitter Color and Finish: Match Your Spooky Style
Color is key! When choosing glitters for Halloween nail art, think about the classic Halloween colors – black, orange, purple, green, and red. But don’t be afraid to get creative! Metallic glitters like gold, silver, and bronze can also add a touch of glam to your spooky designs. Holographic glitters are another awesome option, as they shift colors in the light and create a mesmerizing effect.
Beyond the color, consider the finish of the glitter. Do you want a glitter that’s super sparkly and reflective, or one that has a more subtle, matte finish? Iridescent glitters are another cool option, as they have a pearly, shimmering effect. For a truly haunting look, explore glow-in-the-dark glitters – imagine your nails glowing eerily in the dark!
Glitter Material: Considering Quality and Safety
Not all glitters are created equal! The material the glitter is made from can affect its sparkle, durability, and even its safety. High-quality glitters are typically made from polyester or acrylic, which are more resistant to fading and discoloration. They also tend to have a brighter, more intense sparkle.
Avoid using craft glitters on your nails! Craft glitters are often made from materials that are not safe for cosmetic use and can even cause allergic reactions. Always look for glitters that are specifically labeled as cosmetic-grade and designed for use on skin and nails. Your health and safety are always more important than saving a few bucks.
Glitter Density and Coverage: Getting the Sparkle You Need
The density of the glitter refers to how much glitter is packed into a given volume. A denser glitter will provide more coverage with less product, while a less dense glitter will require more layers to achieve the desired effect. Consider what kind of look you’re going for. If you want a full-coverage glitter manicure, opt for a denser glitter.
For more subtle accents, a less dense glitter might be perfect. You should also think about the base color you’ll be using. If you’re using a dark base color, you might need a denser glitter to make sure it really pops. Experimenting with different densities is a great way to find what works best for your nail art style. Sifting through different products to find the best halloween nail art glitters can be a bit of a chore, so make sure to read reviews.
Glitter Application Method: Ease and Precision are Key
How are you going to apply the glitter? Are you planning on sprinkling it over wet polish, using a brush to place individual pieces, or mixing it into a gel or acrylic? The application method will influence the type of glitter you choose. For example, fine glitters are easy to sprinkle and blend, while chunky glitters might be better suited for placement with a brush or dotting tool.
Consider your skill level and the time you have available. If you’re a beginner, starting with fine glitters and simple application techniques is a great way to build your confidence. As you become more comfortable, you can experiment with chunkier glitters and more intricate designs. Don’t be afraid to watch tutorials and practice different techniques to find what works best for you.
Glitter Packaging and Storage: Keeping Your Sparkle Organized
Okay, this might seem like a minor detail, but trust me, proper packaging and storage are essential for keeping your glitters in tip-top shape! Look for glitters that come in airtight containers, such as jars or pots. This will prevent them from drying out, clumping together, or spilling all over your workspace.
Proper storage will also help to preserve the color and sparkle of your glitters. Store them in a cool, dry place away from direct sunlight. You might also consider organizing your glitters by color, size, or type. This will make it much easier to find the perfect glitter when you’re ready to create your next Halloween nail art masterpiece! Nobody wants to be searching endlessly for that perfect shade of spooky green!
Brand Reputation and Reviews: Trust the Glitter Experts
Before you commit to buying a bunch of glitters from a brand you’ve never heard of, take a few minutes to do some research. Read online reviews and see what other nail artists are saying about the brand’s glitters. Are they highly pigmented? Do they last long? Are they easy to work with?
A reputable brand will typically have a good track record for quality, customer service, and ethical sourcing. Look for brands that are transparent about their ingredients and manufacturing processes. Don’t be afraid to ask questions! If you’re unsure about a particular glitter, reach out to the brand or retailer for more information. Finding the best halloween nail art glitters can be tough, but relying on others’ experiences can make it a bit easier.
And there you have it! Seven key factors to consider when choosing the best Halloween nail art glitters. With a little bit of planning and research, you’ll be well on your way to creating some seriously spooktacular manicures this Halloween season. Happy haunting!
Frequently Asked Questions
What kind of glitter is best for Halloween nail art?
Well, that really depends on the look you’re going for! For a subtle shimmer, you’ll probably want to stick with finer glitters like micro glitters or dusts. These give a beautiful, ethereal sparkle without being too overwhelming. Think ghostly glows or a subtle hint of magic.
On the other hand, if you’re aiming for a bold, dramatic look – maybe a blood-splattered effect or a full-on disco ball vibe – then chunkier glitters like hex glitters or mixes with different shapes and sizes will be your best friend. Don’t be afraid to experiment! Just consider the overall theme of your Halloween nails and choose a glitter that complements it perfectly.
How do I apply glitter to my nails so it actually stays on?
Ah, the age-old question! The key is a good base and a proper sealant. Start by applying a base coat of nail polish that coordinates with your glitter. While it’s still tacky, gently press or sprinkle the glitter onto your nail. For larger glitters, you might find it easier to place them individually using a dotting tool or orange wood stick.
Once the base coat is completely dry and the glitter is securely in place, seal it all in with several layers of a high-quality top coat. Make sure to wrap the tip of your nail with each layer to prevent chipping and keep that glitter locked down. Don’t rush this step; patience is your friend when it comes to a long-lasting, glittery manicure!
Are there any glitters I should avoid using for nail art?
Generally speaking, you want to steer clear of glitters that aren’t specifically designed for cosmetic use. Craft glitter, for example, often has sharp edges and can be made of materials that aren’t safe for direct contact with your skin. It might look tempting, but it can be irritating and potentially damaging to your nails.
Always opt for glitters that are labeled as “cosmetic grade” or “nail art glitter.” These have been processed to be safe and gentle, ensuring a smooth and comfortable application. Your nails will thank you for it! Plus, cosmetic-grade glitters tend to have a much better sparkle and shine anyway.
How do I remove glitter nail polish without making a huge mess?
Glitter removal can definitely be a challenge, but fear not! The foil method is your best bet for a clean and relatively mess-free experience. Soak cotton balls in acetone nail polish remover, place them over your glittery nails, and then wrap each fingertip in foil.
Let them sit for about 10-15 minutes. The acetone will soften the glitter and polish, making it easier to wipe away. Once the time is up, remove the foil and cotton balls and gently wipe away the remaining glitter. You might need to use a cuticle pusher to help nudge off any stubborn pieces. Finish with a cuticle oil to rehydrate your nails.
Can I mix different types of Halloween nail art glitter together?
Absolutely! In fact, mixing different types of glitter is a fantastic way to create unique and eye-catching designs. Combining fine glitters with chunky glitters can add depth and dimension to your Halloween nail art. Think about layering a fine, iridescent glitter over a base of black polish and then adding a few strategically placed chunky holographic stars for a spooky, celestial effect.
Just be mindful of the color combinations and glitter sizes you’re using. Generally, it’s a good idea to stick to a cohesive color palette to avoid a cluttered look. And remember, experimentation is key! Don’t be afraid to try out different combinations to see what works best for you and your Halloween theme.
What’s the best way to store my Halloween nail art glitter to keep it from clumping?
Proper storage is essential for keeping your glitters in tip-top shape! The best way to store them is in airtight containers, away from direct sunlight and extreme temperatures. Small plastic jars or resealable bags work perfectly.
Keeping them away from moisture is also crucial. If your glitter gets damp, it can definitely clump together. You might also consider adding a small desiccant packet (like those found in shoe boxes or vitamin bottles) to each container to absorb any excess moisture. With a little care, your glitters will stay sparkling and ready for your next Halloween masterpiece!
Will certain top coats make my glitter dull?
Yes, absolutely! Some top coats, especially those that are thicker or have a matte finish, can dull the sparkle of your glitter. Look for top coats specifically designed to enhance shine and clarity. These tend to be thinner and more transparent, allowing the glitter to really shine through.
Read reviews and look for terms like “high gloss” or “gel-like finish.” It might also be a good idea to test the top coat on a small area of your glittery nails before applying it to the entire manicure, just to make sure it doesn’t diminish the sparkle. And remember, multiple thin coats are always better than one thick coat for preserving that beautiful glitter effect!
Final Thoughts
Alright, ghoulfriends, you’re now armed with a cauldron full of knowledge to snag the best Halloween nail art glitters! From subtle shimmers to bold, bewitching sparkles, the power to create truly spellbinding manicures is now in your hands. Don’t be afraid to experiment, mix and match, and most importantly, have fun unleashing your inner nail artist! After all, Halloween is all about expressing yourself and rocking a look that screams you.
So go ahead and dive into the glittery abyss! Pick out the shades that speak to your spooky soul, envision the designs that make you cackle with glee, and get ready to transform your nails into tiny masterpieces. With a little imagination and some of these fantastic glitters, you’ll be the queen (or king!) of Halloween style in no time! What are you waiting for? Let the glitter games begin!