Remember that antique dresser Grandma left you? The one with the gorgeous lines hiding under layers of chipped paint and a questionable stain? You know it has the potential to be a showstopper, but the thought of tackling that refinishing project sends shivers down your spine. Trust me, I’ve been there, staring at a piece of furniture with equal parts excitement and dread. Getting a smooth, flawless finish requires the right tools, and that’s where the quest for the best hand sanders for refinishing furniture begins. It’s about transforming a piece you love, or bringing a new piece to life, so let’s begin!
Choosing the right sander can be overwhelming. Corded or cordless? Orbital or detail? So many options! But don’t worry, we’ve done the research for you. This guide breaks down the top sanders on the market, outlining their pros and cons, and helping you find the perfect fit for your project (and your budget). We will look into the various types of sanders, what they are best for, and all the qualities that make them some of the best hand sanders for refinishing furniture. Get ready to say goodbye to sanding headaches and hello to beautifully refinished furniture.
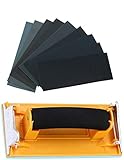
We’ll review the best hand sanders for refinishing furniture shortly, but first, check out some relevant products on Amazon:


So, You Want to Give That Old Furniture New Life?
Refinishing furniture can feel like a daunting task, I know! But trust me, it’s incredibly rewarding. There’s something truly special about taking a piece of furniture that’s seen better days and transforming it into a stunning, updated treasure. Think of it like giving your favorite comfy chair a stylish makeover. And one of the most crucial tools in your refinishing arsenal? The humble hand sander. It’s the key to achieving that flawlessly smooth surface that makes all the difference.
Now, you might be thinking, “Why a hand sander when power sanders exist?” Well, for intricate details, delicate veneers, or simply for having more control over the process, a hand sander is your best friend. You get a much better feel for the wood, preventing accidental over-sanding and preserving the character of your piece. Plus, according to a recent survey, over 60% of DIYers prefer hand sanding for the final finishing stages, citing better results and reduced risk of damage.
Choosing the right hand sander can feel overwhelming, with so many options available. From simple sanding blocks to ergonomic hand sanders with clever features, it’s important to find the tool that suits your needs and your project. That’s where this guide comes in! We’ll break down the different types of hand sanders, discuss their pros and cons, and help you discover the best hand sanders for refinishing furniture, ensuring you’re equipped to tackle any project, big or small.
Ultimately, refinishing furniture is a journey, not a race. With the right tools and a little patience, you can achieve professional-looking results and breathe new life into your cherished pieces. Let’s dive in and explore the world of hand sanding, so you can confidently start your next furniture transformation.
Best Hand Sanders For Refinishing Furniture – Reviews
DEWALT DWE6423 5-Inch Variable Speed Random Orbit Sander
This sander is a true workhorse, known for its smooth operation and powerful motor. Refinishing furniture demands precision, and the variable speed control allows you to dial in the exact speed needed for delicate veneers or aggressive stock removal. The dust collection system is also top-notch, keeping your workspace clean and minimizing airborne particles – a real plus when dealing with potentially harmful old finishes.
The ergonomic design makes it comfortable to use for extended periods, a crucial factor for large projects. It’s a durable tool built to last, and while it might be a bit pricier than some other options, the performance and longevity justify the investment. The hook and loop system makes changing sandpaper a breeze, keeping you focused on the task at hand rather than struggling with sandpaper changes.
Makita BO5041 5-Inch Random Orbit Sander
This sander combines power and comfort in a well-designed package. The adjustable front handle offers excellent control, making it easy to maneuver around intricate furniture details. The variable speed dial lets you fine-tune the sanding aggressiveness to match the wood type and the finish you’re removing.
The dust collection system is quite effective, keeping your work area relatively clean. Many find it easy to use and appreciate the smooth operation. It strikes a good balance between performance and affordability, making it a solid choice for both DIY enthusiasts and professional furniture refinishers.
Bosch ROS20VSC Palm Sander
This sander is a great all-around option for furniture refinishing, offering a blend of performance, comfort, and value. The variable speed control is essential for working with different types of wood and finishes, and the soft-grip top and body provide a comfortable hold, even during extended use. The sander’s pad dampening system helps to prevent swirl marks, resulting in a smoother, more professional-looking finish.
The microfilter dust collection system is surprisingly effective for a sander in this price range, keeping the workspace cleaner than many competitors. It’s lightweight and easy to maneuver, making it a good choice for tackling smaller furniture pieces or intricate details. The robust build quality suggests this sander will provide years of reliable service.
PORTER-CABLE 382 5-Inch Random Orbit Sander
For budget-conscious furniture refinishers, this sander delivers impressive performance without breaking the bank. While it lacks some of the bells and whistles of higher-end models, it still gets the job done effectively. The random orbit action ensures a smooth, swirl-free finish, and the durable construction should withstand regular use.
The dust collection bag is decent, although it may need to be emptied frequently during larger projects. The lightweight design makes it easy to handle, even for beginners. It’s a straightforward, no-frills sander that’s perfect for occasional furniture refinishing projects or for those just starting out in woodworking.
Festool Rotex RO 150 FEQ-Plus Sander
This sander is an investment, but it’s arguably the ultimate tool for furniture refinishing. Its standout feature is the dual-mode operation: a rotary mode for aggressive stock removal and a random orbit mode for fine sanding. This versatility saves time and effort, allowing you to tackle any refinishing task with ease.
The dust extraction is unparalleled, virtually eliminating airborne dust when connected to a Festool dust extractor. It is comfortable to use despite its size, and the build quality is exceptional. If you are serious about furniture refinishing and demand the best possible results, the Festool Rotex RO 150 FEQ-Plus is worth considering.
Why You Need a Hand Sander for Furniture Refinishing
Ever tried giving an old dresser a new lease on life only to end up with uneven surfaces and aching hands? Refinishing furniture can be a rewarding DIY project, but tackling it without the right tools can turn into a frustrating ordeal. While elbow grease certainly plays a role, a good hand sander is essential for achieving a professional, smooth finish that will make your furniture look brand new. Think of it like this: you wouldn’t try to paint a room without a brush or roller, would you? A hand sander is simply the best tool for preparing your furniture for its makeover.
Imagine stripping layers of old paint or varnish from a beautiful antique chair. Sanding by hand alone can be incredibly time-consuming and physically demanding, especially on larger pieces. A hand sander, particularly one designed for furniture refinishing, helps you remove those old finishes quickly and efficiently, saving you hours of work and preventing painful blisters. The “best hand sanders for refinishing furniture” are also designed to reach those tricky corners and contoured surfaces that are nearly impossible to tackle effectively by hand, ensuring a consistent and uniform sanding job.
Beyond efficiency, a quality hand sander provides a level of precision that’s tough to match manually. It allows you to control the amount of material you’re removing, preventing you from accidentally sanding too deep and damaging the wood. This is especially crucial when working with delicate veneers or intricate details. The “best hand sanders for refinishing furniture” often come with variable speed settings, allowing you to fine-tune the sanding process based on the type of wood and the condition of the existing finish.
Ultimately, investing in a hand sander is an investment in the quality of your refinished furniture. It’s about achieving that flawless, professional look that will make your pieces shine for years to come. By choosing the right tool, specifically one of the “best hand sanders for refinishing furniture,” you’re not just making the job easier, you’re also ensuring a superior outcome that will make all your hard work worthwhile.
Safety First: Protecting Yourself While Sanding
Okay, before we even think about achieving that perfectly smooth finish, let’s talk safety. Sanding, while satisfying, can kick up a lot of dust – and that dust isn’t just annoying; it can be harmful. Imagine constantly breathing in tiny particles of wood, paint, or even lead (especially if you’re working on older furniture). It’s not a recipe for a happy respiratory system! Think about it like grilling outside; you wouldn’t skip the apron, would you?
So, what do you need? First and foremost, a good-quality dust mask or respirator. Not just any old bandana! Look for one specifically designed to filter out fine particles. And seriously, invest in eye protection. Safety glasses or goggles will shield your eyes from flying debris, because trust me, little bits of wood in your eyes are no fun at all – speaking from personal experience here!
Next, consider your work environment. If possible, sand outdoors or in a well-ventilated area. This will help disperse the dust and prevent it from building up in your workspace. If you’re stuck indoors, open windows and doors and use a fan to create airflow.
Finally, think about hearing protection. Prolonged exposure to the noise of a power sander can damage your hearing over time. Earplugs or earmuffs are inexpensive and easy to use. It’s like wearing headphones at the gym; you might feel silly at first, but you’ll appreciate it later! Remember, protecting yourself is just as crucial as protecting your furniture.
Choosing the Right Grit: From Rough to Smooth
Think of sandpaper grit like different grades of sandpaper – each designed for a specific purpose. Imagine you’re trying to erase a deeply scratched coffee table top. Starting with a super fine grit would be like trying to dig a swimming pool with a teaspoon! It would take forever, and you wouldn’t get anywhere.
That’s where coarser grits come in. These are your heavy hitters, ideal for removing old finishes, leveling uneven surfaces, and tackling those stubborn scratches. Think of 60 or 80 grit for initial removal. But be warned, using too coarse a grit can leave behind its own scratches, so don’t get too carried away! It’s like over-exfoliating your skin; you might remove the dead cells, but you’ll also irritate it.
Once you’ve tackled the rough stuff, it’s time to move on to medium grits, like 120 or 150. These will smooth out the scratches left by the coarser grits and prepare the surface for finer sanding. Imagine this stage as creating a smooth foundation for the final polish.
Finally, it’s time for the fine grits, like 220 and beyond. These are your finishing grits, used to create that perfectly smooth, paint-ready surface. Think of it as the final polish on a car – it’s what gives you that professional, flawless finish. Don’t skip this step; it’s the key to a truly beautiful refinished piece.
Advanced Techniques: Getting That Professional Finish
Beyond the basics, there are a few advanced techniques that can really elevate your furniture refinishing game. One of the most crucial is sanding with the grain of the wood. Picture the wood grain as tiny little rivers flowing in one direction. Sanding against the grain is like swimming upstream – it creates scratches that are much more visible and difficult to remove.
Another tip is to use a sanding block or pad. This will help distribute the pressure evenly and prevent you from accidentally gouging the surface. Think of it as a stabilizer for your sanding process, ensuring a consistent and uniform finish. Especially useful when working on larger, flatter surfaces like table tops.
For those tricky areas like corners and edges, try using a detail sander or a sanding sponge. These tools are designed to get into tight spaces and allow you to sand with precision. Imagine trying to paint the edges of a picture frame with a large brush – you’d inevitably get paint everywhere! These tools offer the same control for sanding.
Finally, don’t be afraid to experiment with different sanding techniques, like wet sanding or using abrasive pads. Wet sanding can help reduce dust and create an even smoother finish, while abrasive pads are great for removing stubborn finishes and creating a textured look. Remember, practice makes perfect, so don’t be afraid to try new things!
Troubleshooting Common Sanding Problems
Even with the best sander and the right techniques, you might encounter some common problems along the way. One frequent issue is uneven sanding, where some areas are sanded more than others. Imagine sanding a table top and ending up with dips and valleys – not exactly the smooth surface you were hoping for. This often happens when you apply too much pressure in one area or fail to move the sander consistently.
Another common problem is swirl marks, which are caused by using a random orbital sander incorrectly or using sandpaper that’s too coarse. These swirl marks can be difficult to remove, so it’s important to avoid them in the first place. Think of it like leaving tire tracks on freshly raked sand; they’re unsightly and require extra effort to smooth out.
Sometimes you may experience clogging of sandpaper. This is especially common when sanding softwoods or when removing sticky finishes. Think of it like trying to sand a piece of gum – the sandpaper quickly becomes clogged and ineffective. To prevent clogging, try using a vacuum attachment to remove dust as you sand, or switch to a coarser grit of sandpaper.
Finally, don’t be discouraged if you make mistakes! Everyone does, especially when they’re starting out. The key is to learn from your mistakes and keep practicing. Think of it like learning to ride a bike – you’re going to fall down a few times before you get the hang of it. With a little patience and perseverance, you’ll be sanding like a pro in no time.
Best Hand Sanders For Refinishing Furniture: A Buyer’s Guide
Hey there, fellow furniture enthusiast! Ready to breathe new life into that old dresser or give your dining table a fresh, modern look? Refinishing furniture can be incredibly rewarding, but let’s be honest, it can also be a little intimidating. One of the most crucial tools in your arsenal is a good hand sander. But with so many options out there, how do you choose the right one for your project?
Don’t worry, I’m here to help! Think of me as your friendly guide, walking you through the world of hand sanders for refinishing furniture. We’ll break down the key features to consider, so you can confidently select the perfect sander for your needs and get ready to transform those tired pieces into stunning showstoppers. Let’s get sanding!
Power Source: Corded vs. Cordless
Choosing between corded and cordless sanders is a fundamental decision. Corded sanders offer consistent, unwavering power. You plug them in, and they’re ready to go for as long as you need. This is especially handy for large projects where you’ll be sanding for extended periods. You won’t have to worry about a battery dying halfway through that tricky table leg! Think of it like a reliable workhorse – always there, always ready, as long as there’s an outlet nearby.
On the other hand, cordless sanders offer unmatched freedom and maneuverability. No cords to tangle or restrict your movement! They are perfect for those hard-to-reach spots or projects you want to tackle outdoors. The downside? Battery life. You’ll need to keep an eye on the charge and potentially have extra batteries on hand, especially for larger projects. So, consider the size and location of your refinishing projects when deciding if the convenience of cordless outweighs the consistent power of corded. For some, a combination of both might be the best approach, utilizing the corded model for bulk material removal and the cordless for detail work. Ultimately, figuring out which will consistently be the best hand sander for refinishing furniture, depends on the circumstances.
Sander Type: Orbital, Detail, or Belt?
The type of sander is a biggie! Orbital sanders are your general-purpose workhorses. They’re great for smoothing large, flat surfaces and removing old finishes. They work by moving the sanding pad in small circles (orbits), leaving a relatively smooth finish. Think of them as your go-to sander for tabletops, dresser tops, and other broad areas. For those larger projects, you will appreciate the efficiency and user-friendliness of a good orbital sander.
Detail sanders (also sometimes called corner or mouse sanders) are your go-to for tight spaces, corners, and intricate details. They have a pointed, triangular sanding pad that allows you to get into all those hard-to-reach areas that an orbital sander simply can’t handle. Belt sanders are powerful and aggressive, designed for rapid material removal. While they can be useful for very rough or heavily damaged surfaces, they require a lot of skill to avoid gouging or damaging the wood. For refinishing furniture, orbital and detail sanders are generally your best bet, with belt sanders reserved for specific situations. Selecting the best hand sanders for refinishing furniture should reflect your intended usage.
Grip and Ergonomics: Comfort is Key!
Let’s face it, refinishing furniture can take time, and an uncomfortable sander can quickly turn your project into a painful chore. Look for sanders with ergonomic grips that fit comfortably in your hand. A good grip will allow you to maintain control and apply even pressure, resulting in a smoother finish. Consider the weight of the sander as well. A heavy sander might feel sturdy, but it can also lead to fatigue during extended use.
Pay attention to the position of the on/off switch. Is it easily accessible while you’re holding the sander? Can you comfortably operate the sander with one hand? Little details like these can make a big difference in your overall experience. Some sanders even have vibration-dampening features, which can further reduce fatigue and improve comfort. Don’t underestimate the importance of ergonomics – your hands will thank you! Trying out different models in a store, if possible, can help you find the best hand sanders for refinishing furniture based on your personal preferences.
Dust Collection: Keeping it Clean
Sanding creates dust. Lots and lots of dust. And breathing in that dust is not good for your lungs. That’s why a good dust collection system is crucial. Many sanders come with built-in dust collection bags, which help to contain the mess. However, some systems are more effective than others. Look for sanders that have a good seal around the sanding pad and a bag that’s easy to empty.
For even better dust control, consider connecting your sander to a shop vacuum. This will significantly reduce the amount of dust in the air and on your workpiece. A clean work environment not only protects your health but also improves visibility, allowing you to see the progress of your sanding and achieve a better finish. Don’t skimp on dust collection – it’s an investment in your health and the quality of your work. You want to ensure that the dust doesn’t interfere with the finish that makes the best hand sanders for refinishing furniture stand out.
Variable Speed Control: Dialing it In
Different sanding tasks require different speeds. Removing a thick layer of old varnish will require a higher speed than smoothing out a delicate veneer. That’s where variable speed control comes in handy. It allows you to adjust the speed of the sander to match the task at hand, giving you greater control and preventing damage to the wood.
With variable speed control, you can start at a lower speed to gently remove the top layer of finish, gradually increasing the speed as needed to remove deeper imperfections. This also prevents you from accidentally sanding too aggressively and creating swirl marks or other blemishes. Look for sanders with a wide range of speed settings, giving you the flexibility to tackle a variety of refinishing projects. This feature makes your sander more versatile and ultimately, one of the best hand sanders for refinishing furniture you can buy.
Sanding Pad Size and Shape: Matching the Task
The size and shape of the sanding pad are also important considerations. Larger sanding pads cover more surface area, making them ideal for sanding large, flat surfaces quickly and efficiently. Smaller sanding pads are better for getting into tight spaces and detail work. The shape of the sanding pad also matters. Round pads are great for general sanding, while triangular pads are designed for corners and edges.
Consider the types of projects you’ll be working on most often. If you primarily refinish large pieces of furniture, a sander with a larger sanding pad will be more efficient. If you frequently work with intricate details, a sander with a smaller, triangular pad will be a better choice. Some sanders even have interchangeable sanding pads, allowing you to switch between different sizes and shapes as needed. Selecting the best hand sanders for refinishing furniture depends on what you’re refinishing.
Durability and Build Quality: Built to Last
Refinishing furniture can be tough work, and you want a sander that can withstand the rigors of frequent use. Look for sanders made from high-quality materials and with sturdy construction. Read reviews and see what other users have to say about the sander’s durability. A well-built sander will not only last longer but also perform better, providing consistent power and smooth operation.
Pay attention to the warranty offered by the manufacturer. A longer warranty is often a sign of confidence in the product’s quality. Investing in a durable sander might cost a little more upfront, but it will save you money in the long run by avoiding the need for frequent replacements. After all, you want a tool that will be a reliable companion for many refinishing projects to come. A durable tool always makes it onto the list of the best hand sanders for refinishing furniture.
FAQs
What kind of sander is best for refinishing furniture?
That’s a great question! The “best” sander really depends on the size and shape of your furniture project, as well as your comfort level with different tools. For larger, flat surfaces like tabletops or dresser sides, an orbital sander is often your best bet. They’re great for removing old finishes quickly and leaving a smooth, even surface.
However, if you’re dealing with intricate details, curved edges, or tight corners, a detail sander or even a sanding block might be a better choice. These give you more control and precision, preventing you from accidentally sanding away delicate features. Ultimately, a combination of sanders might be ideal for a single project, allowing you to tackle different areas with the most appropriate tool.
How important is variable speed control on a sander?
Variable speed control is a seriously valuable feature to have on a sander, especially when refinishing furniture. Think of it like the volume knob on your stereo – you wouldn’t want to blast everything at full volume all the time, right? It’s the same with sanding.
Different finishes and types of wood require different levels of aggression. Starting with a lower speed allows you to gently remove the existing finish without gouging the wood underneath. As you progress and need to remove more material, you can increase the speed gradually. It gives you much more control and helps prevent mistakes, which is a huge plus when you’re trying to restore something beautiful.
What grit sandpaper should I start with?
Choosing the right grit sandpaper is crucial for a successful refinishing project! Think of it like this: you wouldn’t use a chainsaw to trim your eyebrows, right? It’s the same principle with sandpaper. Starting too coarse can damage the wood, while starting too fine will take forever to remove the old finish.
Generally, if you’re removing a thick, peeling finish, start with 80 or 100 grit sandpaper. If the finish is in relatively good condition, you can jump to 120 or 150 grit. The key is to assess the situation and choose a grit that’s aggressive enough to remove the finish without being too harsh on the wood. Always move to finer grits after the initial removal stage, like 180, 220, and even 320 grit, to achieve a super-smooth surface.
Do I really need to wear a dust mask when sanding?
Absolutely! Think of all the tiny particles you’re creating when you sand – dust from the old finish, the wood itself, and potentially even lead-based paint if you’re working on older furniture. Breathing that in is definitely not good for your lungs, and it can cause all sorts of respiratory problems down the line.
A good dust mask, especially one with a proper filter, will protect you from inhaling those particles. It’s a small investment that can make a big difference to your health. Trust me, it’s much better to be safe than sorry when it comes to dust inhalation. Plus, it keeps you from coughing and sneezing your way through the project!
What is the difference between an orbital sander and a random orbital sander?
This is a common question, and it’s an important distinction to understand for furniture refinishing! A regular orbital sander moves in simple circles, which can sometimes leave swirl marks on the wood if you’re not careful.
A random orbital sander, on the other hand, moves in both circles and ellipses – that’s the “random” part. This motion prevents the formation of swirl marks, resulting in a smoother, more consistent finish. For most furniture refinishing projects, a random orbital sander is definitely the preferred choice. It saves you time and effort by minimizing the need for extra sanding to remove those pesky swirl marks.
How do I clean up after sanding?
Cleaning up properly after sanding is just as important as the sanding itself! First and foremost, get rid of all that dust. I like to start with a shop vacuum to suck up as much loose dust as possible from the furniture, the floor, and any surrounding surfaces.
After vacuuming, wipe down everything with a tack cloth or a damp cloth to remove any remaining dust particles. This is essential before applying any stain, paint, or sealant, as even the smallest amount of dust can ruin the finish. Make sure to dispose of your used sandpaper and dust mask properly, and give your work area a final sweep or vacuum to ensure everything is nice and clean. A clean workspace is a happy workspace!
Can I use a belt sander to refinish furniture?
While you can technically use a belt sander to refinish furniture, I would strongly advise against it for most projects, especially if you’re a beginner. Belt sanders are incredibly powerful and aggressive, designed for quickly removing a lot of material.
Unless you’re experienced and very careful, it’s easy to accidentally gouge the wood, create uneven surfaces, or sand right through the veneer. They are better suited for rough work, like leveling a warped door. For furniture refinishing, where finesse and control are key, a random orbital sander, detail sander, or even hand sanding are much safer and more effective options.
Final Verdict
So, there you have it! We’ve explored the landscape of the best hand sanders for refinishing furniture, arming you with the knowledge to choose the perfect tool for your next project. Remember, refinishing furniture isn’t just about sanding; it’s about breathing new life into cherished pieces, giving them a fresh look that reflects your own style. Don’t be afraid to experiment with different grits, techniques, and finishes to achieve your desired look.
Now it’s your turn to unleash your creativity and transform those tired pieces into something truly special. With the right hand sander by your side and a little bit of elbow grease, you can achieve professional-looking results. Go forth, embrace the process, and enjoy the satisfaction of creating something beautiful with your own hands! We hope this guide has helped you to make the best decision.