You’re staring at that antique dresser you inherited, the one with the chipped finish and a story etched into every scratch. You love the piece, but it just doesn’t quite fit your aesthetic right now. Or maybe you’re tackling a DIY project, dreaming of a glossy, protective layer to bring out the natural beauty of the wood. Whatever your project, you’re likely thinking about how to achieve a beautiful, durable finish. It’s a common conundrum for homeowners and crafters alike, and the answer often lies in finding the right product.
And that’s where we come in! Choosing the best household shellac for your specific needs can feel overwhelming with so many options available. That’s why we’ve put together this comprehensive guide, complete with reviews and essential information to help you navigate the world of shellac and achieve a stunning, professional-looking finish on your cherished furniture or exciting new project.
Before we start our review of the best household shellac, here are some related products you can find on Amazon:


Rediscovering the Magic of Shellac: A Friendly Introduction
Ever wondered how antique furniture achieves that warm, inviting glow? Chances are, shellac had something to do with it. Shellac, a natural resin secreted by the lac beetle (yes, an insect!), has been used for centuries as a wood finish, and it’s currently experiencing a well-deserved renaissance. Forget the harsh chemicals and complicated application processes you might associate with modern finishes. Shellac is surprisingly user-friendly, biodegradable, and non-toxic, making it an ideal choice for many household projects.
For those looking for a natural, beautiful finish that is easy to apply and maintain, shellac may be the perfect choice. But with so many options available, how do you find the best household shellac for your needs? Don’t worry, we’re here to help! We’ll break down the different types, application techniques, and considerations for achieving that perfect, durable finish on everything from furniture to floors. In fact, studies show that shellac has excellent adhesion properties, often outperforming synthetic alternatives in older wood projects.
Beyond its beautiful finish, shellac boasts some remarkable properties. It’s incredibly versatile; it can be used as a sealant, primer, or topcoat on various surfaces, including wood, metal, and even plaster. Plus, it dries quickly, often in under an hour, meaning you can complete your projects in a fraction of the time compared to oil-based finishes. And if you make a mistake? Shellac is easily repairable, often with just a little bit of denatured alcohol and a soft cloth.
So, whether you’re a seasoned DIY enthusiast or just dipping your toes into the world of woodworking, understanding the best household shellac options will empower you to create stunning, long-lasting finishes. This guide will explore the various shellac products available, offer tips and tricks for flawless application, and help you discover the many benefits of this timeless and eco-friendly finish. Let’s get started!
The Best Household Shellac
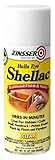
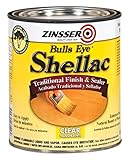
Zinsser Bulls Eye Shellac
Zinsser Bulls Eye Shellac is a true classic for a reason! This stuff is incredibly versatile, working as a sealer, finish, and even a primer. It’s fantastic for giving wood a warm, amber glow and really bringing out the natural grain. It dries super quickly, which is a huge bonus when you’re trying to tackle a project efficiently. Plus, it’s easy to sand smooth for a flawless final coat.
One of the best things about Zinsser Bulls Eye is its ability to stick to almost anything. It’s perfect for sealing knots in wood to prevent bleed-through when painting, or as a base coat on slick surfaces like laminate. Cleanup is a breeze too, just use denatured alcohol! Just be mindful of its relatively short working time; you’ll need to move efficiently once you start applying it.
Rust-Oleum Zinsser Amber Shellac
Rust-Oleum Zinsser Amber Shellac is your go-to if you crave that rich, vintage look. This shellac is all about adding depth and character, imparting a beautiful warm tone that enhances the natural beauty of wood. It’s especially great for antique furniture or giving newer pieces a more aged feel. The amber hue really deepens over time, creating a lovely patina.
Aside from aesthetics, this shellac performs well as a protective coating. It creates a durable barrier against moisture and scratches, although it’s not quite as water-resistant as some modern polyurethanes. Application is straightforward, and it levels nicely, minimizing brush marks. Remember to apply thin coats for the best results and avoid runs.
Mohawk Finishing Products Clear Shellac
Mohawk Finishing Products Clear Shellac is for those who want protection without drastically changing the color of the wood. Its crystal-clear formula allows the natural beauty of the wood to shine through, making it ideal for lighter woods or when you want to maintain the original tone. This shellac is a favorite among professional woodworkers for its quality and consistent results.
This product offers great adhesion and creates a smooth, hard finish that’s perfect for furniture, cabinets, and trim. It’s also incredibly versatile, working well as a sealer, undercoat, or topcoat. Just like other shellacs, it dries quickly and sands easily, which is a huge time-saver. Keep in mind that because it’s clear, any imperfections in the wood will be more visible, so proper surface preparation is key.
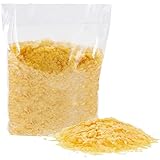
Liberon Button Polish Shellac
Liberon Button Polish Shellac is a more traditional and refined option, often favored by furniture restorers and those seeking an authentic, hand-rubbed finish. This shellac comes in the form of flakes (or buttons) that you dissolve in alcohol, giving you complete control over the strength and color of the finish. It’s a bit more involved to prepare, but the results are worth it for the dedicated craftsman.
The finish achieved with Liberon Button Polish is simply stunning. It creates a depth and luster that’s hard to replicate with modern finishes. It’s also highly repairable, which is a significant advantage for antique furniture. The learning curve is steeper than with pre-mixed shellacs, but the control and the final result make it a fantastic choice for those who appreciate the artistry of traditional finishing techniques.
SealCoat Universal Sanding Sealer
SealCoat Universal Sanding Sealer isn’t technically just shellac, but a de-waxed shellac. This is a huge advantage when you’re planning to apply other finishes like polyurethane over it. The de-waxed nature allows for better adhesion and prevents compatibility issues, making it a great base for all sorts of topcoats. It’s a workhorse product for ensuring a smooth and trouble-free finishing process.
Beyond its compatibility, SealCoat is also an excellent sealer on its own. It penetrates deeply into the wood, sealing the pores and providing a stable base for subsequent coats of finish. It sands beautifully, creating a perfectly smooth surface for painting or varnishing. If you’re looking for a reliable sanding sealer that plays well with other finishes, this is an excellent choice.
Why Do People Need to Buy Household Shellac?
Imagine your grandmother’s antique dresser, the one you inherited with so much love. The finish is starting to look a little tired, a little worn. Or perhaps you’ve just finished a gorgeous new DIY project – a custom bookshelf built with your own two hands! You want to protect it, give it a beautiful sheen that highlights the natural wood grain, and make it durable enough to withstand daily use. That’s where household shellac comes in. It’s not just for professionals; it’s a fantastic tool for any homeowner looking to preserve and beautify their cherished belongings.
Now, you might be thinking, “There are so many wood finishes out there. Why shellac?” Well, our “best household shellac” offers a unique blend of beauty, protection, and ease of use. It’s made from natural ingredients, making it a safer choice for your family and the environment. It dries quickly, meaning you can complete your projects faster and with less fuss. Plus, it’s incredibly versatile. Use it as a sealer, a finish, or even a colorant by adding pigments.
Think about your kitchen table, constantly exposed to spills and scratches. Applying a coat of our shellac creates a protective barrier, preventing liquids from seeping into the wood and making it incredibly easy to clean. Or consider your child’s wooden toys. You want a finish that’s safe and non-toxic. Our shellac is perfect for that, giving you peace of mind knowing your children are playing with beautifully finished and safe items.
Investing in our “best household shellac” is investing in the longevity and beauty of your home. It’s about preserving your treasures, protecting your surfaces, and adding a touch of elegance to your everyday life. With its easy application, quick drying time, and natural composition, our shellac is the perfect choice for anyone who wants to achieve professional-quality results without the hassle. Give your furniture, crafts, and home decor the protection and shine they deserve!
Shellac vs. Other Finishes: Making the Right Choice
So, you’re standing in the hardware store, staring at rows upon rows of cans – varnish, lacquer, polyurethane, and, of course, shellac. It’s easy to get overwhelmed! Understanding the fundamental differences between these finishes is key to choosing the right one for your project. Shellac, for example, offers a unique warmth and clarity that’s hard to replicate.
Think about a cherished antique dresser you want to restore. While polyurethane offers excellent durability, it can often impart a plastic-like appearance that detracts from the original character. Shellac, on the other hand, will highlight the wood grain and provide a beautiful, classic sheen. It’s about preserving that character, not modernizing it away.
Another consideration is the environment. Modern varnishes and lacquers often contain VOCs (volatile organic compounds), which can be harmful. Shellac, being derived from a natural resin, is a more eco-friendly option, especially if you opt for dewaxed shellac, making it safer for your home and easier to apply subsequent coats. This is particularly important if you have children or pets who might be sensitive to chemical fumes.
Ultimately, the “best” finish depends entirely on your specific needs and the piece you’re working on. Consider the level of protection required, the desired aesthetic, and your personal preferences. Researching each option thoroughly will ensure you achieve the result you’re aiming for, and prevents costly mistakes down the line.
Preparing Your Surface for Shellac: Achieving a Flawless Finish
Imagine spending hours meticulously applying shellac, only to find unsightly blemishes and imperfections shining through! Proper surface preparation is the unsung hero of any finishing project, and shellac is no exception. A clean, smooth, and properly prepared surface is crucial for achieving a professional-looking result.
First, thorough cleaning is paramount. Remove any dirt, grease, wax, or previous finishes. Think of restoring an old kitchen table. If you try to apply shellac over layers of old wax polish, the finish will likely be uneven and won’t adhere properly. Use a suitable cleaner and degreaser to strip the surface down to bare wood.
Next, sanding is essential. Start with a coarser grit sandpaper to remove any imperfections or scratches, then gradually work your way to finer grits for a smooth surface. Imagine refinishing a wooden chair that has years of wear and tear. You’ll need to sand out those dents and scratches before applying the shellac.
Finally, consider using a sanding sealer. This will help to fill the wood pores and create a more uniform surface for the shellac to adhere to. A sealer is particularly useful for porous woods like oak or mahogany. Skipping this step can lead to an uneven finish that requires more coats of shellac to achieve the desired look.
Tinting and Coloring Shellac: Creative Customization
Shellac isn’t just a clear finish; it’s a blank canvas for adding color and character to your projects. Whether you want to match an existing piece of furniture or create a unique, eye-catching effect, tinting shellac opens up a world of creative possibilities.
Think about wanting to replicate the deep, rich color of an antique writing desk. You could use dyes or pigments specifically designed for shellac to achieve that exact hue. Experimenting with different colors and intensities can lead to stunning results. Remember to test your color mix on a scrap piece of wood before applying it to your main project.
Alternatively, consider using universal tints that can be added to various finishes, including shellac. These tints offer a convenient way to customize your color and are readily available at most hardware stores. Just be sure to add the tint gradually and mix thoroughly to ensure an even color distribution.
Another option is to layer different colors of shellac to create unique effects. Imagine applying a base coat of amber shellac followed by a top coat of garnet shellac. This can add depth and warmth to the finish, mimicking the look of aged wood. The possibilities are truly endless, so don’t be afraid to experiment and find what works best for your style.
Shellac Application Techniques: Brush, Spray, and Beyond
Applying shellac isn’t a one-size-fits-all process. The best technique depends on the size and complexity of your project, your desired finish, and your personal preferences. Mastering different application methods allows you to tackle any project with confidence.
For smaller projects, brushing is often the easiest and most accessible option. Think about refinishing a small wooden box. A high-quality brush designed for shellac will ensure a smooth, even application. Use long, even strokes and avoid over-brushing, as this can lead to brush marks. Practice on a scrap piece of wood to get a feel for the shellac’s viscosity and drying time.
Spraying shellac is ideal for larger or more intricate pieces, like furniture with detailed carvings. A spray gun allows you to apply a thin, even coat quickly and efficiently. Imagine restoring a large antique cabinet. Spraying shellac will ensure that you reach all the nooks and crannies, providing a consistent finish. Remember to work in a well-ventilated area and wear appropriate safety gear, such as a respirator.
Don’t be afraid to experiment with other application methods, such as padding. Padding involves applying shellac with a cloth pad, creating a French polish effect. This technique requires patience and practice but can result in a stunning, high-gloss finish. Consider learning this technique if you want to achieve a truly professional look on your next project.
The Ultimate Buying Guide for the Best Household Shellac
Hey there, future shellac enthusiast! So, you’re thinking about using shellac for your next project? Fantastic choice! Shellac is a versatile and beautiful finish with a rich history. But with so many options out there, finding the best household shellac for your needs can feel a bit overwhelming. Don’t worry, that’s where this guide comes in! We’re going to break down everything you need to know to confidently choose the perfect shellac for your project, ensuring a stunning and long-lasting finish. Let’s get started!
Understanding Shellac Cut: Your Recipe for Success
Think of shellac cut like a recipe. It’s all about the ratio of shellac flakes to denatured alcohol. The cut is usually expressed as pounds of shellac flakes dissolved in a gallon of denatured alcohol – so a 2-lb cut means 2 pounds of flakes per gallon. Knowing your cut is crucial because it dictates the thickness and how many coats you’ll need. A thinner cut, like a 1-lb or 1.5-lb cut, is great for building up a finish in multiple thin coats, which minimizes drips and ensures a smooth, even surface. A thicker cut, like a 2-lb or 3-lb cut, provides faster build-up but requires more skill to avoid runs.
Choosing the right cut depends entirely on your project and experience level. If you’re new to shellac, starting with a 1.5-lb or 2-lb cut is generally a safe bet. You can always thin it down further by adding more denatured alcohol. Remember, it’s always easier to add coats than to remove drips and runs from a too-thick application. Experimenting with different cuts is part of the fun of learning shellac, but starting with a manageable cut will save you headaches and ensure a beautiful final product.
Dewaxed vs. Waxed Shellac: Knowing the Difference
Okay, this one is super important. Dewaxed shellac has had the naturally occurring wax removed, while waxed shellac retains it. Why does this matter? Well, wax interferes with adhesion. If you plan to apply other finishes, like varnish or lacquer, over your shellac, you absolutely need to use dewaxed shellac. The wax will prevent the subsequent finish from bonding properly, leading to peeling and other problems down the line.
Think of it this way: waxed shellac is like having a layer of oil on your surface. Nothing will stick to it properly. Dewaxed shellac, on the other hand, provides a clean, receptive surface for other finishes to adhere to. If you’re only using shellac as your final finish, waxed shellac is perfectly fine and can even offer a slightly softer, warmer look. However, for maximum versatility and compatibility with other finishes, dewaxed is usually the best choice for the best household shellac. Always check the label carefully!
Flake vs. Pre-Mixed: Convenience vs. Control
You have two main options for buying shellac: flakes that you mix yourself, or pre-mixed shellac in a can. Flakes offer ultimate control. You can adjust the cut to your exact preference, and you know exactly what’s in your finish. However, mixing flakes requires more time and effort, as you need to dissolve them in denatured alcohol, which can take a few hours or even overnight.
Pre-mixed shellac, on the other hand, is all about convenience. Just open the can and start applying! This is a great option if you’re short on time or just want a hassle-free experience. However, pre-mixed shellac has a limited shelf life, as it can deteriorate over time. Also, you don’t have as much control over the cut or the additives that might be included. For beginners, pre-mixed is often recommended, but experienced users often prefer the control and freshness of flakes.
Color and Clarity: Achieving Your Desired Look
Shellac comes in a range of colors, from clear to amber, and each color imparts a different warmth and tone to your wood. Super blonde shellac is the lightest and clearest, ideal for preserving the natural color of light-colored woods like maple or birch. Amber shellac, on the other hand, adds a warm, golden glow, enhancing the richness of darker woods like cherry or walnut. Garnet shellac has a reddish-brown hue, perfect for adding antique character to your projects.
Consider the look you’re trying to achieve when choosing the color of your shellac. If you want to preserve the wood’s natural beauty, opt for super blonde or a very light blonde. If you want to add warmth and depth, amber or garnet are excellent choices. You can also mix different colors of shellac to create your own custom shades. Always test the color on a scrap piece of wood before applying it to your final project to ensure you’re happy with the result. Finding the best household shellac also means finding the best color for your individual project.
Shelf Life and Storage: Keeping Your Shellac Fresh
Shellac, especially pre-mixed, doesn’t last forever. Over time, it can deteriorate and become less effective. Pre-mixed shellac typically has a shelf life of about 6-12 months after it’s opened, while shellac flakes, if stored properly, can last for several years. The key to prolonging the life of your shellac is proper storage.
Store shellac in a cool, dark, and dry place. Avoid storing it in direct sunlight or in areas with extreme temperature fluctuations. For pre-mixed shellac, make sure the lid is tightly sealed to prevent evaporation and oxidation. For shellac flakes, store them in an airtight container to protect them from moisture. Before using shellac that has been stored for a while, always test it on a scrap piece of wood to ensure it still dries properly and provides a good finish. If it’s cloudy or doesn’t dry properly, it’s time to replace it.
Application Methods: Brushing, Spraying, and Beyond
Shellac is incredibly versatile and can be applied in a variety of ways. Brushing is the most common method, especially for smaller projects and beginners. A good quality natural bristle brush is essential for achieving a smooth, even finish. Spraying shellac, either with an HVLP (high-volume, low-pressure) sprayer or aerosol can, is ideal for larger surfaces and achieving a perfectly smooth, professional-looking finish.
Another traditional method is French polishing, which involves applying very thin coats of shellac with a pad to create a deep, lustrous finish. The best application method depends on your project size, desired finish, and experience level. If you’re new to shellac, start with brushing. As you gain experience, you can explore spraying or French polishing. Regardless of the method you choose, always work in a well-ventilated area and wear appropriate safety gear, such as a respirator.
Safety Precautions: Working Responsibly
Shellac is generally considered a safe finish, but it’s important to take certain precautions when working with it. The denatured alcohol used to dissolve shellac flakes is flammable, so always work in a well-ventilated area away from open flames or sparks. Wear gloves to protect your hands from irritation, and use a respirator or mask to avoid inhaling the fumes.
When disposing of shellac-soaked rags, be sure to lay them out flat to dry completely before discarding them. Piling them together can create a fire hazard due to spontaneous combustion. Always read and follow the manufacturer’s instructions on the shellac container. While shellac is a natural finish, it’s still important to handle it responsibly and prioritize your safety. Choosing the best household shellac also involves choosing a brand that emphasizes safety and provides clear instructions.
FAQs
What exactly *is* shellac, anyway?
Shellac is a fascinating finish with a long history! It’s actually a resin secreted by the lac bug found in forests of India and Thailand. This resin is harvested, processed, and then dissolved in alcohol to create the liquid finish we know as shellac. Think of it as a natural, biodegradable coating that’s been used for centuries on everything from furniture to musical instruments.
Beyond its natural origins, shellac boasts some pretty impressive characteristics. It dries quickly, adheres well to most surfaces, and is non-toxic when dry, making it a safe choice for projects around the home. It also comes in a variety of colors, from clear to amber, allowing you to achieve different looks. Don’t let its old-world charm fool you – shellac is a versatile and effective option for many finishing applications!
Is shellac safe to use around my family and pets?
That’s a fantastic question and definitely something you want to consider! The good news is, when dry, shellac is considered non-toxic. It’s even been used in food glazing and as a pharmaceutical coating, which speaks to its safety. However, it’s important to remember that shellac is dissolved in alcohol, so you need to be mindful of the fumes during application.
Proper ventilation is key when working with shellac. Open windows and doors, or even use a fan to circulate the air. Avoid applying shellac in enclosed spaces. Once the shellac is dry and the alcohol has evaporated, it’s perfectly safe for your family and furry friends to be around. Just remember to store any leftover shellac in a secure place, out of reach of children and pets, just like you would with any other finishing product.
Can I use shellac over existing finishes like varnish or paint?
Absolutely! Shellac is a very accommodating finish and usually plays well with others. In most cases, you can apply shellac over existing varnish or paint. However, there are a couple of things you should consider before diving in.
First, you’ll want to make sure the existing finish is clean and sound. Give it a good cleaning with a degreaser or mineral spirits to remove any dirt, grease, or wax. Lightly sanding the surface will also help the shellac adhere better. If the existing finish is peeling or flaking, you’ll want to remove that loose material first. Also, always test a small, inconspicuous area first to make sure the shellac adheres properly and doesn’t react negatively with the existing finish.
How do I clean my brushes after using shellac?
Cleaning up after a shellac project is surprisingly easy! Since shellac is dissolved in alcohol, you don’t need any harsh chemicals or special solvents. The best and most effective way to clean your brushes is with denatured alcohol.
Simply pour some denatured alcohol into a container and thoroughly rinse your brushes, making sure to work the alcohol into the bristles to dissolve any remaining shellac. You may need to repeat this process a couple of times until the brushes are completely clean. Once they’re clean, reshape the bristles and let them air dry completely before storing them. That’s it! Easy peasy!
What’s the best way to apply shellac for a smooth finish?
Achieving a smooth finish with shellac is all about technique and a little patience! One of the best methods is to apply multiple thin coats rather than one thick coat. This helps to avoid drips and runs and allows the shellac to dry evenly.
Use a high-quality brush designed for shellac or a lint-free cloth. Apply the shellac in smooth, even strokes, overlapping each stroke slightly. After each coat, lightly sand the surface with fine-grit sandpaper to remove any imperfections. Then, wipe away the dust with a tack cloth before applying the next coat. With a little practice, you’ll be able to achieve a beautiful, smooth shellac finish that you’ll be proud of!
How long does it take for shellac to dry?
One of the great things about shellac is how quickly it dries! Under ideal conditions, shellac can dry to the touch in as little as 30 minutes. You’ll usually be able to recoat in about an hour. However, drying times can vary depending on factors like humidity, temperature, and the thickness of the coat you’ve applied.
Higher humidity can slow down the drying process, so it’s best to apply shellac on a dry day. Also, make sure the room is well-ventilated to help the alcohol evaporate quickly. Before applying the next coat, gently touch the surface to make sure it’s completely dry and no longer tacky.
What are the different “cuts” of shellac, and why does it matter?
The “cut” of shellac refers to the ratio of shellac flakes to alcohol. It’s essentially a measurement of how concentrated the shellac solution is. A “one-pound cut” means that one pound of shellac flakes has been dissolved in one gallon of alcohol. A “two-pound cut” means that two pounds of flakes have been dissolved in one gallon, and so on.
The cut matters because it affects the thickness and drying time of the shellac. Higher cuts (like a 3-pound or 4-pound cut) will result in a thicker finish that dries more slowly, while lower cuts (like a 1-pound or 2-pound cut) will result in a thinner finish that dries more quickly. For most furniture finishing projects, a 2-pound cut is a good starting point. You can then adjust the cut by adding more alcohol to thin the shellac or allowing some of the alcohol to evaporate to thicken it.
Final Verdict
Choosing the best household shellac might seem daunting with so many options, but hopefully, this guide has given you the confidence to navigate the world of shellac finishes. Think about your project, consider the factors we discussed, and don’t be afraid to experiment! Each brushstroke is a learning experience, and the rewards of a beautifully finished piece are absolutely worth the effort.
Ultimately, the power to transform your furniture and bring out the beauty in your wood lies in your hands. Armed with the knowledge from our reviews and buying tips, you’re ready to embark on a rewarding DIY adventure. Go ahead, select your perfect shellac, and create something amazing. You’ve got this!