So, you’re gearing up for that solo backpacking adventure you’ve been dreaming about, aren’t you? Visions of serene sunsets, crisp mountain air, and undisturbed nature already dance in your head. But before you hit the trail, there’s a crucial decision to make: your shelter. Nobody wants to be weighed down by a bulky tent when you’re conquering miles of terrain, especially when you’re carrying everything yourself. That’s where finding the right tent becomes absolutely paramount to ensure a comfortable and enjoyable trip.
That’s why we’ve put together this comprehensive guide focusing on the best lightweight backpacking tents for 1 person. We know the market can be overwhelming, so we’ve cut through the noise to bring you detailed reviews and a practical buying guide to help you choose the perfect tent for your needs. We’ll walk you through everything from weight and packability to durability and weather resistance, making sure you’re well-equipped to choose a shelter that’s your ideal home away from home, without breaking your back (or the bank!).
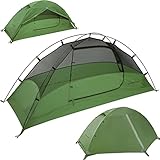
Before we start our review of the best lightweight backpacking tents for 1 person, here are some related products you can find on Amazon:


Venturing Solo: Finding Your Perfect Shelter
So, you’re planning a solo backpacking trip? Awesome! There’s nothing quite like the freedom of exploring the wilderness on your own terms. But before you hit the trail, you need to think about shelter. Your tent is your home away from home, the barrier between you and the elements, and a crucial piece of gear for a comfortable and safe experience. One of the biggest factors for solo hikers is weight. Every ounce counts when you’re carrying everything yourself, and that’s where choosing wisely becomes paramount.
That’s why we’re diving into the world of the best lightweight backpacking tents for 1 person. We’re not talking about bulky, uncomfortable shelters here. We’re talking about tents that are designed for efficiency, packability, and, most importantly, solo adventurers like you. Imagine being able to set up a cozy haven in minutes after a long day of hiking, knowing you’re protected from rain, wind, and bugs, all without adding unnecessary weight to your pack.
Now, when we say “lightweight,” what are we actually talking about? Generally, for solo backpacking, we’re looking at tents that weigh under 3 pounds. Some ultra-light options can even dip below 2 pounds! In fact, according to a recent survey of long-distance hikers, the average tent weight for a solo trip was just 2.7 pounds. Finding that sweet spot between weight, durability, and comfort is the key to a happy backpacking experience.
This guide is here to help you navigate the sometimes-overwhelming world of solo tents. We’ll explore different types, discuss important features to consider, and highlight some of the best lightweight backpacking tents for 1 person currently on the market. Think of this as your friendly guide to finding the perfect shelter, so you can focus on what truly matters: enjoying your solo adventure!
5 Best Lightweight Backpacking Tents For 1 Person
Big Agnes Copper Spur HV UL1
The Big Agnes Copper Spur HV UL1 is a palace for solo adventurers, offering a surprising amount of headroom and livable space for its weight. It’s like having a tiny apartment in the backcountry, complete with well-placed pockets for stashing gear. Setup is a breeze thanks to the intuitive pole system, and the durable materials hold up well against wind and rain. You will appreciate the details like the oversized door that makes getting in and out easy.
However, all that space comes at a slight weight penalty compared to some of the more minimalist options out there. It’s still incredibly lightweight, but if shaving every possible ounce is your top priority, there might be lighter choices. The price point might also give some pause, as quality like this doesn’t come cheap. Overall, for a balance of comfort, durability, and low weight, the Copper Spur is a hard-to-beat choice.
REI Co-op Quarter Dome SL1
REI’s Co-op Quarter Dome SL1 strikes an excellent balance between affordability and performance. This tent is a solid choice for backpackers seeking a reliable shelter without breaking the bank. It offers decent space, easy setup, and the quality craftsmanship that REI is known for. The tent’s design prioritizes ventilation, making it a comfortable option for warmer climates.
While it’s not the absolute lightest tent on the market, the Quarter Dome SL1 offers a fantastic value proposition. The materials, while durable, aren’t quite as ultralight as some of the higher-end options, which contributes to its slightly heavier weight. However, for most backpackers, the added durability and lower price tag more than compensate for the extra few ounces. If you’re looking for a dependable tent that won’t empty your wallet, this is a great option.
NEMO Hornet Elite OSMO 1P
The NEMO Hornet Elite OSMO 1P is for those who prioritize going light and fast. This tent is incredibly lightweight, making it a favorite among thru-hikers and ounce-counters. The minimalist design sheds unnecessary weight, resulting in a barely-there shelter that packs down incredibly small. Despite its featherweight nature, it still provides decent protection from the elements.
The tradeoff for its minimal weight is a more cramped interior. It is definitely a tight squeeze for larger individuals, and there is not much room for storing gear inside the tent. Durability is also a concern, as the lightweight materials require careful handling. If you are willing to sacrifice some space and durability for an incredibly light shelter, the Hornet Elite OSMO is a top contender.
MSR Hubba Hubba NX Solo
The MSR Hubba Hubba NX Solo is known for its robust construction and exceptional weather protection. This tent is a reliable companion for challenging conditions, offering a secure and comfortable shelter in wind and rain. It’s a great choice for backpackers who prioritize durability and stability over minimizing weight. The Hubba Hubba NX Solo’s design allows for a good amount of internal space and headroom, making it a comfortable refuge after a long day on the trail.
While not the lightest option in its class, the Hubba Hubba NX Solo’s weight is a fair trade-off for its durability and weather resistance. It might not be the ideal choice for gram-counters, but for those who value a sturdy and dependable tent that can handle rough weather, the Hubba Hubba NX Solo is an excellent pick. It’s a tent you can rely on when the weather turns sour.
Durston Gear X-Mid 1P
The Durston Gear X-Mid 1P is a fantastic value that offers a lot of space and great weather protection at a very competitive weight. Its unique design, using trekking poles for support, allows for a spacious interior and stable structure. It’s a tent that feels larger than it is, offering ample room to move around and store gear.
Setting up the X-Mid 1P with trekking poles does require a bit of practice, but the payoff is worth it. Some users might find the lack of a freestanding design inconvenient. However, for those looking for a lightweight, spacious, and affordable shelter, the X-Mid 1P is a standout option. It punches well above its weight class in terms of features and performance.
Why Invest in a Lightweight Backpacking Tent for One Person?
Imagine this: you’re miles deep into the wilderness, the sun setting, painting the sky in vibrant hues. But your shoulders ache, your legs are burning, and your pack feels like it’s filled with bricks. The last thing you want to do is wrestle with a heavy, bulky tent. A lightweight backpacking tent designed for one person can be a game-changer. It significantly reduces the load you’re carrying, allowing you to hike further, explore more, and ultimately enjoy your time in nature with far less physical strain. Think of all the extra energy you’ll have to appreciate the stunning views and conquer that challenging trail!
Beyond just weight savings, these tents are often engineered for optimal space efficiency. They prioritize a comfortable sleeping area while minimizing bulk, ensuring you have enough room to stretch out after a long day but don’t sacrifice precious pack space. Picture yourself having a cozy, private sanctuary to retreat to after a day of adventure, a space specifically designed for you and your gear. Plus, many of the best lightweight backpacking tents for 1 person boast impressive durability, able to withstand harsh weather conditions while remaining incredibly portable.
Consider the versatility a dedicated one-person tent offers. Whether you’re a solo traveler seeking solitude, a thru-hiker covering hundreds of miles, or simply prefer the independence of having your own shelter, a lightweight backpacking tent provides the freedom and flexibility to explore on your own terms. No more relying on shared campsites or bulky group shelters. You’re in control of your adventure, able to set up camp wherever you find the perfect spot, without the burden of extra weight or the hassle of unnecessary space.
Investing in a lightweight backpacking tent for one person is an investment in your comfort, your efficiency, and ultimately, your enjoyment of the great outdoors. It’s about maximizing your experience and minimizing the physical strain, allowing you to fully immerse yourself in the beauty of nature. Think of it as upgrading your adventure, transforming your backpacking trips from endurance tests into truly unforgettable experiences. The right tent can make all the difference between a grueling trek and a blissful escape.
Understanding Tent Fabrics and Materials
Ever wondered why some tents feel like a sauna while others breathe so well? It all boils down to the fabric. You’ll encounter materials like nylon and polyester, often coated with polyurethane (PU) or silicone. Nylon is known for its strength-to-weight ratio, making it a popular choice for lightweight tents. However, it can stretch a bit when wet.
Polyester, on the other hand, resists stretching and holds its shape better in damp conditions. This is crucial if you anticipate rain or dew. The coating, like PU or silicone, adds waterproofness. Think of PU as the standard, reliable protection. Silicone coatings, however, tend to be lighter and more durable, leading to longer-lasting waterproof performance.
The denier rating (like 20D or 30D) indicates the thread thickness – a lower number generally means a lighter fabric. Be mindful of this, though! Super-light fabrics might be more prone to wear and tear. It’s a trade-off between weight and durability. Imagine patching a super thin tent on a windy mountain – not ideal.
Ultimately, the best fabric depends on your priorities. If you’re consistently hiking in dry climates and are careful with your gear, a lightweight nylon tent with a silicone coating could be perfect. If you’re expecting rain and want something more durable, a polyester tent with a PU coating might be a better bet. Research the typical weather conditions of your backpacking locations and factor that into your tent fabric decision.
Choosing the Right Tent Shape and Design
Tent shapes aren’t just for aesthetics; they significantly impact weight, livability, and weather resistance. Dome tents, for example, are popular for their free-standing design, which is super convenient when you’re setting up camp on rocky or uneven ground. They also tend to handle wind well because their curved shape deflects gusts.
Tunnel tents, on the other hand, often offer more interior space for the same weight. They’re excellent for stretching out after a long day, but usually require staking to stay upright, which can be tricky in certain terrains. Think about how much room you truly need. Are you just sleeping, or will you be spending significant time inside due to inclement weather?
Another design factor to consider is the vestibule. This small, covered area outside the main tent body is a lifesaver for stashing muddy boots and packs. It keeps the inside of your tent cleaner and gives you a bit of extra covered space. Imagine waking up to a rainy morning; having a vestibule lets you brew coffee without getting soaked!
Ultimately, consider your typical backpacking environment and personal needs. If you prioritize ease of setup and wind resistance, a dome tent might be ideal. If space and weather protection are key, a tunnel tent with a good vestibule could be a better choice. Don’t forget to factor in how easy it is to pitch each design on your own, especially if you’re solo backpacking.
Mastering Condensation Management
Condensation: the bane of many backpackers! Even without rain, you can wake up to a damp tent interior due to the moisture you exhale and the natural humidity. Proper ventilation is key to minimizing this. Look for tents with large mesh panels and vents that can be opened to allow airflow. Imagine trying to pack a soaking wet tent on day one of a weeklong trip – not a fun scenario.
A double-wall tent offers better condensation management than a single-wall. The inner mesh tent allows moisture to escape, while the outer rainfly protects you from the elements. If you opt for a single-wall, make sure it has excellent ventilation features. Also, consider the location you’re camping in. Areas near water sources or at higher altitudes are more prone to condensation.
Another trick is to avoid pitching your tent in low-lying areas where cold air and moisture tend to accumulate. Look for slightly higher ground with good airflow. You can also wipe down the interior of your tent with a absorbent cloth before packing it up. This can help prevent mildew and keep your gear drier in the long run.
Finally, consider investing in a tent footprint. This protects the bottom of your tent from moisture and abrasion, which can reduce condensation and extend the life of your tent. Condensation is often an unavoidable aspect of camping; learning to manage it will make your backpacking experience much more enjoyable.
Packing and Maintaining Your Lightweight Tent
The key to a happy tent is proper packing and care. Always pack your tent as neatly as possible, avoiding creases and sharp folds that can weaken the fabric over time. Stuffing it haphazardly into its stuff sack might seem quick, but it can lead to damage and uneven wear. Think of it like rolling up a map versus crumpling it – one lasts a lot longer.
Store your tent in a cool, dry place when you’re not using it. Moisture can lead to mildew and mold, which can seriously damage the fabric and coatings. Avoid storing it in your car trunk for extended periods, as the heat can also degrade the materials. Take the time to completely dry your tent before storing it.
Regularly inspect your tent for any signs of wear and tear, such as small tears, holes, or damaged zippers. Repairing these issues promptly can prevent them from becoming larger problems down the line. Carry a small repair kit with you on your backpacking trips for on-the-go fixes. Duct tape is a backpacker’s best friend!
Finally, avoid using harsh chemicals or abrasive cleaners on your tent. Simply wiping it down with a damp cloth is usually sufficient. If you need to use soap, opt for a mild, pH-neutral detergent specifically designed for outdoor gear. Taking good care of your lightweight tent ensures it will provide you with many years of comfortable and reliable shelter on your backpacking adventures.
Best Lightweight Backpacking Tents For 1 Person: A Buyer’s Guide
So, you’re looking to ditch the dead weight and venture into the backcountry with one of the best lightweight backpacking tents for 1 person? Awesome! Choosing the right tent is a crucial decision that can make or break your solo adventures. It’s not just about finding the lightest option; it’s about striking the perfect balance between weight, comfort, durability, and features that suit your specific needs. Think of this guide as a friendly chat around the campfire, helping you navigate the sometimes-overwhelming world of solo backpacking tents. Let’s get started!
Weight: Every Ounce Counts
Okay, let’s talk weight. This is probably the first thing on your mind when searching for the best lightweight backpacking tents for 1 person, and for good reason! When you’re carrying everything on your back, every ounce adds up. Think about it – that extra half-pound in your tent can quickly turn into a pounding ache in your shoulders after a few miles on the trail. Aim for a tent that weighs between 2 to 3 pounds (trail weight) if you’re serious about minimizing your pack weight. Ultralight options can even dip below 2 pounds, but be prepared for potential trade-offs in durability or features.
Imagine yourself scaling a steep incline, already feeling the burn in your legs. Now picture yourself carrying an extra pound or two that you could have easily avoided by choosing a lighter tent. Suddenly, that stunning vista doesn’t seem quite as appealing, does it? Trust me, your body will thank you for prioritizing weight when selecting a solo tent. Remember, it’s not just about the initial weight; it’s about how that weight will feel after hours of hiking in varying conditions.
Livability: Your Home Away From Home
Don’t let the pursuit of minimal weight lead you to sacrifice livability! After a long day of hiking, your tent becomes your sanctuary, your place to rest, recharge, and prepare for the next day’s adventure. Consider the interior space of the tent – can you comfortably sit up? Is there enough room to store your gear inside with you? A cramped tent can quickly become a source of frustration, especially during bad weather when you’re confined indoors. So, when scouting the best lightweight backpacking tents for 1 person, think comfort.
Think about the kind of trips you typically take. Do you often find yourself stuck inside your tent due to rain or snow? If so, a tent with good headroom and a decent-sized vestibule (the covered area outside the tent door) will be a lifesaver. A vestibule provides valuable space for storing wet gear, cooking (with proper ventilation, of course!), and generally keeping your living area clean and dry. It’s these little details that can significantly impact your overall enjoyment of your backpacking trip.
Weather Resistance: Staying Dry and Protected
Mother Nature can be unpredictable, so ensuring your tent can handle various weather conditions is paramount. Look for a tent with a decent waterproof rating (measured in millimeters – mm) for both the tent floor and the rainfly. A rating of 1200mm or higher is generally considered sufficient for resisting rain, while a higher rating (2000mm+) is preferable for heavier rain or snow. Also, pay attention to the tent’s seam construction. Are the seams taped and sealed to prevent water from seeping through? This is a crucial detail often overlooked.
Beyond waterproofing, consider the tent’s wind resistance. A streamlined design and sturdy pole structure are essential for withstanding strong winds. Look for tents with multiple guy-out points, which allow you to secure the tent more firmly to the ground. Think about the environments where you’ll be camping most often. If you frequently encounter windy conditions, investing in a tent specifically designed for high winds is a wise decision. You’ll thank yourself later when you’re tucked away comfortably while the wind howls outside. The best lightweight backpacking tents for 1 person will keep you dry and comfy.
Durability: Investing in Longevity
While lightweight materials are essential for backpacking, you don’t want a tent that will fall apart after just a few trips. Check the denier (D) rating of the fabrics used in the tent floor, body, and rainfly. A higher denier indicates a thicker, more durable fabric. For the floor, consider tents with a denier of 40D or higher for increased puncture resistance. For the rainfly and tent body, 20D or 30D fabrics can offer a good balance between weight and durability.
Think about the types of terrain you’ll be camping on. If you frequently camp on rocky or abrasive surfaces, a tent with a more durable floor is a must. You can also consider using a tent footprint (a separate piece of fabric placed under the tent) to provide an extra layer of protection. While a footprint adds a bit of weight, it can significantly extend the lifespan of your tent floor. Remember, investing in a slightly more durable tent can save you money in the long run by avoiding costly repairs or replacements.
Ease of Setup: Making Camp a Breeze
After a tiring day on the trail, the last thing you want is to struggle with a complicated tent setup. Look for a tent that’s easy to pitch, even in less-than-ideal conditions. Freestanding tents, which can stand on their own without being staked down, are generally easier to set up than non-freestanding tents. Color-coded poles and clips can also simplify the process, especially when you’re setting up camp in the dark or in the rain.
Practice setting up your tent in your backyard before heading out on your first trip. This will allow you to familiarize yourself with the setup process and identify any potential issues. Some tents have confusing instructions, so a trial run can save you a lot of frustration in the field. Also, consider watching online videos demonstrating the setup of your chosen tent. Visual aids can be incredibly helpful, especially for complex or unfamiliar tent designs.
Ventilation: Avoiding Condensation Blues
Condensation can be a major issue in backpacking tents, especially in humid conditions. When you breathe and sweat inside the tent, the moisture can condense on the interior walls, leaving you damp and uncomfortable. Look for a tent with good ventilation features, such as mesh panels in the tent body and vents in the rainfly. These features allow air to circulate, reducing condensation buildup.
Consider tents with adjustable vents that you can open or close depending on the weather conditions. During cold weather, you can close the vents to retain heat, while during warm weather, you can open them to maximize airflow. The placement of the vents is also important. Vents located near the top of the tent are more effective at removing warm, moist air. A well-ventilated tent will not only keep you drier but also prevent the growth of mold and mildew, extending the lifespan of your tent. Finding the best lightweight backpacking tents for 1 person can often be a process of learning which vents perform best.
Price: Balancing Budget and Quality
Finally, let’s talk about price. Backpacking tents can range in price from a few hundred dollars to well over a thousand. While it’s tempting to go for the cheapest option, remember that you often get what you pay for. Cheaper tents may use lower-quality materials and construction, which can compromise durability and weather resistance. On the other hand, you don’t necessarily need to spend a fortune to get a reliable tent.
Set a budget and then research tents within that price range. Read reviews from other backpackers to get a sense of their experiences with different tents. Look for sales and discounts, especially during the off-season. Remember, a tent is an investment, and choosing the right one can make your backpacking adventures much more enjoyable. Don’t be afraid to spend a little extra for a tent that will last for years and provide you with the comfort and protection you need. The best lightweight backpacking tents for 1 person are out there, and hopefully, this guide helps you find one!
Frequently Asked Questions
What makes a tent “lightweight” for backpacking?
That’s a great question, and a common one for anyone getting into solo backpacking! Generally, a lightweight backpacking tent for one person falls somewhere under 3 pounds, often even closer to 2 pounds. But “lightweight” is also relative – what’s lightweight for a weekend trip might not cut it on a thru-hike where every ounce counts. Think about the overall weight of your pack and how much you’re willing to dedicate to shelter.
Beyond the raw weight, consider the packability of the tent. Can you compress it down small enough to fit comfortably in your pack alongside your other gear? Bulk can be just as important as weight. A lightweight tent that takes up half your pack might not be the best choice, even if it’s technically light. Look for models that compress well and come with a stuff sack that lets you cinch it down.
How important is the packed size of a backpacking tent?
Super important! Especially when you’re backpacking solo, space is at a premium. Every inch counts in your pack, and a bulky tent can really eat into that precious real estate. Imagine trying to squeeze in your sleeping bag, cooking gear, and food around a tent that takes up half your pack. It’s not a fun scenario!
A compact packed size makes it much easier to organize your gear and distribute the weight evenly, leading to a more comfortable hike. Look for tents that pack down small and come with a stuff sack that allows you to really cinch them down. You might also consider dividing the components – tent body, fly, poles – and distributing them strategically in your pack to further optimize space.
What’s the difference between single-wall and double-wall tents?
This is a key difference to understand! A single-wall tent, as the name suggests, has just one layer of fabric. These are generally lighter and easier to set up because there’s less material. However, single-wall tents can sometimes struggle with condensation. Because there isn’t a separate inner layer, moisture from your breath or the ground can condense on the inside of the tent wall.
Double-wall tents, on the other hand, have two layers: an inner tent body (often made of breathable mesh) and an outer waterproof fly. This creates a buffer zone that helps to manage condensation. The fly also provides better protection from rain and wind. While double-wall tents are typically a bit heavier and take slightly longer to set up, the added comfort and weather protection often outweigh the drawbacks, especially in areas with unpredictable weather.
How waterproof should my tent be? What’s “hydrostatic head?”
Waterproofness is definitely a crucial factor! You’ll want to look for a tent with a decent hydrostatic head rating. This is basically a measurement of how much water pressure the fabric can withstand before leaking. Generally, a hydrostatic head of 1500mm is considered the bare minimum for a reliable backpacking tent, but 2000mm or higher is preferable, especially if you expect to encounter heavy rain.
Don’t just focus on the fly rating, though. Pay attention to the floor rating as well, since that’s where you’ll be putting the most pressure. Also, remember that even the most waterproof fabric can leak at the seams. Look for tents with taped or sealed seams for added protection. Good ventilation also helps to manage condensation, which can sometimes feel like a leak even if the fabric itself is waterproof.
Are expensive tents really that much better than cheaper ones?
Well, like with most things, you often get what you pay for. More expensive tents tend to use higher-quality materials that are lighter, more durable, and more waterproof. They might also have features like better ventilation, more robust zippers, and more thoughtfully designed interiors. This can translate to a more comfortable and reliable experience on the trail.
However, that doesn’t mean you absolutely need to break the bank! There are plenty of excellent mid-range tents that offer a good balance of weight, durability, and price. Ultimately, the best tent for you will depend on your specific needs and budget. If you’re only planning on occasional weekend trips in fair weather, a more affordable option might suffice. But if you’re planning on more challenging adventures, it might be worth investing in a higher-end model.
How easy are these tents to set up, especially when I’m tired after a long day of hiking?
Ease of setup is super important, especially when you’re exhausted after a long day! Look for tents with intuitive designs and color-coded poles. A free-standing tent (one that can stand on its own without being staked) can be a real lifesaver, especially on rocky or uneven terrain where it might be difficult to find good staking points.
Consider practicing setting up your tent in your backyard before your trip, so you’re familiar with the process and can do it quickly and efficiently. Reading reviews can also give you a sense of how easy (or difficult) a particular tent is to set up in real-world conditions. Some reviewers even post videos of the setup process, which can be incredibly helpful.
What kind of maintenance do these lightweight tents require?
To keep your tent in good shape for years to come, a little TLC goes a long way! The most important thing is to always make sure your tent is completely dry before storing it. Moisture can lead to mildew and damage the waterproof coating. Shake out any dirt or debris before packing it away as well.
When you’re on the trail, try to pitch your tent on a smooth surface to avoid tearing the floor. Consider using a footprint (a ground sheet designed to fit under your tent) for added protection. Avoid storing your tent in direct sunlight for extended periods, as UV rays can degrade the fabric. With proper care, your lightweight tent will be your trusted shelter for many adventures!
Final Verdict
Choosing the perfect solo shelter can feel like a big decision, but remember, you’re investing in more than just a tent. You’re investing in your comfort, safety, and ultimately, your freedom to explore the wild on your own terms. Armed with the knowledge from these reviews and the buying guide, you’re well-equipped to pick one of the best lightweight backpacking tents for 1 person and find a match that perfectly suits your needs. Don’t overthink it – trust your gut and envision yourself already out there, enjoying the peace and solitude of the backcountry.
Now, go forth and start planning your adventure! Don’t be afraid to take that first step towards your next solo backpacking trip. The world is waiting to be explored, and with the right shelter, you’ll be ready to answer its call. Remember that the memories you’ll create under starry skies are worth more than any hesitation you might have right now. Happy trails!