So, you’ve got a Raspberry Pi! Maybe you’re tinkering with a home automation project, setting up a retro gaming console, or even learning to code. The possibilities are pretty endless. But before you can truly unleash its potential, you need a screen to see what you’re doing, right? Choosing the right display can be tricky, with so many options out there boasting different features and resolutions. Fear not, because we’re here to help you navigate the world of displays and pick the perfect one for your needs.
This guide is all about finding the best monitors for Raspberry Pi projects, whether you’re a seasoned maker or just starting your journey. We’ve researched and reviewed a range of monitors, from compact and portable screens to larger, more immersive displays. We’ll break down the key features to consider and provide you with our top recommendations, so you can find the ideal monitor to bring your Raspberry Pi projects to life.
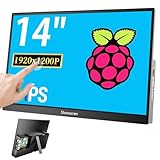
Before we start our review of the best monitors for raspberry pi, here are some related products you can find on Amazon:


Choosing the Perfect Visual Companion for Your Pi: An Introduction
So, you’ve got your Raspberry Pi, a tiny but mighty computer brimming with potential. But let’s be honest, staring at that little green board won’t get you very far! You need a screen, a window into the digital world you’re about to create. Finding the right display can feel like a rabbit hole, but fear not! This guide will help you navigate the often-confusing landscape of monitors and help you find the perfect match for your Pi-powered projects.
Think of it like this: the Raspberry Pi is the engine, and the monitor is the dashboard. A clear, responsive screen allows you to tinker, code, and create with ease. And with over 45 million Raspberry Pi units sold globally by 2022, there’s a massive community out there already enjoying the benefits of a great Pi setup. Whether you’re building a retro gaming console, a home automation hub, or even a smart mirror, the right monitor will be your best friend.
The good news is, you don’t need to break the bank. The “best monitors for Raspberry Pi” don’t necessarily mean the most expensive ones. It’s all about finding the sweet spot between size, resolution, connectivity, and price that suits your particular project. Do you need a compact display for a portable project? Or a larger, high-resolution monitor for coding and development? These are the questions we’ll help you answer.
Ultimately, choosing the perfect monitor is a crucial step in unlocking the full potential of your Raspberry Pi. We’ll explore various options, from budget-friendly picks to high-end displays, ensuring you find the ideal visual companion for your digital adventures. Get ready to transform that little green board into something truly amazing!
5 Best Monitors For Raspberry Pi
Elecrow 5 Inch HDMI Monitor
This little screen is a fantastic option if you’re working on a portable Raspberry Pi project or need a compact display for monitoring system stats. Its 800×480 resolution is surprisingly clear for its size, and the HDMI connectivity makes it a breeze to set up – just plug it in and you’re good to go. The viewing angles aren’t the widest, and you probably won’t be watching movies on it, but for embedded applications or a tiny desktop, it’s a winner.
What makes this monitor really shine is its affordability and its compact form factor. It’s light enough to be mounted on a robot or integrated into a custom enclosure without adding significant bulk. Plus, the included mounting holes offer even more flexibility in how you can use it. For the price, it’s tough to beat the versatility of this little guy.
Waveshare 7 Inch HDMI LCD (C)
If you need a bit more screen real estate without breaking the bank, the Waveshare 7 Inch HDMI LCD (C) is a great choice. With a resolution of 1024×600, it provides a decent amount of detail for general use, coding, or even light gaming. The capacitive touchscreen is responsive and accurate, making it a handy option for interactive projects or applications that benefit from touch input.
This monitor is particularly well-suited for Raspberry Pi projects that require user interaction, such as a smart home control panel or a portable gaming system. The included case (sold separately in some bundles) provides a nice level of protection and makes it easier to integrate into your project. Just be aware that the viewing angles aren’t perfect, so positioning is key.
Official Raspberry Pi 7″ Touchscreen Display
The Official Raspberry Pi 7″ Touchscreen Display is a no-brainer for anyone wanting a seamless and reliable experience. Because it’s designed specifically for the Raspberry Pi, setup is incredibly simple. It connects directly to the DSI port, freeing up your HDMI port for other uses. The touchscreen is responsive and accurate, and the image quality is decent for its size and resolution.
One of the biggest advantages of this display is the official support from the Raspberry Pi Foundation. You can be sure it will work perfectly with your Raspberry Pi, and you’ll find plenty of resources and tutorials online to help you get the most out of it. While it might be slightly pricier than some other options, the peace of mind and ease of use make it worth the investment for many.
Geekworm Raspberry Pi 4B 7 Inch IPS Touch Screen Monitor
Looking for something a little more premium for your Raspberry Pi setup? The Geekworm Raspberry Pi 4B 7 Inch IPS Touch Screen Monitor delivers a vibrant and crisp viewing experience, thanks to its IPS panel. Colors are accurate, and viewing angles are much wider compared to cheaper TN panels. The touchscreen is responsive and works well, adding a layer of interactivity to your projects.
What sets this monitor apart is its build quality and thoughtful design. It often comes with a sturdy stand or case that holds the Raspberry Pi securely behind the screen, creating a clean and integrated look. While it might cost a bit more, the improved image quality, wider viewing angles, and overall build quality make it a compelling option for those who want a more polished Raspberry Pi experience.
Uperfect Raspberry Pi Monitor 13.3 Inch
If you’re looking for a larger display for your Raspberry Pi that can double as a portable monitor, the Uperfect Raspberry Pi Monitor 13.3 Inch is a great option. Its 1080p resolution provides a sharp and detailed image, making it ideal for coding, browsing, or even watching videos. The slim and lightweight design makes it easy to carry around, and the built-in speakers are a nice bonus.
This monitor’s versatility is its biggest selling point. You can use it as a primary display for your Raspberry Pi, a secondary monitor for your laptop, or even connect it to a game console. The multiple input options (HDMI, USB-C) give you plenty of flexibility. Just be aware that you may need an external power source for some devices, and the built-in speakers are adequate but not amazing.
Why People Need to Buy Monitors for Raspberry Pi
Imagine buying a brand-new car but never being able to see the dashboard or the road ahead. That’s essentially what it’s like having a Raspberry Pi without a monitor! While these tiny computers are incredibly powerful and versatile, they lack a built-in screen. To interact with your Pi, whether you’re programming, browsing the web, playing games, or controlling smart home devices, you absolutely need a monitor. It’s the window into your Pi’s world, allowing you to see the output of your commands and interact with the graphical user interface.
Think about projects like building a retro gaming console, creating a digital photo frame, or setting up a smart mirror. None of these are possible without a display! You need to see the game you’re playing, the photos you’re showcasing, or the information reflected in your smart mirror. A good monitor allows you to fully experience and utilize the Raspberry Pi’s capabilities, turning your ideas into reality. It’s not just about seeing something; it’s about interacting with it and making it tangible.
Choosing the right monitor can also significantly improve your experience. The “best monitors for Raspberry Pi” aren’t necessarily the most expensive. Factors like screen size, resolution, and connectivity options matter. A larger screen makes coding and browsing easier, while a higher resolution ensures sharper images and clearer text. HDMI compatibility is crucial for a seamless connection, and features like built-in speakers can eliminate the need for external audio devices.
Investing in a suitable monitor unlocks the full potential of your Raspberry Pi, transforming it from a bare circuit board into a functional and engaging device. It empowers you to bring your creative projects to life, learn new skills, and enjoy countless hours of fun and productivity. So, ditch the headless setup and give your Raspberry Pi the display it deserves – you’ll be amazed at what you can achieve!
Understanding Monitor Connectivity Options for Raspberry Pi
Okay, so you’ve got your Raspberry Pi itching to be connected to a display, but hold on, which cable do you even need? Let’s break down the common connectivity options. HDMI is the king here, almost all modern monitors and Raspberry Pi boards support it, making it the most straightforward choice. Think of it like the universal translator for visual signals – crisp, clear, and readily available.
Then there’s the legacy option of composite video. This is that yellow RCA connector you might remember from older TVs. It’s perfectly acceptable for basic display requirements and older Raspberry Pi models, but the image quality isn’t stellar. Imagine trying to watch a Blu-ray on a VHS player – it technically works, but you’re not getting the full experience. This is fine for simple tasks like running a retro gaming emulator.
Lastly, some Raspberry Pi models offer Display Serial Interface (DSI). This allows for direct connection to specialized screens, often smaller touchscreens. This is often seen in DIY projects, like a smart mirror or a small interactive display built into a project case. You can think of this as a direct line of communication – faster and more efficient for specific purposes.
Choosing the right connectivity is crucial for getting the best visual experience from your Raspberry Pi. Consider the capabilities of your monitor, the intended use case, and the ports available on your Pi board. With HDMI being the most universal and recommended choice.
Powering Your Monitor: Ensuring a Stable Setup
So, you’ve got your monitor connected, but is it actually turning on? Powering your monitor seems simple enough, but it’s an important aspect often overlooked. Most external monitors use a standard AC power adapter that plugs into the wall. Make sure the adapter is compatible with the voltage in your region to avoid any mishaps. Imagine accidentally plugging a European appliance into an American outlet – sparks and a ruined appliance are likely in your future.
For smaller, portable monitors specifically designed for Raspberry Pi, USB power becomes a viable option. The great thing about this method is that you can power both your Raspberry Pi and the monitor from the same power source. Be careful not to overload the power supply and get voltage drops that cause intermittent shutdowns and display problems. Think of it like trying to power too many devices from a single extension cord – the system might become unstable.
Keep in mind that the power requirements of your monitor will vary depending on its size and brightness. Larger, higher-resolution displays will naturally consume more power. Make sure your chosen power source is capable of supplying enough juice to keep the monitor running smoothly. The last thing you want is a monitor that flickers or randomly shuts off in the middle of an important task.
A stable power supply is fundamental for a reliable Raspberry Pi setup. Choose the right power adapter and ensure it provides enough power to your monitor. This will prevent issues like screen flickering, unexpected shutdowns, and potential damage to your hardware. Always double-check compatibility and power requirements before plugging anything in.
Optimizing Display Resolution and Settings for Raspberry Pi
Alright, you’ve got your monitor powered and connected, but the image looks…off. That’s where display resolution and settings come in. Your Raspberry Pi needs to be properly configured to display the correct resolution for your monitor. Often, it will auto-detect, but sometimes it needs a little nudge. Think of it like trying to wear shoes that are too big or too small – they technically fit, but they’re not comfortable or effective.
Start by navigating to the Raspberry Pi configuration settings. Here, you can manually adjust the resolution to match your monitor’s native resolution. Experiment with different settings until you find the one that looks sharp and clear. A mismatched resolution can lead to blurry text, distorted images, and an overall unpleasant viewing experience.
Don’t forget about other important display settings like brightness, contrast, and color temperature. These can be adjusted to suit your preferences and viewing conditions. A monitor that’s too bright in a dark room can cause eye strain, while one that’s too dim can be difficult to see. Consider adjusting the blue light filter to reduce eye strain when using the monitor for extended periods.
Properly configuring your display settings is crucial for a comfortable and productive Raspberry Pi experience. Take the time to adjust the resolution, brightness, and color settings to match your monitor and your personal preferences. A well-configured display can make a huge difference in both image quality and user comfort.
Mounting and Positioning Your Raspberry Pi Monitor
Now that you have your monitor displaying, consider the ergonomics of where you have it placed. Whether you’re setting up a desktop workstation, a portable project, or a wall-mounted display, the way you position your monitor can have a big impact on your overall experience. A monitor placed too low can cause neck strain, while one that’s too far away can be difficult to read. Think of it like trying to play the piano on a stool that’s too high or too low – it’s technically possible, but it’s not going to be comfortable or conducive to good performance.
For desktop setups, consider using a monitor stand that allows you to adjust the height, tilt, and swivel of your display. This will allow you to find the optimal viewing angle and reduce the risk of musculoskeletal issues. A monitor arm can also free up valuable desk space and provide even greater flexibility in positioning.
If you’re working on a portable project, you might need to get creative with mounting solutions. Consider using a VESA mount adapter to attach your monitor to a stand or arm. Or perhaps utilize a custom-designed enclosure that integrates the monitor and Raspberry Pi into a single unit.
Positioning your monitor correctly is about more than just aesthetics. It’s about creating a comfortable, ergonomic workspace that promotes productivity and prevents health problems. Experiment with different setups until you find the one that works best for you.
Best Monitors For Raspberry Pi: A Buying Guide
Hey there! So, you’re looking to hook up a monitor to your Raspberry Pi? Awesome! Whether you’re building a retro gaming machine, a smart home hub, or just need a small, dedicated screen for coding, the right monitor can make all the difference. Finding the best monitors for Raspberry Pi doesn’t have to be daunting. Think of me as your friendly guide, walking you through the key things to keep in mind to find the perfect display for your project. Let’s get started!
Screen Size: How Much Real Estate Do You Need?
First things first, let’s talk about size. It’s easy to think bigger is always better, but that’s not always the case, especially when you’re working with a Raspberry Pi. Consider the intended use. Are you going to be constantly looking at the screen for detailed coding, or is it mainly for displaying information at a glance? A small 7-inch display might be ideal for a portable project or a dedicated control panel. On the other hand, if you’re aiming for a desktop-like experience, a 21-inch or even a 24-inch monitor might be a better fit.
Also, think about the physical space you have available. If you’re squeezing your Raspberry Pi project into a small enclosure or limited workspace, a larger monitor might simply be impractical. Measure your space carefully and choose a monitor that fits comfortably without overwhelming the area. Trust me, you don’t want to end up with a monitor that’s bigger than your actual project! Finding the best monitors for Raspberry Pi is about finding the right balance between size and functionality.
Resolution: Sharpness and Clarity Matter
Resolution is all about sharpness. It dictates how many pixels are crammed onto the screen, and the more pixels, the sharper and clearer the image will be. For most Raspberry Pi projects, a 1080p (1920×1080) resolution is a sweet spot, offering a good balance between clarity and performance. You’ll get crisp text and detailed images without putting too much strain on your Raspberry Pi’s processing power. Lower resolutions like 720p (1280×720) might be acceptable for smaller screens or less demanding applications, but you’ll definitely notice a drop in image quality.
Of course, you could go even higher with a 4K (3840×2160) monitor. While the Raspberry Pi 4 can technically output 4K, remember that it may struggle with demanding tasks at that resolution. If you’re planning on doing a lot of video playback or graphics-intensive work, a higher resolution might be worth considering, but for general use, 1080p is usually sufficient and keeps things running smoothly. Ultimately, the best monitors for Raspberry Pi balance resolution with the capabilities of the Pi itself.
Connectivity: HDMI is Your Friend
Connectivity is crucial. Fortunately, most Raspberry Pi models come equipped with an HDMI port, making it the most common and straightforward way to connect a monitor. Look for a monitor with an HDMI input. Standard HDMI is generally fine, but mini-HDMI is also an option if space is tight, or the monitor comes with a mini-HDMI port. Just be sure to have the correct adapter if needed. Using HDMI offers the best image and audio quality, ensuring a seamless experience.
Older monitors might use VGA, but this requires an HDMI-to-VGA adapter, which can sometimes introduce compatibility issues or a slight degradation in image quality. DVI is another option, but again, it might require an adapter. Sticking with HDMI simplifies things and ensures the best possible connection between your Raspberry Pi and the monitor. So, double-check the monitor’s input options to make sure it aligns with your Pi’s output capabilities! Some of the best monitors for Raspberry Pi prioritize user-friendly connectivity.
Power Supply: Keep it Simple and Efficient
Think about how the monitor is powered. Some smaller monitors, especially those designed for portable projects, can be powered directly from a USB port, which can be super convenient. However, larger monitors will typically require a separate power adapter. Pay attention to the power requirements of the monitor and ensure you have a suitable power source available.
It is also worth noting if the monitor comes with its own power adapter. Some may require you to purchase one separately, adding to the overall cost. A monitor that requires a lot of power might also put a strain on your overall setup, especially if you’re already powering other peripherals from your Raspberry Pi. Efficiency is key. The best monitors for Raspberry Pi will have reasonable power consumption.
Viewing Angle: See the Screen from Any Position
Viewing angle refers to the range of angles from which you can view the screen without significant distortion or color shift. If you’re planning to use the monitor in a fixed position, like on a desk, a narrow viewing angle might not be a big deal. However, if you need to be able to see the screen from different positions – perhaps for a public display or a collaborative project – a wider viewing angle is essential.
Monitors with IPS (In-Plane Switching) panels generally offer the best viewing angles, providing consistent colors and clarity even when viewed from the side. TN (Twisted Nematic) panels are often faster and cheaper but tend to suffer from color shift and distortion at wider angles. VA (Vertical Alignment) panels offer a compromise between the two. Consider the intended use of your monitor and choose a panel type that meets your viewing angle requirements. For those looking for the best monitors for Raspberry Pi for all-around use, IPS panels are generally recommended.
Response Time and Refresh Rate: Important for Gaming
If you’re planning to use your Raspberry Pi for gaming, response time and refresh rate become important considerations. Response time refers to how quickly the monitor’s pixels can change color, typically measured in milliseconds (ms). A lower response time reduces motion blur and ghosting, resulting in a smoother and more responsive gaming experience.
Refresh rate, measured in Hertz (Hz), indicates how many times the monitor updates the image per second. A higher refresh rate (e.g., 75Hz or 144Hz) results in smoother motion and reduced screen tearing. While the Raspberry Pi might not be able to drive extremely high refresh rates in demanding games, a monitor with a decent refresh rate can still improve the overall gaming experience. Keep in mind that most Raspberry Pi applications will function well with standard refresh rates. However, for any retro gaming setup, these factors become increasingly important when choosing the best monitors for Raspberry Pi.
Price and Features: Balancing Budget and Functionality
Finally, let’s talk about price and features. Monitors range in price from budget-friendly options to high-end models with advanced features. Consider your budget and prioritize the features that are most important to you. Do you need built-in speakers? A headphone jack? A stand that can be adjusted for height and tilt?
Don’t be afraid to shop around and compare prices from different retailers. Read reviews from other users to get a sense of the monitor’s strengths and weaknesses. Remember that the cheapest monitor might not always be the best value in the long run, especially if it lacks essential features or has poor image quality. Conversely, the most expensive monitor might have features that you don’t need or won’t use. Find the best monitors for Raspberry Pi that strike a balance between your budget and the features you require to maximize the Raspberry Pi experience.
FAQ
What screen size is best for a Raspberry Pi monitor?
Choosing the right screen size really depends on what you plan to do with your Raspberry Pi. For general desktop use, web browsing, and coding, a monitor between 21 and 24 inches is a sweet spot. It gives you enough screen real estate to comfortably work with multiple windows without feeling too cramped. Plus, these sizes are readily available and often quite affordable.
However, if you’re using your Pi for a dedicated project like a retro gaming setup or a smart home dashboard, a smaller display, perhaps around 7 to 10 inches, might be more appropriate. Conversely, if you want a more immersive experience, like for media consumption or detailed graphics work, you might consider a larger display, like 27 inches or even bigger. Just keep in mind that a larger screen usually means a higher price point.
What resolution should I look for in a Raspberry Pi monitor?
For most Raspberry Pi projects, a Full HD (1920×1080) resolution will be plenty sufficient. It offers a good balance between clarity and performance, especially considering the Pi’s processing power. You’ll get sharp images and text without overly taxing the Pi’s resources. Plus, Full HD monitors are generally very affordable these days.
If you’re planning to use your Pi for more demanding tasks, such as displaying high-resolution images or videos, or if you just really value crisp visuals, you could consider a QHD (2560×1440) or even a 4K (3840×2160) monitor. Just be aware that pushing higher resolutions will require more processing power from your Pi, and you might experience some lag if your Pi isn’t up to the task. Experiment and see what works best for your specific setup!
Do I need a monitor with built-in speakers?
Whether you need built-in speakers really boils down to your audio setup and preferences. If you plan on using headphones or external speakers, then having built-in speakers on your monitor isn’t necessary. You can simply connect your audio devices directly to the Raspberry Pi. This is actually a pretty common setup.
However, if you prefer a simple, all-in-one solution without extra wires cluttering your desk, then a monitor with built-in speakers can be quite convenient. Just keep in mind that the sound quality of built-in speakers is often not the best, so if audio quality is a priority, you’re better off using dedicated external speakers or headphones. It depends on what’s more important to you – convenience or premium sound!
What type of connectivity is important for a Raspberry Pi monitor?
HDMI is the most important connection type for a Raspberry Pi monitor. Most Raspberry Pi models come with an HDMI port, and it’s the easiest way to get both video and audio signals from the Pi to the monitor. Make sure the monitor you choose has an HDMI input. Micro HDMI might be needed for some Raspberry Pi models, so check before buying a cord.
Beyond HDMI, other connectivity options might be useful depending on your needs. VGA can work with older models, but HDMI is generally preferred for better image quality. DisplayPort is less common in Raspberry Pi setups but is becoming more prevalent. USB ports on the monitor can be handy for connecting peripherals like keyboards and mice, and an audio output jack allows you to easily connect external speakers or headphones if your monitor doesn’t have built-in ones or you want better sound.
What refresh rate do I need for a Raspberry Pi monitor?
For most Raspberry Pi applications, a standard 60Hz refresh rate is perfectly adequate. This means the monitor refreshes the image on the screen 60 times per second, which is smooth enough for general desktop use, web browsing, and even some light gaming. You probably won’t notice any issues with a 60Hz monitor unless you’re doing something very specific.
If you plan to use your Raspberry Pi for more demanding gaming or graphics-intensive tasks, then a higher refresh rate like 75Hz or even 144Hz might be beneficial. A higher refresh rate can result in smoother motion and less screen tearing, which can enhance the overall gaming experience. However, keep in mind that the Raspberry Pi’s hardware might not be powerful enough to fully utilize a very high refresh rate in many games, so consider if the extra expense is truly worth it for your specific use case.
Do I need a touchscreen monitor for my Raspberry Pi?
A touchscreen monitor isn’t strictly necessary for a Raspberry Pi, but it can definitely add a new level of interactivity and convenience to certain projects. If you’re planning to use your Pi for a project that benefits from direct touch input, like a kiosk, a control panel, or a portable tablet, then a touchscreen monitor is a great choice. Imagine controlling your smart home devices with a simple tap or creating a custom interactive display!
However, for general desktop use, programming, or media consumption, a standard non-touchscreen monitor is usually sufficient. Touchscreen monitors also tend to be a bit more expensive than their non-touchscreen counterparts. Consider how you plan to use your Pi and whether the added cost and functionality of a touchscreen are worth it for your specific needs. A touch screen isn’t for everyone.
Are there any power considerations when choosing a monitor for my Raspberry Pi?
Yes, absolutely! While the Raspberry Pi itself doesn’t consume a ton of power, you need to make sure your monitor has its own dedicated power supply. Avoid monitors that rely solely on USB power from the Pi, as this can overload the Pi’s power supply and lead to instability or even damage. Check the monitor’s power requirements and ensure you have a separate power adapter for it.
Also, be mindful of the overall power consumption of the monitor, especially if you’re planning to run your Raspberry Pi setup on battery power. Look for monitors with good energy efficiency ratings to maximize battery life. This is especially important for portable projects or setups where you want to minimize power consumption. A little research into the power draw of a monitor can save you headaches later on.
Final Thoughts
And there you have it – a curated collection to help you find the best monitors for Raspberry Pi to perfectly match your needs. Whether you’re aiming for a portable powerhouse, a budget-friendly display, or something that just looks fantastic on your desk, the power to choose is now firmly in your hands. Go forth, explore the possibilities, and bring your Raspberry Pi projects to life!
Ultimately, the ideal choice comes down to your vision. Don’t be afraid to experiment, consider how you plan to use your Raspberry Pi, and then jump in! You’re now equipped with the knowledge to make an informed decision and unlock a whole new level of creativity with your Raspberry Pi setup. Get ready to witness your projects soar!