Remember that time you almost took down your entire backdrop because your cheap light stand decided to spontaneously disassemble itself mid-shoot? Or perhaps you’ve spent way too much time wrestling with wobbly booms, desperately trying to angle your key light just right, only to have it droop and ruin the shot? We’ve all been there, battling unreliable equipment when we should be focused on capturing amazing images. Investing in sturdy and dependable lighting mounting hardware might seem like a boring detail, but trust us, it can be the unsung hero that saves your sanity and elevates the quality of your work.
That’s why we’ve created this guide to help you navigate the world of stands, clamps, arms, and more. Whether you’re a seasoned professional or just starting out on your photographic journey, finding the best photographic lighting mounting hardware is crucial for creating a safe, efficient, and professional studio setup. Let’s dive in and explore the essential gear that will keep your lights exactly where you need them, allowing you to focus on what truly matters: creating stunning photographs.
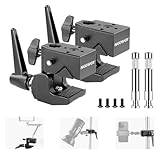
We’ll review the best photographic lighting mounting hardware shortly, but first, check out some relevant products on Amazon:


So, You Want to Conquer the Light? It All Starts with Mounting!
Ever tried balancing a speedlight on a stack of books while shooting a portrait? Yeah, me too. It usually ends with a blurry photo and a bruised ego. That’s when the importance of solid, reliable lighting mounting hardware really hits home. It’s not the most glamorous part of photography, but trust me, investing in the best photographic lighting mounting hardware is like laying the foundation for a skyscraper – you can’t build anything impressive without it. We are talking about everything from light stands and booms to clamps and grip heads – all the essential ingredients that allow you to precisely control your light sources and bring your vision to life.
Think of mounting hardware as the unsung hero of your photography kit. It’s the bridge between your creative vision and the technical reality of getting that light exactly where you want it. According to a recent survey, professional photographers cited stability and durability as the most important factors when choosing mounting hardware. That makes sense! No one wants a light stand collapsing mid-shoot, especially not when you are trying to create that perfect shot. And with the rise of online content creation, the demand for adaptable and easy-to-use mounting solutions has skyrocketed.
But navigating the world of clamps, arms, and stands can feel a bit overwhelming at first. Do you need a heavy-duty stand for a studio strobe, or will a lightweight option suffice for your speedlight? Should you invest in a boom arm for overhead lighting, or can you achieve the same effect with a well-placed stand and a reflector? These are the questions we’ll be tackling.
This guide isn’t about pushing specific brands or advocating for the most expensive gear. It’s about helping you understand your needs and finding the best photographic lighting mounting hardware that fits your style, budget, and the type of photography you do. We’ll explore different types of hardware, discuss their strengths and weaknesses, and offer practical tips to help you make informed decisions. Let’s get started on solidifying your lighting game!
Best Photographic Lighting Mounting Hardware – Reviews
Manfrotto 055XPROB Tripod with 496RC2 Ball Head
This tripod and ball head combo is a workhorse. If you’re serious about photography and need something stable and reliable, the Manfrotto 055XPROB is a fantastic option. The build quality is exceptional – this thing can handle some weight and stand up to regular use. It’s definitely an investment, but one that will pay off in the long run with sharp images and peace of mind knowing your gear is secure.
The 496RC2 ball head is a great pairing. It allows for smooth and precise adjustments, making it easy to get the exact angle you need. The quick-release plate system is also a huge time-saver. While it might not be the lightest setup, the stability and versatility make it a winner for studio and location work.
Neewer Pro 100% Metal Adjustable Photographic Light Stand
Looking for a budget-friendly light stand that doesn’t feel cheap? The Neewer Pro 100% Metal Adjustable Light Stand is a solid choice. It’s surprisingly sturdy for the price and can comfortably hold smaller strobes and speedlights. The metal construction gives it a more premium feel compared to some of the flimsier plastic options out there.
While it might not be suitable for super heavy-duty equipment, it’s perfect for beginners or photographers needing extra stands for background lights or smaller setups. The adjustable height is a nice feature, and it folds down compactly for easy storage and transport. Overall, a great value for the money.
Impact Turtle Base C-Stand with Sliding Leg
The Impact Turtle Base C-Stand is a staple in professional photography and film sets, and for good reason. This thing is built like a tank! The turtle base design allows for easy placement in tight spaces or on uneven terrain. The sliding leg is especially useful for leveling the stand on stairs or slopes, giving you maximum flexibility on location.
It’s definitely on the heavier side, so not ideal for photographers who prioritize lightweight gear. However, the stability and durability are unmatched. This is a workhorse that will last for years, making it a worthwhile investment for serious photographers who need a reliable and versatile support system.
Godox S2 Speedlite Bracket Bowens Mount
Want to unlock the full potential of your speedlight? The Godox S2 Speedlite Bracket with Bowens Mount is a game-changer. It allows you to easily attach your speedlight to Bowens mount modifiers, like softboxes and beauty dishes, giving you a wide range of lighting options. The clamp securely holds your speedlight in place, and the tilting mechanism lets you adjust the angle of the light.
It’s a simple yet effective design that makes a huge difference in the quality of light you can achieve with your speedlight. No more relying on flimsy adapters or awkward setups. This bracket opens up a whole new world of creative lighting possibilities.
Matthews Road Rags II Kit
The Matthews Road Rags II Kit is a must-have for photographers and filmmakers who need to control and shape light on location. This kit provides a versatile selection of diffusion fabrics, silks, nets, and flags, all neatly organized in a convenient carrying bag. Being able to quickly modify light is key to achieving the perfect look, and this kit makes it easy to do just that.
While it’s an investment, the quality of the materials and the versatility of the kit make it worth the price. Whether you’re softening harsh sunlight, reducing reflections, or creating dramatic shadows, the Road Rags II Kit gives you the tools you need to take your lighting to the next level.
Why Do You Need Photographic Lighting Mounting Hardware?
Ever tried balancing a speedlight precariously on a stack of books or taping a reflector to a chair during a photoshoot? We’ve all been there! While improvising can sometimes work in a pinch, it’s far from ideal. Photographic lighting mounting hardware might seem like an extra expense, but it’s actually an investment in your creativity, efficiency, and safety. Imagine you’re capturing a family portrait and want to create a soft, diffused light. Instead of relying on a wobbly setup, proper mounting hardware lets you position your light modifier precisely where you need it, ensuring consistent, professional results and removing unnecessary stress.
Think of mounting hardware as the unsung heroes of a great photograph. A sturdy light stand, for example, allows you to confidently position your lights high above your subject, creating dramatic shadows or simulating natural window light. Boom arms extend your lighting reach, allowing you to illuminate backgrounds or create overhead light without the light stand itself appearing in your shot. Different types of clamps and adapters give you the freedom to attach lights and accessories to virtually any surface, opening up a world of creative possibilities you simply can’t achieve with makeshift solutions.
The best photographic lighting mounting hardware isn’t just about stability; it’s about control and precision. With quality gear, you can make micro-adjustments to your light placement, fine-tuning the shadows and highlights to achieve your desired aesthetic. This level of control allows you to experiment with different lighting techniques and develop your own unique style. Plus, it saves you time! No more fiddling with precarious setups or worrying about your equipment toppling over mid-shoot. You’ll be able to focus entirely on your subject and capturing the perfect image.
Ultimately, investing in good lighting mounting hardware is an investment in your photography journey. It protects your valuable equipment, allows you to work safely and efficiently, and unlocks creative potential you never knew you had. From beginner to seasoned professional, having reliable mounting solutions will transform the way you approach lighting, leading to more consistent, professional, and captivating photographs. So, ditch the duct tape and cardboard boxes and embrace the freedom and confidence that comes with having the right tools for the job!
Essential Accessories for Your Lighting Setup
Let’s face it, a great light is only half the battle. You also need to consider how you’re going to position it! We often overlook small accessories, but they can significantly impact your workflow and the quality of your images. Think about that time you were shooting outdoors and desperately needed a way to secure your reflector against a gust of wind. That’s where reflector clamps and sandbags become indispensable!
Simple things like cable management accessories can also have a surprisingly positive impact. Ever tripped over a stray power cord during a shoot? Or had a client nearly do the same? Cable ties and organizers can help create a safer and more professional environment, not to mention making your life easier during setup and teardown. They’re also critical for avoiding accidentally unplugging a vital light during a critical shot.
And don’t underestimate the value of a good carrying case or bag. Protecting your investment is key. A sturdy case keeps your expensive gear safe from bumps, scratches, and the elements. Think about the peace of mind you’ll have knowing your lights and modifiers are properly secured during transport. No more worrying about broken bulbs or damaged reflectors!
Consider specialized accessories tailored to specific needs. If you’re a product photographer, a small tabletop light stand with flexible arms could be a game changer for achieving precise lighting angles on small objects. Or, if you frequently shoot on location, a durable and portable battery pack can provide power when outlets aren’t available. It’s all about identifying the gaps in your setup and filling them with the right tools.
Understanding Different Mounting Systems
Navigating the world of lighting mounts can seem daunting, especially with all the different types and sizes available. Let’s start with the basics: think about the standard spigot size. It’s crucial to understand whether your lights and modifiers use a 5/8″ spigot, a 1/4″ thread, or a 3/8″ thread. Mixing and matching without adapters can lead to unstable setups and potentially damage your gear.
Next, consider the versatility you need. Do you require something lightweight and portable for on-location shoots, or a more robust and stable system for studio use? C-stands, for example, are known for their strength and stability, making them ideal for heavier lights and modifiers. However, they can be bulky and less convenient to transport compared to lightweight aluminum stands.
Another important factor is the type of grip equipment you might need. If you plan on using flags, scrims, or reflectors, you’ll need clamps and arms that can securely hold them in place. Consider things like articulating arms, which offer maximum flexibility in positioning your modifiers. Imagine trying to diffuse a harsh sunlight on location without a proper scrim mounted on a sturdy grip arm. It’s a recipe for frustration!
Finally, don’t forget about safety. Always ensure that your mounting system can handle the weight of your lights and modifiers. Overloading a stand can lead to collapses, which can damage your equipment and even cause injury. Double-check the weight capacity of each component and use sandbags to provide extra stability, especially when shooting outdoors or in windy conditions.
Creative Lighting Techniques Enabled by Proper Mounting
Proper mounting isn’t just about securing your lights; it’s about unlocking new creative possibilities. Consider the freedom that comes with being able to precisely position your lights at any angle. Imagine using a boom arm to position a softbox directly overhead for a flattering beauty light, or mounting a small accent light on a wall to create dramatic shadows.
Explore the potential of rigging lights in unconventional ways. With the right clamps and adapters, you can attach lights to ceilings, doorways, or even trees. Think about the unique perspectives you can achieve by mounting a light behind your subject, creating a rim light or silhouette effect. This opens up a whole new world of creative control.
Experiment with combining different lighting modifiers. A sturdy mounting system allows you to stack modifiers, like attaching a grid to a softbox for more directional light control. Picture the ability to quickly switch between different modifiers without having to completely dismantle your setup. That efficiency can be a huge time-saver on set.
Don’t limit yourself to traditional light stands. Explore alternative mounting options like suction cups for attaching lights to windows or smooth surfaces, or magnetic mounts for attaching lights to metal structures. These specialized mounts can be incredibly useful in challenging locations where conventional stands won’t work. The goal is to have the right tools to overcome any lighting challenge and bring your creative vision to life.
Maintaining and Protecting Your Mounting Hardware
Just like any piece of equipment, your lighting mounting hardware needs proper care and maintenance to ensure its longevity and performance. Start with the basics: regularly clean your stands and clamps with a damp cloth to remove dust and dirt. This helps prevent corrosion and keeps moving parts operating smoothly.
Pay attention to tightening knobs and levers. Over time, these components can loosen, leading to instability. Periodically check all knobs and levers and tighten them as needed. Consider using a small amount of lubricant on threads to prevent them from seizing up. Think about that frustrating moment when you can’t loosen a clamp during a shoot because it’s completely stuck.
Proper storage is also crucial. Avoid storing your mounting hardware in damp or humid environments, as this can cause rust and corrosion. Store your stands and clamps in a dry, protected location, such as a gear bag or storage closet. Consider using padded cases to protect your equipment from bumps and scratches during transport.
Finally, inspect your mounting hardware regularly for signs of wear and tear. Look for cracks, bends, or other damage that could compromise its stability. Replace any damaged components immediately to prevent accidents. A little preventative maintenance can go a long way in ensuring that your mounting hardware remains reliable and safe for years to come.
Choosing the Best Photographic Lighting Mounting Hardware: A Friendly Guide
Hey there, fellow photographer! Finding the best photographic lighting mounting hardware can feel like navigating a jungle of clamps, stands, and adapters. Don’t worry, we’ve all been there. This guide is here to help you cut through the confusion and choose the right gear to support your creative vision. Forget feeling overwhelmed; let’s break down what truly matters so you can focus on capturing amazing images!
Think of this as a conversation with a friend who’s already stumbled through the mounting hardware maze. We’ll focus on the practical aspects, the things that really impact your workflow and results. No complicated jargon or unnecessary features, just straightforward advice to help you make informed decisions. Let’s get started!
Stability is Key: Don’t Let Your Lights Take a Dive
First and foremost, you need stability. Imagine setting up the perfect shot, only to have your light stand wobble precariously with the slightest breeze. Or worse, topple over completely! Nobody wants that expensive equipment hitting the ground. Think about the weight of your lights and modifiers and choose a stand that can handle significantly more. It’s always better to err on the side of caution. A wider base and sturdy construction are your best friends here. Look for weight ratings and consider adding sandbags or weights for extra security, especially if you’re working outdoors or in a crowded studio.
Remember, the best photographic lighting mounting hardware starts with a stable foundation. Consider the materials used in the stand’s construction. Aluminum is lightweight and generally sturdy, making it a popular choice. Steel is heavier and more robust, ideal for heavier lights and demanding environments. The type of legs also matters; wider legs provide greater stability, while adjustable legs are crucial for uneven surfaces. Don’t underestimate the importance of a secure locking mechanism – it’s what keeps your lights where you need them.
Weight Capacity: Know Your Limits (and Exceed Them!)
Following on from stability, weight capacity is a critical consideration. It’s not just about whether the stand can hold your light; it’s about whether it can hold it safely and reliably. Overloading a stand can lead to collapses, damaged equipment, and potentially even injury. Always check the manufacturer’s weight rating and factor in the weight of any modifiers you’ll be using, such as softboxes, umbrellas, or reflectors. Again, it’s always best to overestimate rather than underestimate.
Don’t forget to consider the distribution of weight. If you’re using a boom arm, the weight will be concentrated at the end of the arm, putting a significant strain on the stand. In such cases, you’ll need a heavier-duty stand with a counterweight to maintain balance. Also, factor in the potential for accidental bumps or knocks. A stand that’s already at its maximum weight capacity is more likely to fail under pressure. So, give yourself some breathing room and choose a stand that can comfortably handle your lighting setup with a safety margin.
Height and Reach: Getting the Light Where You Need It
Think about the types of shots you typically take. Do you need to position your lights high above your subject for dramatic overhead lighting? Or do you prefer low angles and close-up work? The height and reach of your mounting hardware will significantly impact your ability to achieve your desired lighting effects. Pay attention to the maximum and minimum height of light stands, as well as the length and adjustability of boom arms.
Consider the space you’ll be working in. If you have low ceilings, you won’t need a stand that extends to 12 feet. Conversely, if you’re shooting in a large studio or outdoors, you’ll want a stand with ample height. Boom arms are particularly useful for positioning lights over subjects without the stand being visible in the frame. However, they require careful balancing and a sturdy base. Think about the versatility you need and choose hardware that can adapt to different shooting scenarios.
Portability: Studio or On-Location?
Are you primarily a studio photographer, or do you frequently shoot on location? The answer to this question will heavily influence your choice of mounting hardware. If you’re always working in the same space, you can opt for heavier, more robust stands that prioritize stability over portability. However, if you’re constantly on the move, you’ll need lightweight, compact gear that’s easy to transport and set up.
Consider the weight and folded dimensions of light stands and other hardware. Can you easily carry them in a backpack or rolling case? Are they durable enough to withstand the rigors of travel? Look for stands with collapsible legs and lightweight materials like aluminum. Quick-release mechanisms can also save you valuable time during setup and breakdown. Remember, the best photographic lighting mounting hardware for on-location work is the kind you’ll actually use because it’s convenient to carry and set up.
Mounting Options: Versatility is Your Friend
The world of lighting modifiers is vast and ever-evolving. From softboxes and umbrellas to reflectors and snoots, there’s a tool for every lighting scenario. Your mounting hardware needs to be versatile enough to accommodate a wide range of these modifiers. Look for stands with standard spigots and adapters that can be easily converted to different sizes and thread types.
Consider the types of modifiers you use most frequently. Do you need a Bowens mount for your strobes? Or a Profoto mount? Make sure your mounting hardware is compatible with your existing equipment. Also, think about accessories like umbrella brackets and reflector holders. These can greatly expand the versatility of your light stands and allow you to create more complex lighting setups. The best photographic lighting mounting hardware is adaptable to many situations.
Build Quality and Durability: Investing in the Long Haul
While it might be tempting to save money by opting for cheaper mounting hardware, it’s important to remember that you get what you pay for. Poorly constructed stands are more likely to break down, wobble, or simply fail to hold your lights securely. Investing in high-quality, durable hardware is a smart long-term investment that will save you money and frustration in the end.
Look for stands made from robust materials like aluminum or steel. Pay attention to the quality of the locking mechanisms and joints. Are they smooth and secure? Read reviews and see what other photographers have to say about the durability of the product. A well-built light stand should last for years, even with regular use. Think of it as an investment in your photography business or hobby.
Budget: Finding the Sweet Spot
Let’s be honest, budget is always a factor. You don’t want to break the bank on mounting hardware, but you also don’t want to compromise on quality and safety. The key is to find the sweet spot between affordability and performance. Start by prioritizing the most essential pieces of equipment, such as sturdy light stands with a good weight capacity.
You can always add more specialized hardware later on, as your needs evolve. Consider buying used equipment to save money, but be sure to inspect it carefully for any signs of damage or wear. Also, don’t be afraid to mix and match brands. You might find that one brand makes excellent light stands, while another excels at boom arms. Focus on getting the best value for your money and choose hardware that will help you create amazing images without exceeding your budget. Ultimately, the best photographic lighting mounting hardware for you balances quality, features, and affordability.
FAQs
What types of lighting mounting hardware are most common?
The most common types of lighting mounting hardware you’ll encounter are light stands, boom arms, clamps, and grip heads. Light stands are your bread and butter; they provide a stable base for your lights. Boom arms allow you to position your lights overhead or extend them away from the stand, giving you more creative freedom. Clamps are super versatile for attaching lights to various surfaces, and grip heads are the workhorses that hold everything together, allowing for precise angle adjustments.
Think of it like this: light stands are the foundation, boom arms add reach, clamps provide flexibility in attachment, and grip heads are the fine-tuning knobs. Understanding these core components will help you navigate the wide world of mounting hardware and choose what’s best for your needs. Don’t be afraid to start simple and build your collection as your lighting skills and needs evolve!
How do I choose the right light stand for my needs?
Choosing the right light stand really boils down to considering the weight and size of your lights, the height you need, and the environment you’ll be shooting in. Heavier lights and modifiers require sturdier stands with a higher weight capacity. Think about the tallest height you’ll realistically need, as reaching too high with an extended stand can compromise stability.
Consider where you’ll be using the stand most often. Are you primarily in a studio? A heavier, more robust stand might be ideal. Are you always on location? A lighter, more portable stand is a must. Don’t forget to think about the footprint of the stand’s legs. A wider footprint provides more stability but takes up more space.
What is a grip head, and why is it so important?
A grip head is essentially a universal joint that allows you to attach and adjust lights, flags, reflectors, and other accessories to stands or other mounting hardware. It’s typically comprised of two interlocking metal surfaces that tighten around a pin or rod, allowing for secure and flexible positioning. Think of it as the unsung hero of your lighting setup, providing the precise control you need.
Why is it so important? Well, without a good grip head, you’ll struggle to achieve the exact angle and position you desire for your lights and modifiers. It allows for fine-tuning that’s crucial for crafting the perfect lighting scenario. A sturdy, well-designed grip head will also ensure that your expensive lighting equipment remains secure and doesn’t unexpectedly shift during a shoot.
What is the difference between C-stands and regular light stands?
C-stands and regular light stands serve the same basic purpose – holding lights – but they’re designed for vastly different situations. Regular light stands are generally lighter, more portable, and more affordable, making them great for beginners or photographers who shoot on location frequently. They’re typically constructed from lighter-gauge aluminum.
C-stands, on the other hand, are the heavyweights of the lighting world. Built with robust steel, they’re incredibly strong and stable, capable of supporting much heavier equipment like large softboxes or studio strobes. They have a unique “turtle base” design with legs that can be positioned independently, allowing them to be placed in tight spaces or on uneven surfaces. If you’re working with heavier modifiers or shooting in a studio setting, C-stands are well worth the investment.
How do I ensure my lighting setup is safe and stable?
Safety and stability are paramount when working with lighting equipment! Always ensure that your light stands are placed on a level surface and that the legs are fully extended for maximum stability. Distribute the weight evenly, especially when using modifiers like softboxes or umbrellas, to prevent tipping.
Double-check that all knobs and clamps are securely tightened before walking away from your setup. Use sandbags or weights to add extra stability, particularly when shooting outdoors or in windy conditions. Regularly inspect your equipment for any signs of wear and tear, and replace damaged components promptly. Never exceed the weight capacity of your light stands or mounting hardware.
What are some good budget-friendly lighting mounting options?
You don’t have to break the bank to get a decent lighting setup! There are several budget-friendly options available that can get you started without sacrificing too much quality. Look for basic aluminum light stands from reputable brands – they’re often surprisingly sturdy for the price.
Consider starting with a simple clamp or two for mounting smaller lights or reflectors to tabletops or shelves. Avoid the absolute cheapest, no-name brands, as they often lack durability and can be unsafe. Reading reviews and comparing prices from different retailers can help you find the best deals on reliable equipment. Remember, you can always upgrade your mounting hardware as your budget and needs grow.
Can I use a tripod as a light stand?
While technically you could use a tripod as a makeshift light stand in a pinch, it’s generally not recommended for anything beyond very lightweight speedlights. Tripods are primarily designed for cameras and are optimized for stability with a centered load.
Using a tripod for heavier lights or modifiers can compromise its stability and potentially damage the tripod itself. Light stands are specifically designed to support the weight and configuration of lighting equipment, with wider bases and reinforced construction. It’s best to invest in dedicated light stands for your lighting needs to ensure both safety and the longevity of your equipment.
Final Thoughts
So, there you have it! We’ve covered a ton of ground, from understanding the basics of clamps and stands to diving deep into specific options for the best photographic lighting mounting hardware. Remember, investing in quality mounting hardware isn’t just about holding up your lights; it’s about creating a safe, efficient, and inspiring workspace where you can focus on what truly matters – capturing incredible images. Don’t let wobbly stands or unreliable clamps hold you back from achieving your creative vision.
Now it’s time to take action! Armed with this knowledge, you’re well-equipped to choose the perfect gear for your unique needs and studio space. Go explore, experiment, and find the best photographic lighting mounting hardware that will empower you to illuminate your subjects in ways you never thought possible. The only limit is your imagination, so get out there and create some magic!