Remember that summer night? I was maybe ten years old, sprawled out on a blanket in my backyard, craning my neck to catch a glimpse of something, anything, beyond the blurry pinpricks of city stars. My grandpa, bless his heart, was fiddling with this clunky old telescope – a beast of metal and mirrors that looked like something straight out of a Jules Verne novel. It took forever, but finally, finally, he got something in focus: a wobbly, grey crescent we both agreed was the moon. That blurry image sparked a lifelong fascination with astronomy, and I’ve been chasing that magic ever since. Now, you don’t need a vintage behemoth to start your own celestial journey. In fact, amazing options abound if you’re looking for the best reflector telescopes under $300.
Choosing the right telescope can feel daunting, especially with so many models and confusing specifications out there. Don’t worry! We’ve done the research for you, sifting through the noise to identify the truly outstanding performers in this price range. Whether you’re a budding astronomer just starting out, or you’re looking for an affordable upgrade to your current setup, this guide is designed to help you find the perfect stargazing companion. We’ll break down the key features, explain the jargon, and provide honest reviews of the best reflector telescopes under $300 currently available, ensuring you make an informed decision and begin exploring the cosmos tonight.
We’ll review the best reflector telescopes under $300 shortly, but first, check out some relevant products on Amazon:

Stargazing on a Budget: Unveiling the Cosmos with Reflector Telescopes
Ever looked up at the night sky and felt a tug – a silent invitation to explore the vast unknown? You’re not alone! Millions share that yearning. And you might be surprised to learn that you don’t need to spend a fortune to begin your astronomical journey. In fact, for under $300, you can snag a reflector telescope powerful enough to reveal the craters of the Moon, the rings of Saturn, and even some of the brighter deep-sky objects. It’s a surprisingly accessible hobby, thanks to advances in manufacturing and telescope design.
Reflector telescopes, utilizing mirrors to gather and focus light, offer a significant bang for your buck. Generally speaking, for the same price point, you’ll get a larger aperture with a reflector than a refractor telescope. And aperture, my friend, is king! A larger aperture means more light gathering power, translating to brighter, more detailed views of celestial objects. This is especially important when you’re just starting out because it means you’ll see a lot more with your telescope.
Now, navigating the world of telescopes can feel daunting. There are countless models out there, with seemingly endless features and specifications. Don’t worry; we’re here to cut through the jargon and help you find the perfect match. The good news is, there’s a solid selection of great quality choices in the best reflector telescopes under $300.
We’ve carefully curated a list of top contenders, focusing on factors like optical quality, ease of use, stability, and overall value. Each telescope has been evaluated to ensure it delivers a rewarding stargazing experience without breaking the bank. So, get ready to embark on an exciting adventure – the cosmos is waiting!
Best Reflector Telescopes Under $300 – Reviewed
Celestron AstroMaster 130EQ
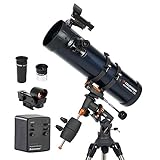
Looking for a solid entry-level reflector that won’t break the bank? The Celestron AstroMaster 130EQ is a fantastic option. Its 130mm aperture gathers a good amount of light, allowing you to observe fainter deep-sky objects like nebulae and galaxies (under dark skies, of course!). The equatorial mount, while requiring a bit of a learning curve, allows you to smoothly track celestial objects as they move across the night sky, which is a huge plus for longer viewing sessions.
This telescope is generally praised for its ease of assembly and user-friendliness, making it ideal for beginners. The included accessories, such as the two eyepieces, are decent starting points. While more experienced observers might eventually want to upgrade, they provide a good range of magnifications to get you exploring the cosmos right away. Overall, the AstroMaster 130EQ provides a great balance of performance and affordability.
Orion StarBlast 4.5 Astro Reflector Telescope
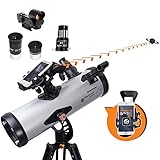
If you crave instant gratification and hassle-free setup, the Orion StarBlast 4.5 Astro Reflector is a top contender. This tabletop reflector is incredibly portable and requires virtually no assembly – just take it out of the box, plop it on a stable surface, and you’re ready to observe! Its 4.5-inch aperture delivers bright and crisp images of the Moon, planets, and brighter deep-sky objects.
The StarBlast 4.5’s simple design makes it a breeze to use, even for complete beginners. The point-and-view nature of the telescope means there are no complicated mounts or adjustments to worry about. It’s also a fantastic grab-and-go option for spontaneous stargazing sessions. Keep in mind that its tabletop design limits its height, so a sturdy table or platform is a must for comfortable viewing.
Gskyer 90mm Refractor Telescope
Though technically a refractor, the Gskyer 90mm Telescope offers impressive performance for its price and is often compared favorably to reflectors in the same budget range. Its 90mm aperture gathers ample light, providing clear views of the Moon, planets like Jupiter and Saturn, and even some brighter deep-sky objects under favorable conditions. It comes with a variety of accessories, including eyepieces and a finder scope to get you started.
The Gskyer is lauded for its ease of setup and portability, making it a great choice for beginners and those who want a telescope they can easily transport. The adjustable tripod provides a stable platform for viewing, and the included smartphone adapter allows you to capture stunning photos of the celestial wonders you observe. While not as powerful as larger aperture reflectors, this scope delivers a satisfying stargazing experience at an attractive price.
Meade Instruments Infinity 102mm Refractor Telescope
The Meade Instruments Infinity 102mm Refractor Telescope provides another great option for those seeking a budget-friendly and user-friendly telescope. With its 102mm aperture, this refractor offers bright and detailed views of the Moon, planets, and some deep-sky objects. Its long focal length yields higher magnifications, making it particularly well-suited for planetary observing.
This telescope is designed with beginners in mind, featuring an easy-to-use altazimuth mount that allows you to easily move the telescope up, down, left, and right. The included eyepieces and red dot viewfinder help you quickly locate celestial objects. The Meade Infinity 102mm strikes a good balance between aperture, portability, and ease of use, making it an excellent choice for anyone starting their astronomical journey.
AW 70mm Telescope
The AW 70mm Telescope is often chosen as a starter telescope for children and beginners due to its simplicity and extremely affordable price. While its 70mm aperture is smaller than some other models, it still provides decent views of the Moon, planets, and some of the brighter celestial objects. This telescope comes complete with a tripod, eyepieces, and a finder scope, offering everything you need to get started.
This telescope’s appeal lies in its ease of use and portability. It’s lightweight and easy to set up, making it ideal for younger astronomers or those who want a telescope they can easily take on trips. While not as powerful as larger telescopes, the AW 70mm Telescope is an excellent entry point into the world of astronomy, offering an accessible and affordable way to explore the night sky.
Why Buy a Reflector Telescope Under $300?
Ever gazed up at the night sky and felt a burning curiosity about those shimmering stars and distant planets? You’re not alone! Many people are drawn to astronomy, but the thought of expensive equipment can be a real barrier. That’s where reflector telescopes under $300 come in. They offer an accessible and exciting entry point into the world of stargazing, allowing you to explore the cosmos without breaking the bank. Think of it as getting a really good pair of binoculars, but instead of looking at birds, you’re observing the rings of Saturn!
Imagine hosting a backyard stargazing party with friends. Instead of just pointing out constellations, you can actually show them the craters on the moon or even a fuzzy nebula. A reflector telescope under $300 is powerful enough to reveal these wonders. It’s a fantastic way to share your passion for astronomy and spark a sense of awe and wonder in others. Plus, it’s a unique and memorable experience that goes beyond the typical social gathering.
These budget-friendly telescopes are also incredibly practical for beginners. They’re typically easier to set up and use than more complex models, allowing you to focus on learning the basics of astronomy. You can start by exploring the moon, planets, and brighter deep-sky objects, gradually expanding your knowledge and skills as you become more comfortable. It’s like learning to drive in a reliable, affordable car – you gain experience and confidence before upgrading to something fancier.
Ultimately, a reflector telescope under $300 is an investment in knowledge, exploration, and unforgettable experiences. It’s a chance to connect with the universe, share your passion with others, and ignite a lifelong love of astronomy. Don’t let the price tag intimidate you; it’s a gateway to a whole new world, waiting to be discovered, one star at a time!
Setting Up Your New Telescope: A Beginner’s Journey
So, you’ve just unboxed your shiny new reflector telescope! Excitement’s probably bubbling over, but before you aim it at the moon, let’s talk setup. Think of it like building IKEA furniture – a little patience and the right steps make all the difference. Don’t just jump in; skim through the instructions first! Trust me, you’ll save yourself a lot of head-scratching later.
First, identify all the parts. Lay them out on a clean surface. You’ll typically have the optical tube, the mount (which holds the telescope), the tripod (the legs), eyepieces (for different magnifications), and maybe a finder scope. The finder scope is like a mini-telescope that helps you aim the main telescope.
The tripod is usually the first thing to assemble. Extend the legs, making sure they are stable and locked into place. Then, attach the mount to the tripod, using the screws provided. This connection needs to be secure, as the whole telescope will be resting on it.
Now, carefully attach the optical tube to the mount. This might involve sliding it into a cradle or securing it with rings. Make sure it’s balanced so that the telescope doesn’t tip forward or backward. Attach the finder scope and align it with the main telescope – this is crucial for easy navigation!
Mastering the Night Sky: Finding Your First Celestial Objects
Alright, your telescope’s assembled, and now you’re ready to explore the cosmos! But where do you even start? Don’t expect to instantly spot distant galaxies. Think of it like learning a new city. You need a map (a star chart or app) and some landmarks (bright stars or constellations).
Start with the Moon! It’s bright, easy to find, and offers amazing details even with a modest telescope. Download a stargazing app on your phone or tablet. These apps can show you what’s visible in your sky at any given time and point you in the right direction.
Once you’ve conquered the Moon, try finding some bright planets like Jupiter or Saturn. These are usually the brightest “stars” in the sky and often have a distinct color. Use your star chart or app to locate them and use your telescope’s finder scope to center them in your view.
Don’t get discouraged if you don’t find something immediately. Stargazing takes practice. Start with easy targets, be patient, and gradually work your way up to more challenging objects. The reward of seeing a faint galaxy for the first time is well worth the effort!
Essential Accessories for Enhanced Viewing
Your telescope is a fantastic tool, but a few key accessories can dramatically improve your viewing experience. Think of it like upgrading your camera – the right lens or filter can unlock new possibilities. While these aren’t strictly necessary to get started, they definitely enhance your observing.
First up, extra eyepieces. The eyepieces that come with the telescope are often just okay. Investing in a few higher-quality eyepieces with different magnifications can significantly sharpen the image and give you more flexibility. Look for eyepieces with wider fields of view for a more immersive experience.
Next, consider a Barlow lens. This handy device doubles or triples the magnification of any eyepiece, allowing you to see finer details on planets or the moon. It’s like having a zoom lens for your telescope.
Finally, a red flashlight is a must-have. White light can ruin your night vision, making it harder to see faint objects. A red light allows you to read star charts and adjust your telescope without compromising your vision. Plus, it makes you look like a real astronomer!
Troubleshooting Common Telescope Issues
Even with the best equipment, you might encounter some frustrating issues along the way. Don’t panic! Most problems are easily solved with a little troubleshooting. Think of it like fixing a computer glitch – a few simple steps can often get things working again.
Blurry images are a common complaint. First, make sure your telescope is properly focused. Slowly adjust the focus knob until the image snaps into sharpness. Also, allow your telescope time to acclimatize to the outside temperature. This reduces distortions caused by temperature differences between the telescope and the surrounding air.
Another issue is difficulty finding objects. This often happens because the finder scope isn’t properly aligned with the main telescope. During the day, use a distant object like a power line pole, to align the finder scope with the view through your telescope. After a good alignment, it will be much easier to find the target objects.
Lastly, be patient. Stargazing is a skill that takes time to develop. Don’t get discouraged if you don’t see amazing things right away. Keep practicing, keep learning, and keep exploring the wonders of the night sky!
Best Reflector Telescopes Under $300: Your Guide to Stargazing on a Budget
Hey there, future astronomer! Ready to explore the cosmos without emptying your wallet? Buying a telescope can seem daunting, especially when you’re trying to stick to a budget. But don’t worry, you absolutely can find fantastic instruments for under $300 that will open up the wonders of the night sky. This guide is here to help you navigate the world of reflector telescopes and find the perfect one to ignite your passion for stargazing. We’ll break down the key things to consider, so you can make an informed decision and start observing planets, nebulae, and galaxies sooner than you think! Let’s get started on finding the best reflector telescopes under $300 for you.
Aperture: The Bigger, the Better (Mostly!)
Think of aperture like the pupil of your eye – it’s the opening that gathers light. The larger the aperture of your reflector telescope, the more light it collects. And more light means brighter, clearer images, especially when you’re trying to view faint deep-sky objects like galaxies and nebulae. A larger aperture also generally provides better resolution, allowing you to see finer details on planets and the Moon.
However, there’s a trade-off. Larger apertures usually mean larger and heavier telescopes. If you’re planning on moving your telescope frequently, or if you have limited storage space, a smaller aperture might be a more practical choice. Consider what you’ll be observing most – planets and the Moon are relatively bright, so you don’t need a massive aperture, while deep-sky objects demand it. When considering the best reflector telescopes under $300, you’ll often find that compromises need to be made between aperture size and portability.
Focal Length and Focal Ratio: Understanding Magnification
Focal length and focal ratio are crucial for understanding the magnification and field of view your telescope will offer. Focal length is the distance between the telescope’s mirror and the point where the image comes into focus. A longer focal length generally results in higher magnification with a given eyepiece. The focal ratio (f-number) is the focal length divided by the aperture. It affects the brightness of the image and the field of view.
A lower focal ratio (like f/5 or f/6) provides a wider field of view, which is great for viewing large objects like nebulae and star clusters. A higher focal ratio (like f/8 or f/10) gives you a narrower field of view but higher magnification, making it suitable for detailed views of planets and the Moon. When exploring the best reflector telescopes under $300, consider what you want to observe and choose a focal length and focal ratio that suits those needs. Many models offer a good balance for general observing.
Mount Type: Alt-Azimuth vs. Equatorial
The mount is what holds your telescope steady and allows you to move it to different parts of the sky. Two main types of mounts are common in the under-$300 price range: Alt-Azimuth (Alt-Az) and Equatorial. Alt-Azimuth mounts are the simplest and most intuitive to use. They move up and down (altitude) and left and right (azimuth), just like a camera tripod.
Equatorial mounts, on the other hand, are designed to compensate for the Earth’s rotation. They have one axis aligned with the Earth’s axis, allowing you to track objects as they move across the sky with a single, slow adjustment. This is particularly important for astrophotography. While a basic equatorial mount may be included with some best reflector telescopes under $300, they might not be incredibly sturdy. Alt-Azimuth mounts are generally easier to set up and use, especially for beginners.
Eyepieces: Quality Matters More Than Quantity
Many telescopes come with a few eyepieces, but the quality of these eyepieces can vary greatly. Eyepieces determine the magnification of your telescope. A lower focal length eyepiece provides higher magnification, while a higher focal length eyepiece provides lower magnification and a wider field of view.
Don’t be fooled by a telescope that boasts “500x magnification!” Extremely high magnifications are rarely usable because atmospheric conditions (seeing) often limit the amount of detail you can see. It’s better to have a few high-quality eyepieces that provide sharp, clear images at reasonable magnifications than a bunch of cheap ones that produce blurry, distorted views. When searching for the best reflector telescopes under $300, read reviews about the included eyepieces and consider investing in a better quality one if needed.
Finder Scope: Your Navigation System
The finder scope is a small, low-magnification telescope mounted on the main telescope. It helps you locate objects in the sky and center them in the main telescope’s field of view. Finder scopes come in different varieties, including optical finder scopes (which look like tiny telescopes) and red dot finders.
Optical finder scopes usually offer a magnified view, making it easier to identify faint stars. Red dot finders project a red dot onto the sky, showing you exactly where the telescope is pointing. Red dot finders are simple to use but don’t provide any magnification. A good finder scope is essential for navigating the night sky, especially when you’re just starting out. Make sure the finder scope is easy to align with the main telescope, as this will save you a lot of frustration. When exploring the best reflector telescopes under $300, a usable finder scope is a must-have!
Portability and Setup: Will You Actually Use It?
A telescope is only useful if you actually use it! Consider how portable the telescope is and how easy it is to set up. A large, heavy telescope that takes an hour to assemble is less likely to be used regularly than a smaller, lighter telescope that can be set up in minutes.
Think about where you’ll be using your telescope. If you plan on taking it to dark sky locations, portability is crucial. If you’ll primarily be using it from your backyard, a slightly larger and heavier telescope might be acceptable. Also, consider your storage space. Do you have a place to store the telescope when it’s not in use? Don’t underestimate the importance of ease of setup. The less time you spend fiddling with knobs and screws, the more time you’ll spend gazing at the stars. Always check reviews to see how easy the best reflector telescopes under $300 are to set up.
Build Quality and Stability: Avoiding the Wobbles
The overall build quality of the telescope is important for its performance and longevity. A flimsy telescope that wobbles in the slightest breeze will make it difficult to observe anything. Pay attention to the materials used in the telescope’s construction. Metal components are generally more durable than plastic ones.
The stability of the mount is particularly important. A shaky mount will amplify vibrations and make it difficult to focus on objects. Look for a telescope with a sturdy mount that can hold the telescope firmly in place. While the best reflector telescopes under $300 might involve some compromises, avoid anything that feels excessively cheap or flimsy. A stable platform is essential for enjoyable and rewarding stargazing sessions.
FAQ
What exactly *is* a reflector telescope, and why should I choose one?
Reflector telescopes, unlike refractor telescopes, use mirrors to gather and focus light. Think of it like a giant, curved mirror collecting faint light from distant stars and planets and bouncing it to your eye! This design offers a few key advantages, especially at a lower price point. They tend to be more affordable for a given aperture (the size of the light-gathering mirror), meaning you can get a bigger telescope for your money.
Also, reflectors generally don’t suffer from “chromatic aberration,” which is that annoying false color fringing you sometimes see around bright objects with cheaper refractors. This makes for clearer and more accurate images, especially when observing brighter celestial objects like the Moon and planets. If you’re looking for the best bang for your buck and want to see as much detail as possible, a reflector telescope is an excellent choice, particularly when sticking to a budget under $300.
Are reflector telescopes difficult to set up and use?
While reflector telescopes might seem a little intimidating at first, especially if you’re new to astronomy, they’re actually quite manageable to set up and use. Most models come with relatively straightforward instructions, and there are tons of helpful videos and online resources available if you get stuck. Think of it like assembling a piece of furniture – a little patience and following the steps will get you there!
The most important thing to keep in mind is the process of “collimation,” which is aligning the mirrors. Don’t let that word scare you! It sounds complicated, but it’s really just a matter of adjusting a few screws until everything is lined up. It only takes a few minutes once you get the hang of it, and it’s crucial for getting sharp images. Many reflectors under $300 even come with tools to help you collimate.
What kind of objects can I expect to see with a reflector telescope under $300?
Even on a budget, you can see some incredible things! With a reflector telescope under $300, you can easily see the craters and mountains on the Moon in stunning detail. You’ll also be able to observe the phases of Venus, the moons of Jupiter, and the rings of Saturn.
Beyond planets and our moon, you can also start to explore some of the brighter deep-sky objects, like nebulae and star clusters. While you won’t get Hubble-like views of distant galaxies, you’ll be able to spot some of the brighter ones, like the Andromeda Galaxy, as faint, fuzzy patches of light. The key is to find a dark sky location away from city lights. Light pollution drastically reduces what you can see.
How important is the telescope’s aperture (mirror size)?
Aperture is arguably the most important factor in a telescope. Think of the aperture as the “light bucket” of your telescope. The larger the aperture, the more light it can gather. And more light means you can see fainter objects and finer details. A larger aperture will let you resolve smaller details on the moon and planets, and also let you glimpse fainter deep-sky objects like galaxies and nebulae.
For telescopes under $300, aiming for the largest aperture you can afford is generally a good idea. While other factors like optical quality and mount stability are also important, aperture is king. A 6-inch reflector, for example, will show significantly more than a 3-inch reflector, even if the smaller telescope is theoretically “better” in some other way.
What kind of maintenance do reflector telescopes require?
Reflector telescopes are generally pretty low-maintenance, which is great! The biggest thing to be aware of is dust. Over time, dust can accumulate on the mirrors, which will reduce the telescope’s performance. You’ll want to clean the mirrors periodically, but don’t do it too often, as cleaning can actually scratch them if done improperly.
When it is time to clean, use only special optical cleaning solutions and microfiber cloths specifically designed for telescope mirrors. Avoid using household cleaners or paper towels, as these can damage the delicate reflective coating. Also, as mentioned earlier, you’ll need to collimate your telescope occasionally to keep the mirrors properly aligned. How often you need to do this depends on how often you use and transport your telescope.
What is a Dobsonian telescope and why is it often recommended for beginners?
A Dobsonian telescope is essentially a reflector telescope with a very simple, alt-azimuth (up-down and left-right) mount. Think of it as a cannon on a swivel – it’s incredibly intuitive to use! The biggest advantage of a Dobsonian is that it allows you to put all of your budget into the aperture (the size of the mirror), rather than spending money on a fancy computerized mount.
This means you can get a much larger telescope for the same price as a smaller telescope with a more sophisticated mount. For beginners, this is a huge win because a larger aperture lets you see so much more. While Dobsonian telescopes don’t automatically track objects across the sky like computerized telescopes, they’re very easy to manually aim and adjust, making them a great choice for learning the night sky.
Are the accessories that come with these telescopes any good? Will I need to buy more?
The accessories included with reflector telescopes under $300 can be a mixed bag. Usually, you’ll get a couple of eyepieces, a finder scope, and maybe a Barlow lens. The included eyepieces are often okay to start with, but upgrading to higher-quality eyepieces can make a significant difference in image clarity and sharpness.
The finder scope is also a crucial accessory, as it helps you locate objects in the sky. However, the finder scopes included with some telescopes can be a bit difficult to use, so you might consider upgrading to a red dot finder or a better quality optical finder scope. A Barlow lens can double or triple the magnification of your eyepieces, but it can also amplify any imperfections in the optics, so investing in a good quality Barlow lens is key. You probably don’t need to buy more accessories right away, but upgrading them over time can greatly enhance your observing experience.
The Bottom Line
So there you have it – our top picks for the best reflector telescopes under $300! We’ve walked you through some fantastic options, highlighting their strengths and considering what makes them a great choice for stargazers like you. Remember, the most important thing isn’t having the most expensive telescope, it’s having one that gets you out there, looking up, and exploring the cosmos. Don’t be afraid to jump in and choose the one that sparks your excitement the most.
Now, it’s your turn to take the plunge! The universe is waiting to be discovered, and with the right telescope, it’s closer than you think. Consider your needs, budget, and desired portability, and you’ll find the perfect companion for your astronomical journey. We hope our guide has given you the confidence to choose one of the best reflector telescopes under $300 and begin a lifetime of wonder! Clear skies and happy observing!