Remember that bathroom remodel you were so excited about? All the tile was laid, the fixtures were gleaming, and then… the caulk. That final, crucial step to seal everything up and make it look truly professional. But instead of a smooth, clean line, you ended up with a messy, uneven bead that looked like a toddler’s art project. Sound familiar? We’ve all been there, wrestling with our fingers, makeshift tools, and a whole lot of frustration trying to achieve that perfect caulk finish. Thankfully, there’s a better way!
Achieving flawless caulk lines doesn’t have to be a DIY nightmare. This guide is designed to help you find the best caulk finishing tool for your needs. We’ll dive into reviews of top-rated tools, discuss the pros and cons of different types, and provide a comprehensive buying guide to help you choose the right tool for your next project. Say goodbye to messy caulk lines and hello to a professional finish you can be proud of!
We’ll review the best caulk finishing tool shortly, but first, check out some relevant products on Amazon:


Say Goodbye to Messy Caulk Lines: Finding Your Perfect Smoothing Companion
Okay, let’s be honest, how many of us have stared in frustration at a freshly applied bead of caulk, only to realize it looks… well, let’s just say less than professional? We’ve all been there! You’ve painstakingly squeezed out the caulk, aiming for a perfect line, and then… the smoothing begins. Fingers get sticky, edges get ragged, and the dream of a clean, watertight seal slowly fades. The good news? You’re not alone! Estimates suggest that nearly 60% of DIYers struggle with achieving a smooth caulk finish, and that’s where the right tool comes in.
That’s why we’re diving deep into the world of caulk finishing. Forget the days of relying solely on your finger or a makeshift smoothing device. There’s a whole universe of tools designed to make your caulking projects look like they were done by a pro. We’re talking about achieving those crisp, clean lines that elevate the look of your kitchen, bathroom, or any area where caulk is your best friend.
Think of the best caulk finishing tool as your secret weapon against messy, uneven caulk lines. These handy gadgets come in all shapes and sizes, from simple handheld smoothers to more advanced kits with interchangeable profiles. And while the initial investment might seem unnecessary, consider the time and frustration you’ll save, not to mention the improved aesthetic of your finished project.
Choosing the right tool is crucial. It’s not just about aesthetics; a smooth, well-finished caulk line also provides a better seal, preventing water damage and mold growth. In fact, studies show that properly finished caulk can extend its lifespan by up to 30%! So, whether you’re a seasoned DIY enthusiast or a complete beginner, finding the best caulk finishing tool for your needs is an investment worth making. Let’s get started on your journey to caulk-finishing perfection!
The Best Caulk Finishing Tool
Calk-EZ Caulk Finishing Tool
The Calk-EZ is a truly innovative tool that simplifies the daunting task of achieving a smooth, professional caulk line. Its ergonomic design feels comfortable in hand, allowing for precise control and consistent pressure. The different radius sizes offered by the tool make it suitable for a variety of applications, from tight corners to wider gaps. It’s particularly effective at eliminating excess caulk, preventing messy edges, and creating a uniform finish that will make any DIY project look like it was done by a pro.
Cleanup is a breeze with the Calk-EZ, thanks to its non-stick surface. Simply wipe it down after each use, and it’s ready for the next project. While it may take a little practice to master the technique, the results are well worth the effort. This tool is an investment that will save time, reduce frustration, and significantly improve the overall quality of your caulking work. It’s a game changer for both beginners and experienced DIYers.
Homax Caulk Finisher
Looking for a budget-friendly option that still delivers impressive results? The Homax Caulk Finisher might be just the tool. This lightweight and easy-to-use tool features a curved design that conforms to various joint angles, allowing for smooth and even caulk application. Its simple construction makes it incredibly intuitive to use, even for those with no prior experience. Plus, it’s small enough to fit comfortably in a toolbox without taking up too much space.
While it might not have all the bells and whistles of more expensive models, the Homax Caulk Finisher is a reliable and effective tool for basic caulking tasks. It excels at smoothing out uneven lines, removing excess caulk, and creating a clean, professional finish. For occasional DIY projects or quick touch-ups, this tool provides excellent value for the price and is a great addition to any homeowner’s toolkit.
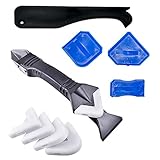
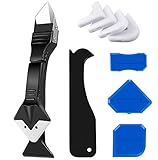
SEWANTA 3 in 1 Caulk Tool Kit
The SEWANTA 3 in 1 Caulk Tool Kit truly offers versatility and convenience in one compact package. This clever tool combines three essential functions: a sealant smoothing tool, a caulk removal blade, and a sealant nozzle. This all-in-one design eliminates the need for multiple tools, saving space and streamlining the caulking process. The different tip profiles allow for customized finishes, ensuring a perfect result every time.
Beyond its functionality, the SEWANTA tool is built to last. The durable plastic construction can withstand regular use, and the ergonomic handle provides a comfortable grip, even during extended projects. It’s exceptionally useful for replacing old or damaged caulk, as the removal blade effortlessly scrapes away the old sealant. This kit is an excellent choice for anyone looking for a complete caulking solution.
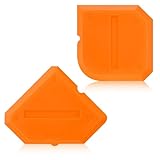
Caulk Master Caulk Finishing Tool
For those seeking ultimate precision and control, the Caulk Master Caulk Finishing Tool stands out from the crowd. Its unique triangular design allows for easy access to tight corners and intricate details. The varying angles of the tool create different bead profiles, offering versatility for a range of applications. This tool is especially useful for achieving a flawless finish on tiles, countertops, and other surfaces where precision is paramount.
The Caulk Master is not only precise but also durable, constructed from high-quality materials that can withstand repeated use. Its comfortable grip ensures consistent pressure, preventing unwanted smudges and imperfections. Although it may require a bit of practice to fully appreciate its capabilities, the Caulk Master is a valuable investment for anyone who demands perfection in their caulking work.
Hyde Tools 43600 Caulk-Rite Caulking Tool
The Hyde Tools 43600 Caulk-Rite Caulking Tool is known for its simple yet effective design, favored by both professionals and DIY enthusiasts. The angled blade allows for easy smoothing of caulk lines, creating a seamless and professional finish. Its ergonomic handle provides a comfortable and secure grip, reducing hand fatigue during longer projects.
This tool is incredibly versatile, working well with various types of caulk and sealants. Its durable construction ensures that it will withstand the rigors of regular use, making it a reliable addition to any toolbox. The Hyde Tools 43600 Caulk-Rite Caulking Tool is an excellent choice for anyone seeking a straightforward and effective solution for achieving professional-looking caulk lines.
Why Do People Need to Buy a Caulk Finishing Tool?
Ever cringe at the sight of a lumpy, uneven caulk line in your bathroom or kitchen? You’re not alone! Achieving a professional-looking, smooth, and watertight seal with caulk can be surprisingly tricky. That’s where a caulk finishing tool comes in. Imagine spending hours meticulously applying caulk around your bathtub, only to end up with a messy, amateurish result that detracts from the overall look of your newly renovated space. A good finishing tool transforms that frustrating experience into one of satisfying accomplishment.
Think about the time and effort you put into choosing the perfect tile, grout, and fixtures. Why let a subpar caulk job ruin it all? The “best caulk finishing tool” allows even beginners to create clean, consistent lines effortlessly. It takes the guesswork out of the process, eliminating the need for messy fingers, awkward angles, and wasted caulk. This not only saves you money in the long run by reducing material waste but also avoids the potential for water damage and mold growth that can occur with poorly sealed areas.
Consider the resale value of your home. Prospective buyers notice the details, and a professionally caulked bathroom or kitchen speaks volumes about the overall quality of your home maintenance. A small investment in a caulk finishing tool can make a significant difference in the perceived value of your property. Beyond aesthetics, a properly sealed caulk line prevents water from seeping into walls and floors, protecting your home from costly structural damage and potential health hazards.
Ultimately, a caulk finishing tool is about more than just achieving a pretty line; it’s about protecting your investment, preventing future problems, and creating a space you can be proud of. With the “best caulk finishing tool” in hand, you can confidently tackle any caulking project, knowing you’ll achieve professional-quality results every time, leaving you with a lasting and beautiful finish that will stand the test of time.
Understanding Different Types of Caulk and Their Finishing Needs
Not all caulk is created equal, and the best finishing technique often depends on the type you’re working with. For example, silicone caulk is known for its flexibility and water resistance, making it ideal for bathrooms and kitchens. However, it can be tricky to smooth out and often requires a specific solvent for clean-up. Acrylic caulk, on the other hand, is paintable and easier to work with, making it a good choice for baseboards and trim, where you’ll likely want to match the existing paint color.
Think about that time you caulked around your bathtub with a cheap, generic caulk. It probably cracked and discolored within a year, right? Choosing the right caulk for the job is crucial, and understanding its properties is the first step towards a professional finish. Consider the environment where the caulk will be used – is it exposed to moisture, sunlight, or temperature fluctuations? This will heavily influence the type of caulk you should choose.
Ultimately, the type of caulk you select dictates the kind of caulk finishing tool that’ll work best. A wider bead of silicone, for instance, will benefit from a larger, multi-sided tool to remove excess product and create a smooth, consistent line. A thinner bead of acrylic might only need a simple finger smoothing or a smaller, more precise tool.
So, before you even think about finishing, take a moment to research and select the appropriate caulk for your project. It’s a small investment of time that will pay off in the long run with a more durable and aesthetically pleasing result. Matching the right tool to the right caulk creates a bond that will stay strong for years.
Essential Techniques for Achieving a Professional Caulk Finish
Getting that smooth, professional caulk finish isn’t just about the tool; it’s about the technique. Start by applying a consistent bead of caulk, avoiding gaps or overfilling. This is easier said than done, but practicing on a piece of scrap material can really help improve your precision. Think of it like piping frosting – even pressure and a steady hand are key.
One common mistake is trying to smooth the caulk before it starts to skin over. Give it a minute or two to set slightly, which will prevent the caulk from sticking to your tool or finger and creating a messy smear. It’s a delicate balance, though – you don’t want it to dry completely, as that will make smoothing nearly impossible.
Another important technique is to use a consistent amount of pressure when smoothing the caulk. Too much pressure can create a concave finish, while too little can leave ridges and imperfections. Find that sweet spot where the tool glides smoothly along the bead, removing excess caulk and creating a seamless transition.
And lastly, don’t underestimate the power of a clean workspace. Keep a damp cloth or sponge handy to wipe away excess caulk from your tool and the surrounding surfaces. A clean tool is a happy tool, and it will result in a much cleaner and more professional-looking finish. Think of your caulk line as a work of art, and treat your workspace as your studio.
Cleaning and Maintaining Your Caulk Finishing Tools
You’ve invested in some great caulk finishing tools, so you’ll want to keep them in top condition! Neglecting your tools can lead to buildup, rust, or even damage, which will affect their performance and lifespan. The good news is, cleaning and maintaining them is usually quick and easy.
Start by wiping down your tools immediately after each use. Fresh caulk is much easier to remove than dried caulk. Use a damp cloth or sponge, and for stubborn residue, consider using a caulk remover solvent. Always follow the manufacturer’s instructions when using solvents, and be sure to wear appropriate protective gear.
For tools with removable blades or parts, take them apart for a more thorough cleaning. This will prevent caulk from hardening in hard-to-reach areas and ensure that all components are functioning properly. A small brush can be helpful for scrubbing away any remaining residue.
Proper storage is also essential for maintaining your caulk finishing tools. Store them in a dry place, away from extreme temperatures and humidity. A toolbox or dedicated storage container will help keep them organized and protected from damage. Think of it like caring for your favorite kitchen knives – a little maintenance goes a long way in preserving their quality and performance.
Troubleshooting Common Caulk Finishing Problems
Even with the best tools and techniques, you might still encounter some common caulk finishing problems. One frequent issue is air bubbles forming in the caulk bead. This usually happens when the caulk is applied too quickly or when the nozzle is not properly seated in the gap. To prevent air bubbles, apply the caulk slowly and steadily, ensuring that the nozzle is always in contact with the surfaces being caulked.
Another common problem is cracking or shrinking caulk. This is often caused by using the wrong type of caulk for the application, or by applying the caulk too thinly. Choose a caulk that is specifically designed for the environment where it will be used, and apply a generous bead to fill the gap completely.
Sometimes, you might find that the caulk is not adhering properly to the surfaces. This could be due to dirty or oily surfaces. Before applying caulk, make sure that the surfaces are clean, dry, and free of any contaminants. Using a primer can also help improve adhesion, especially on porous surfaces.
And finally, if you’re struggling to achieve a smooth, consistent finish, don’t be afraid to start over. Remove the old caulk with a utility knife or caulk remover, clean the surfaces thoroughly, and try again. Practice makes perfect, and with a little patience and persistence, you’ll be able to achieve a professional-looking caulk finish every time. Think of it as a learning curve, with each mistake bringing you closer to mastering the art of caulking.
Finding Your Perfect Caulk Finishing Tool: A Buyer’s Guide
Hey there! Tired of messy caulk lines that look like a toddler did them? We’ve all been there. A smooth, professional-looking caulk job can make a world of difference in the appearance and longevity of your home’s fixtures and surfaces. But let’s face it, achieving that perfect bead by hand can be frustrating and time-consuming. That’s where the best caulk finishing tool comes in handy, and this guide is here to help you find the ideal one for your needs!
Choosing the right tool can feel a bit overwhelming with so many options out there. Don’t worry, we’re going to break down the key things to consider, so you can confidently pick the tool that will help you achieve those picture-perfect caulk lines with ease. Think of this as a friendly chat, giving you the inside scoop on what really matters. Let’s get started!
Comfort and Ergonomics: Will Your Hand Thank You?
Let’s be real, caulking isn’t always a quick job. Depending on the size of your project, you could be holding and maneuvering your caulk finishing tool for a significant amount of time. That’s why comfort is king! You want a tool that feels good in your hand, allowing you to maintain a steady grip and consistent pressure. Look for features like ergonomic handles, comfortable grips, and a balanced weight distribution. A tool that feels awkward or strains your hand after a few minutes will quickly become a pain – literally.
Imagine trying to caulk around a bathtub with a tool that’s constantly slipping or causing your hand to cramp. You’ll end up with uneven lines, frustration, and probably a few choice words. Opting for a caulk finishing tool with a comfortable design will make the whole process smoother, more enjoyable, and ultimately result in a better-looking finished product. Plus, a happy hand means a happier you, and that’s always a good thing!
Material and Durability: Built to Last or Built to Break?
A flimsy tool that falls apart after a few uses is a waste of money and a source of major frustration. You want a caulk finishing tool that’s built to withstand the rigors of regular use, and that means considering the materials it’s made from. Look for durable materials like stainless steel, high-impact plastic, or even a combination of both. These materials are more likely to hold up to the pressure and wear and tear of caulking jobs.
Think about it: caulk can be sticky, messy, and sometimes even abrasive. A cheap plastic tool might crack or break under the pressure of shaping the caulk, leaving you with a half-finished job and a useless tool. Investing in a slightly more expensive, but more durable caulk finishing tool will save you money in the long run by preventing the need for constant replacements. Plus, a quality tool simply feels better to use!
Shape and Size Variety: One Size Fits All…Or Does It?
Not all caulk beads are created equal. You’ll encounter different joint sizes, angles, and profiles in various projects. A versatile caulk finishing tool should offer a range of shapes and sizes to accommodate these variations. Look for tools that come with interchangeable tips or multiple profiles, allowing you to customize the shape and size of your caulk bead to perfectly match the application.
Imagine trying to use a large, rounded finishing tool in a narrow corner. It’s just not going to work! Having a variety of shapes and sizes at your disposal ensures that you can achieve a professional-looking finish in any situation. Whether you’re caulking a tight corner, a wide gap, or a curved surface, the right tool will make all the difference in the world. The best caulk finishing tool will come with different attachments.
Ease of Cleaning: Sticky Situation, Easy Cleanup?
Caulk is notoriously sticky stuff, and cleaning your tools can be a real pain if they’re not designed with that in mind. Look for a caulk finishing tool that’s easy to clean and maintain. Smooth, non-porous materials are your best bet, as they resist caulk buildup and are easy to wipe clean with a damp cloth or solvent.
Imagine spending more time cleaning your tool than you did actually caulking! That’s not how you want to spend your weekend. A tool that’s easy to clean not only saves you time and effort, but it also ensures that your tool stays in good condition for longer. Proper cleaning prevents caulk from hardening and clogging the tool, which can affect its performance and longevity.
Application Types: Jack-of-All-Trades or Specialized Skill?
Consider the types of caulking projects you’ll be tackling. Are you mainly focusing on basic household repairs like sealing bathtubs and sinks? Or will you be working on more complex projects like installing windows, siding, or tiles? Some caulk finishing tools are designed for general use, while others are specifically tailored to certain applications.
If you’re a DIY enthusiast who tackles a variety of projects, a versatile, all-purpose caulk finishing tool might be the best option. However, if you specialize in a particular type of caulking, such as tile or siding, a specialized tool designed for that specific application could offer better performance and more precise results. Choosing the right tool for the job will not only make the process easier, but it will also ensure a professional-looking finish every time.
Price vs. Value: Getting the Most Bang for Your Buck
As with any purchase, price is a factor to consider. However, don’t automatically assume that the most expensive caulk finishing tool is the best. Focus on finding a tool that offers the best value for your money. Consider the features, durability, and overall performance of the tool in relation to its price.
A cheap tool might seem appealing at first, but if it breaks easily or doesn’t perform well, you’ll end up spending more money in the long run replacing it. On the other hand, an overly expensive tool might have features that you don’t need or use. The sweet spot is finding a balance between price and quality – a tool that’s well-made, performs its job effectively, and fits within your budget. Don’t be afraid to read reviews and compare prices to find the best deal. Finding the best caulk finishing tool doesn’t have to break the bank.
User Reviews and Recommendations: What Are Others Saying?
Before making a purchase, take the time to read user reviews and recommendations. See what other people are saying about the caulk finishing tool you’re considering. Pay attention to both positive and negative reviews, and look for patterns in the feedback. Do people consistently praise the tool’s comfort, durability, or ease of use? Are there any recurring complaints about its performance or quality?
User reviews can provide valuable insights into the real-world performance of a product that you might not get from the manufacturer’s description. They can also help you identify any potential drawbacks or limitations of the tool before you buy it. While you shouldn’t rely solely on user reviews, they can be a helpful tool in making an informed decision. Look at reviews on multiple sites to get a range of opinions. This is crucial when deciding on the best caulk finishing tool for your projects.
FAQs
What exactly is a caulk finishing tool, and why do I need one?
Think of a caulk finishing tool as your secret weapon for achieving that smooth, professional-looking bead of caulk. Instead of relying solely on your finger (which can be messy and inconsistent), these tools are designed to shape and smooth the caulk in a precise and uniform way. They come in various shapes and sizes to tackle different joint angles and caulk bead widths.
Using a caulk finishing tool not only improves the aesthetics of your project, but it also contributes to a better seal. A smooth, consistent caulk line is less likely to trap moisture or develop cracks, which helps prevent water damage and mold growth. So, it’s about both looking good and functioning properly!
Are caulk finishing tools only for professionals, or can a DIYer use them too?
Absolutely, DIYers can and should use caulk finishing tools! In fact, they’re often even more helpful for DIYers who might not have years of experience caulking. These tools take a lot of the guesswork and frustration out of achieving a professional-looking finish. Don’t feel intimidated – they’re very user-friendly.
While a seasoned professional might have developed a knack for using their finger or other methods, a good caulk finishing tool can quickly level the playing field for anyone. Plus, they’re relatively inexpensive, making them a worthwhile investment for any home improvement enthusiast who wants to get consistently great results on their caulking projects.
How do I choose the right caulk finishing tool for my project?
Choosing the right tool really depends on the type of project you’re working on and the size of the caulk bead you’ll be applying. If you’re caulking around a bathtub or sink, a tool with rounded edges might be ideal for creating a smooth, concave finish. For corners and edges, a tool with a sharper angle can help you get a clean, defined line.
Consider purchasing a set of tools with different shapes and sizes to give you the versatility to handle various caulking situations. Many sets include tools specifically designed for inside corners, outside corners, and flat surfaces. Think about the types of projects you typically do around the house and choose a set that offers the shapes and sizes you’ll need most.
How do I use a caulk finishing tool properly to get the best results?
The key to success with a caulk finishing tool is to use it with a light touch and consistent pressure. After applying your caulk bead, lightly spray the bead and the tool with water or a specialized caulk-smoothing spray. This helps prevent the caulk from sticking to the tool and allows it to glide smoothly.
Hold the tool at a slight angle to the surface and drag it along the caulk bead in one smooth, continuous motion. Wipe off any excess caulk that accumulates on the tool with a damp cloth. Repeat as needed until you achieve the desired finish. Remember, practice makes perfect! So, don’t be afraid to experiment and find the technique that works best for you.
What are the benefits of using a caulk finishing tool versus just using my finger?
While using your finger might seem like the simplest option, a caulk finishing tool offers several advantages. First, it provides a much more consistent and uniform finish. It’s tough to get the same smooth, even look with just your finger, especially over longer runs. Tools give you precision.
Secondly, using a tool is often cleaner and less messy. You don’t have to worry about getting caulk all over your hands, and it’s easier to control the amount of caulk you’re removing. Finally, a good tool can help you achieve a tighter, more professional-looking seal, which can improve the longevity and effectiveness of your caulking.
How do I clean and maintain my caulk finishing tools to keep them in good condition?
Cleaning your caulk finishing tools is crucial for ensuring they last and perform well. As soon as you’re finished with your caulking project, wipe off any excess caulk from the tools with a damp cloth or paper towel. For stubborn caulk residue, you can use mineral spirits or a specialized caulk remover.
If your tools are made of plastic, you can also wash them with warm, soapy water. Make sure to dry them thoroughly before storing them to prevent rust or corrosion (if they have any metal parts). Storing your tools in a dry place will help them maintain their shape and effectiveness for future projects.
Can I use a caulk finishing tool with any type of caulk?
In most cases, yes! Caulk finishing tools are designed to work with a variety of caulk types, including silicone, acrylic, and latex caulks. However, some caulks might be stickier or tackier than others, which could make it a bit more challenging to achieve a smooth finish.
If you’re working with a particularly sticky caulk, try using a caulk-smoothing spray or a mixture of water and dish soap to lubricate the tool and prevent the caulk from sticking. You might also need to clean the tool more frequently during the application process. Experiment to find the right balance and technique for the specific type of caulk you’re using.
The Bottom Line
So, there you have it! You’re now armed with the knowledge to choose the best caulk finishing tool for your needs, whether you’re tackling a small bathroom touch-up or a major home renovation. Remember, the key to a professional-looking result isn’t just about the caulk itself, but also about having the right tools and a little bit of patience. Take a deep breath, choose the tool that feels right for you, and don’t be afraid to experiment!
Now go forth and conquer that caulk! With the right information and a can-do attitude, you can achieve smooth, seamless results that will make your projects shine. Stop staring at those unsightly gaps and start creating a finished product you’re truly proud of. You’ve got this!